PCI Sound Card
-
Sound Maker Value 4.1/5.1 Sound Card
4
2. Installing the Sound Card
A. Hardware Installation
Before you start, make sure that Windows
®
98/98SE, Windows
®
Me, Windows
®
2000/XP,
Windows NT
®
4.0 or Linux has been installed in your system and running properly. Please follow
the following steps carefully while installing your sound card.
1. Turn off your computer and disconnect all power cords.
2. Remove the case from your computer. Refer to your PC’s user manual for more details.
3. Plug the Sound Card into any free 32-bit expansion PCI slot of the computer.
4. Connect the audio cable to your CD-ROM or DVD-ROM drive.
5. Put the computer cover case on and reconnect the power cords.
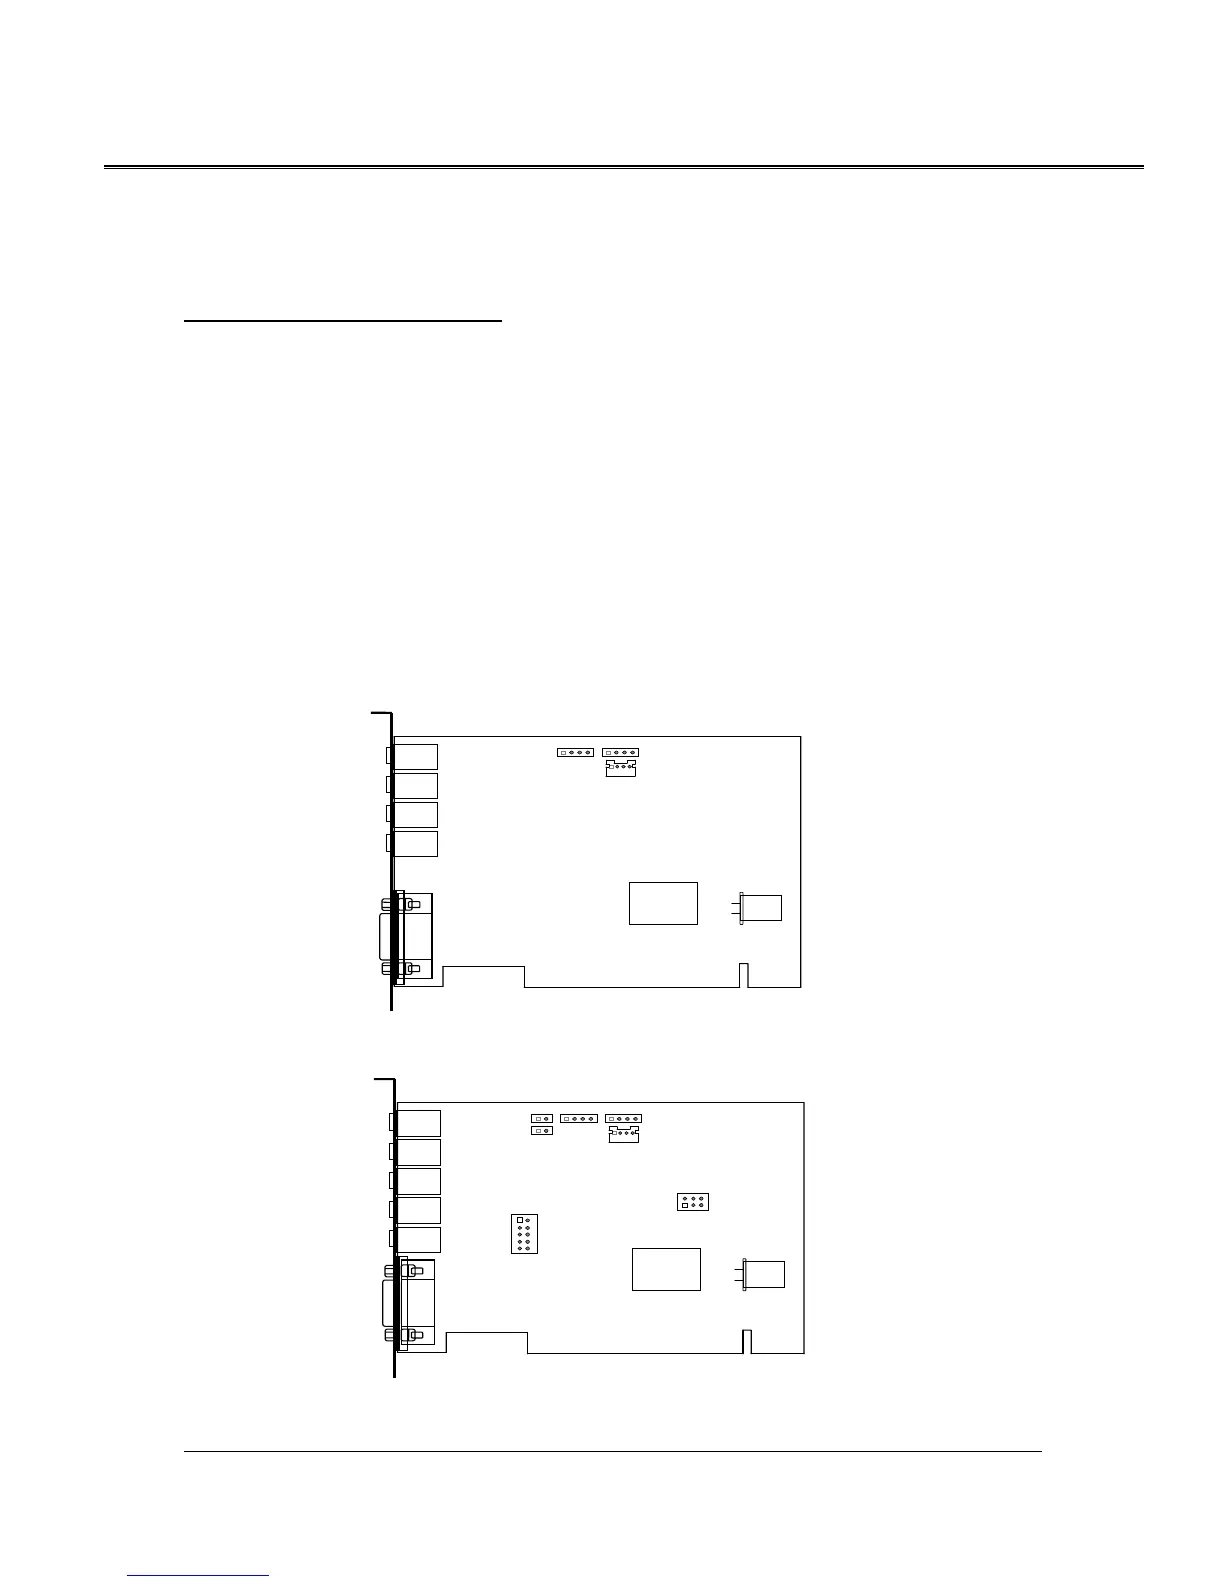
Connecting Audio Devices
You can connect various types of audio equipment, such as speakers, headphones, CD player and so
on, to the sound card through its back panel jacks. The following diagram shows the connectors on
the back panel.
Layout of the Sound Maker Value 4.1 PCI Sound Card
Layout of the Sound Maker Value 5.1 PCI Sound Card
llllllllllllllllllllllllllllllllll llllllll
F-Out
C/LFE
LINE IN
GAME/MIDI
MIC
J1
R-Out
J8
J9
J12
J10
J3
JP2
JP1
J4
CD-IN
J11
J6J7
AUX
CMI8738/PCI-6CH
JP3
2 6
1 5
llllllllllllllllllllllllllllllllll llllllll
F-Out
LINE IN
GAME/MIDI
MIC
J1
R-Out
J8
J9
J10
J3
JP2
J4
CD-IN
J6
AUX
CMI8738/PCI-SX