Do you have a question about the Genius ZODIAC 100 and is the answer not in the manual?
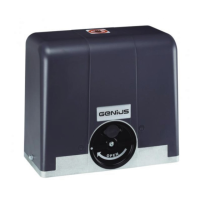
Lists necessary tools and materials for installing the ZODIAC 100 operator.
Details how to assemble the two-piece sliding guide and attach it to the transmission unit.
Explains how to assemble the rear fitting in the drive clutch unit before securing the sliding guide.
Describes the installation steps for the optional external release system.
Instructions for positioning and securing the sliding guide onto the architrave and ceiling.
Guides the user on how to assemble and position the fitting on the door.
Details how to install the operator onto the rear fitting of the sliding guide.
Explains how to set up the manual release knob and handle for emergency use.
Provides final steps for installing the external release cable and handle.
Lists technical details of the control board, including voltage, load, and temperature.
Identifies and describes the various components and connectors on the control board.
Details the connected devices and their corresponding terminals on the control board.
Explains the function of each dip-switch on the DS1 programming board.
Describes the different operating logic modes (Automatic, Semi-automatic) for the system.
Instructions on setting the appliance using Dip-Switch DS1 and adjusting potentiometers.
Details the procedure for learning door movement parameters and operating logic.
Step-by-step guide for manual learning with semi-automatic logic.
Guide for automatic learning of door movement parameters and operating logic.
Steps for manual learning when the system is set to automatic logic.
Instructions for performing learning with a higher thrust force if needed.
How to manually set the stop contact point during the learning stage.
Instructions for storing radio control codes for the 868 MHz frequency.
Instructions for storing radio control codes for the 433 MHz frequency.
How to store 433 MHz radio controls remotely without using the radio setup buttons.
Steps to delete all stored radio control codes from the system.
Instructions on connecting parachute cables to prevent accidental falls.
Describes the central support as a securing point for the sliding guide.
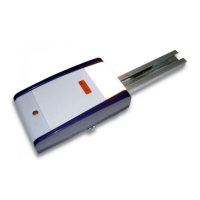
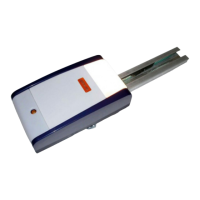
Information on installing the external release with lever or key system.
Details on using a safety edge with a conductive element and its control unit housing.
Explains the function of the battery kit for power cuts and its installation.
| Manufacturer | Genius |
|---|---|
| Model | ZODIAC 100 |
| Lifting Capacity | Up to 100 kg |
| Warranty | 2 years |
| Power Supply | AC |
| Safety Features | Obstacle detection |
| Remote Control | Yes |