Do you have a question about the Genki KBR-JK8808 and is the answer not in the manual?
This document serves as a user manual for a motorized treadmill, providing comprehensive instructions for its assembly, operation, and maintenance, along with crucial safety guidelines. The primary function of this device is to provide a controlled environment for walking or running exercises indoors, allowing users to maintain physical fitness regardless of external weather conditions or time constraints.
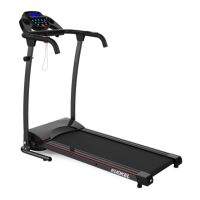
The motorized treadmill is designed to simulate walking or running by moving a continuous belt beneath the user's feet. It features a control panel that allows users to adjust various parameters of their workout, such as speed and to monitor their progress. The treadmill is equipped with pre-set programs, offering structured workouts with varying speeds and durations, catering to different fitness levels and goals. A key safety feature is the emergency stop mechanism, which immediately halts the running belt when activated, preventing potential accidents. The device also includes heart rate sensors, enabling users to monitor their heart rate during exercise, which is crucial for maintaining an effective and safe workout intensity. The design incorporates an IPAD holder, allowing users to engage with media or other applications while exercising, enhancing the user experience. The treadmill is also designed with a folding mechanism, making it convenient for storage in smaller spaces when not in use.
Before operating the treadmill, users are advised to carefully read the entire manual, paying close attention to all safety instructions to prevent injury. Assembly requires two people to safely remove the machine from its carton and set up the support frames. Knobs are used to secure the support frame to the base, and the computer handrail bar is then positioned horizontally and bolted into place. The IPAD holder can be adjusted or removed by pulling out a bolt. A critical step before starting any workout is to attach the safety key to the console and clip the other end to clothing at waist level. This ensures that the machine will stop if the user moves too far from the console, providing an immediate safety cutoff.
To begin a workout, the power line must be plugged in, and the red power switch at the back of the machine turned on. After attaching the safety key, pressing the designated "start" key will initiate the running belt at a speed of 1 km/h after a 3-second countdown. Users can monitor their heart rate by touching the heart sensors on the console. The "MODE" key allows switching between displaying distance, time, and calories burned. The treadmill offers 12 pre-set programs, ranging from P1 to P12, which can be selected when the machine is in standby mode by pressing the "PROG" key. Once a program is selected, pressing the "start" key will begin the workout. It's important to note that the speed and time settings for these pre-set programs are fixed and cannot be altered, with a default duration of 30 minutes for each program. In case of any emergency, pulling out the safety key will slowly bring the machine to a stop. Alternatively, the "stop" button can also be used to halt the running belt.
When folding the treadmill for storage, the bolt on the computer needs to be removed to fold the computer section. The knobs on both sides of the base frame are then removed, and two knobs are used to fix the left and right support frames. The bolt of the IPAD holder is pulled out, and the machine can then be stood upright against a wall. Users are cautioned to ensure children do not touch the folded machine to prevent it from falling.
Regular maintenance is crucial for prolonging the life of the treadmill and ensuring safe operation. One of the most important maintenance tasks is lubricating the running belt with silicone oil. This should be done by lifting the running belt and applying silicone oil directly onto the running board. After application, the machine should be run for 3 minutes without any load (i.e., without anyone standing on it) to distribute the oil evenly. This lubrication process is recommended every 30 working hours.
Beyond lubrication, several other daily maintenance steps are advised. After each use, especially if children are present, the treadmill should be switched off, and the power cable removed from the wall. The treadmill should be cleaned after every use. A dry cloth should be used to clean the control panel and the areas around the power switch. For stubborn stains and dirt on the running belt, a soft clean cloth and a suitable cleanser can be used. The running belt tension should be checked and tightened once a month. Furthermore, all screws and spines at fixing points should be checked and tightened regularly to ensure the machine's stability and safety. It is also important not to hang clothes or other objects on the machine, as this can affect its balance and potentially damage components. For storage, the treadmill should be kept in a safe, dry place, away from sources of heat and water, to protect its electrical components and overall integrity.
The manual also provides detailed instructions for adjusting the running belt if it deviates to the left or right, or if it jams. If the running belt deviates to the left, the user should start the machine at a speed of 2-3 km/h without a load. An Allen key is then used to turn a specific screw 1/4 turn, and the machine is allowed to run for 1-2 minutes without a load. This process is repeated until the belt is centered. The same procedure applies if the running belt deviates to the right, but a different screw is adjusted. If the running belt jams, the Allen key should be used to turn the screw 1/2 a turn on both the left and right sides until the jam is resolved. Before performing any checks or cleaning, the power must always be disconnected. The belt and dial plate should be cleared at least once a week.
| Maximum User Weight | 120 kg |
|---|---|
| Display | LCD |
| Foldable | Yes |
| Running Surface | 120 x 40 cm |
| Programs | 12 |