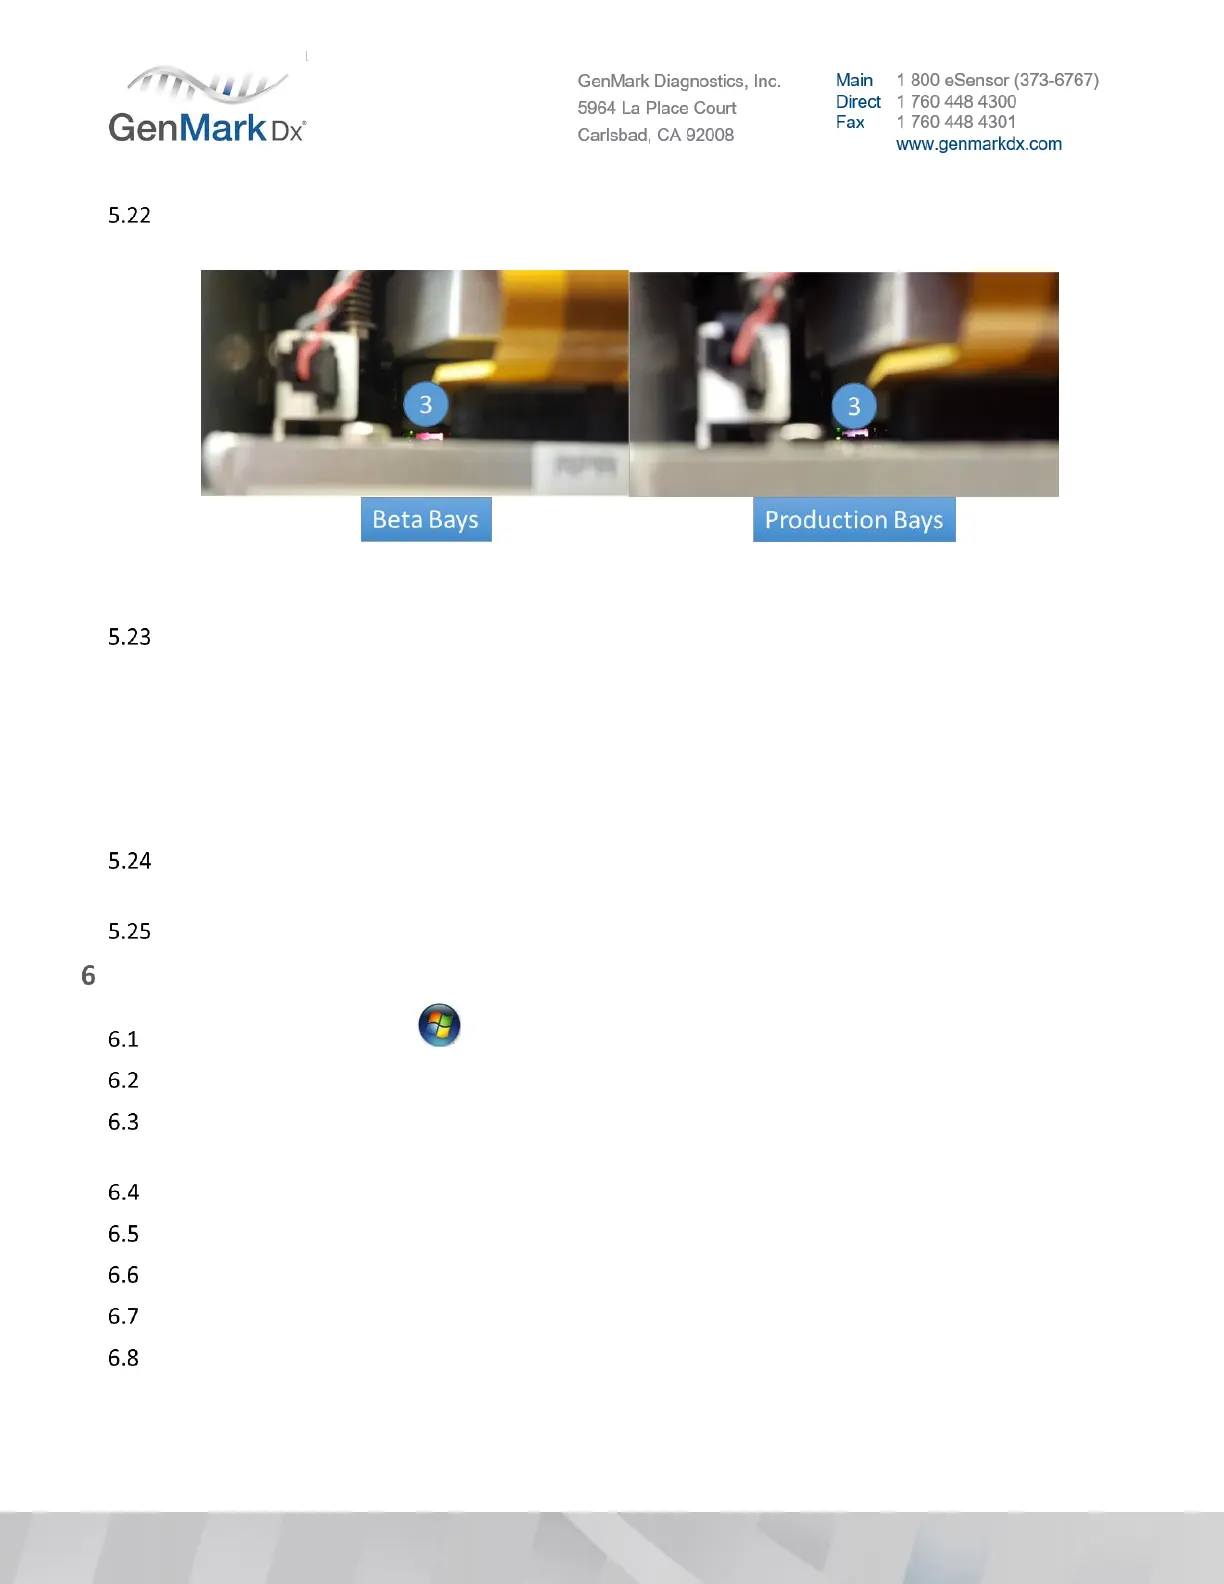
If you do not see the pink light, take the Bay out and wait 3 minutes before placing it back in the
system.
Figure 25 Bay Power & Communication Indicator LED (3)
Ensure all Bays installed have connected to the system, as indicated by flashing red LEDs.
Note: If Bays are not connected, the LEDs at the front of the Bay will not flash red and the status in the
Bay Configuration tab will indicate they cannot connect to the system.
Note: The OS will need to be configured in Windows to reflect the correct IP address to connect the Bays
to the system.
Note: If Bay LED lights are not on, ensure the dip switches are in the correct position per Figure 24.
Press Ctrl + Shift + F3 on the keyboard and logon under the ‘GNMK Service’ account to access the
Windows Operating System.
Check the time zone, date and time and update as necessary based on customer location.
Configure OS Settings
In Windows, go to Start > Control Panel > Network and Sharing Center
In Network and Sharing Center, select Change adapter settings.
Right click on the highest Local Area Connection (Local Area Connection 2 in Figure 26 below) and
select Properties.
Select Internet Protocol Version 4 (TCP/IPv4).
Click the Properties button and ensure the static IP address is properly configured:
IP Address must be 10.10.100.XX (XX must be a number higher than 25, i.e. 26).
Subnet mask must be 255.255.255.0
Press OK > Close > Close again
 Loading...