Note: Scanner should beep and the red LED should turn on shortly after firmware flash completed.
Press Close
Remove the scanner USB cord from the ePlex instrument and wait 5 seconds
Insert scanner USB cord scanner back into the ePlex instrument
Press Connect
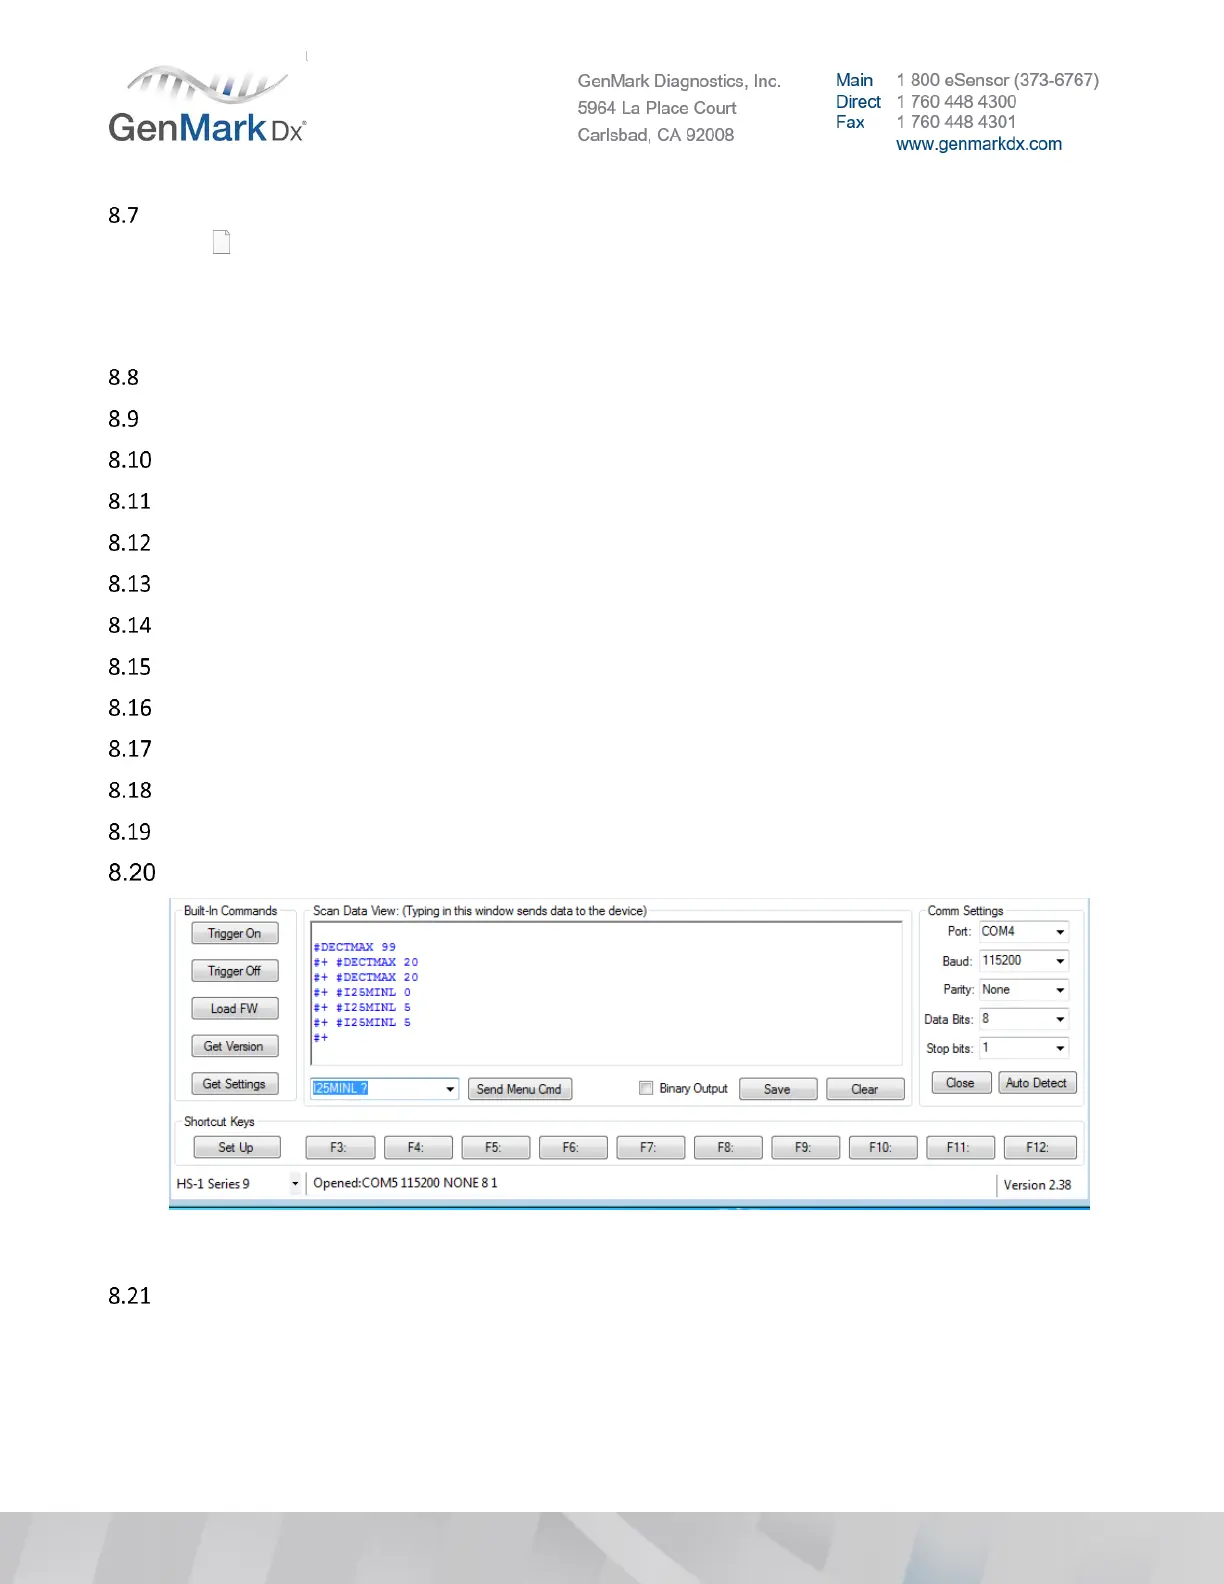
Press Get Version
Confirm version is: #FW-MH3301-03-A6
Program Scanner with Default Settings:
After each input select Send Menu Cmd (Note: Inputs are case sensitive)
Enter ALLENAB 0 (Disable all barcode symbologies)
Enter QRCENAB 1 (Enable QR code for the ePlex cartridge IDs)
Enter DMXENAB 1 (Enable Data Matrix for the User barcodes)
Enter 128ENAB 1 (Enable code 128 the most common lab barcode symbology)
Enter DECTMAX 20 (Set active scanner timeout to 20 or 2.0 sec from 9.9 sec)
Figure 36 Send Commands
Enable Additional Barcode Symbologies:
Note: If laboratory is using any other barcode symbology other than code 128 for accession IDs, please
enable the associated barcode symbology.
Note: You can use your smartphone to determine customer symbology (i.e. Scandit app)
• Enter COMENAB 23 Enable composite code
 Loading...