P.8
Installation Instructions
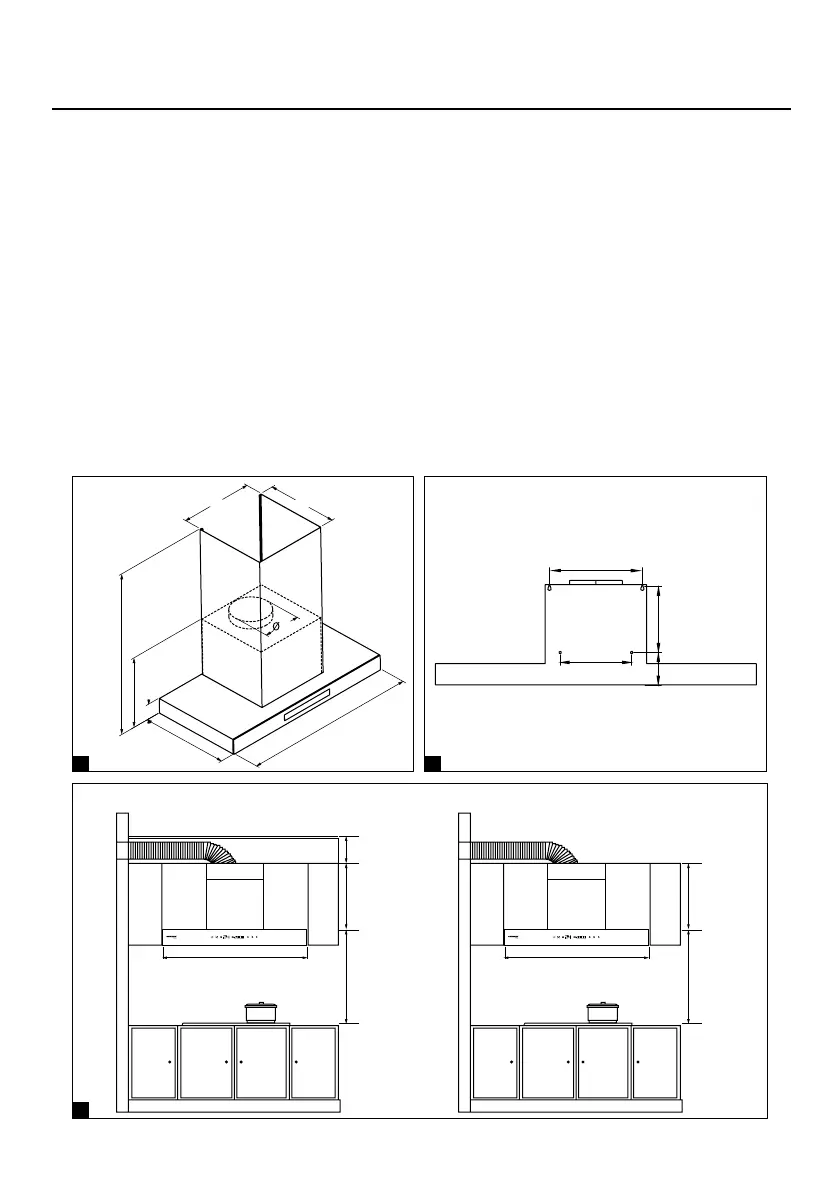
Installation Steps
1. Type of installation: Ducted option; Failure to install the screws or xing device in accordance with
these instructions may result in electrical hazards.
2. Mark on the wall the hole positions as shown in diagram (pic 2); The wall plugs supplied are suitable
for solid walls only. When xing to any other type of wall, please use suitable alternative xings.
3. Distances between the top of cooker or hob and the lowest part of the hood must be observed:
Gas Hobs 750mm; Electric hobs 650mm (pic. 3).
4. Drill the holes, insert the wall plugs in all 4 holes, then insert the lower four screws (pic. 4).
5. Position the hood over the lower four screws, then tighten them (pic. 5).
6. Install the oil cup (pic. 6).
7. Fix the Ducting Tube by using tape or clamp (pic. 7)
8. Fix to the wall the top bracket and place the decorative tubes (pic. 8).
9. Remove the protective lm, done (pic. 9).
2
1
3
260
285
291
It can be stretched to 660
150
330
60
356/457
598/698/798/898
185
>150
330-660 330-660
650
(Electric Hob)
750
(Gas Hob)
650
(Electric Hob)
750
(Gas Hob)
598/698/798/898 598/698/798/898
91
200
The ducting tube is concealed in the cabinet. The ducting tube is not concealed in the cabinet.
Unit: mm Unit: mm
Unit: mm