Do you have a question about the GFW Lancaster 2 Drawer Bedside and is the answer not in the manual?
| Brand | GFW |
|---|---|
| Model | Lancaster 2 Drawer Bedside |
| Category | Indoor Furnishing |
| Language | English |
Covers weight limits, assembly space, tools, general warnings, and care instructions for safe operation.
Lists all required parts with codes, names, and quantities for the bedside unit.
Identifies all screws, dowels, cams, and other hardware used in assembly.
Prepare the workspace and lay out all components on a soft surface to prevent damage.
Connect frame panels using specified fixings (Minifix Bolts).
Mount drawer slides onto side panels using specific fixings (Minifix Cams and Dowels).
Assemble the main side and back panels using Unitar Screws.
Secure the back support panel using specified fixings.
Join the top horizontal bars (U, V, W) together.
Connect the assembled top frame to the main cabinet structure.
Attach the top panel and internal drawer runners using fixings and stickers.
Secure the back panel, ensuring the cabinet is square.
Construct the sides of the drawers using panels Y, Z, and Z1.
Secure the drawer back panel (Z2) to the drawer assembly.
Fit the drawer fronts (Y) and attach the handles (m).
Slide the assembled drawers into the cabinet.
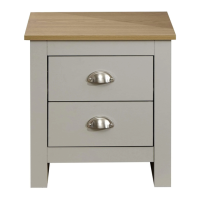
Image showing the completed bedside unit.
Confirms assembly is complete and advises periodic checks and keeping instructions for future reference.
 Loading...