EasyManua.ls Logo

Ghost Controls ABBT2 - User Manual

Ghost Controls ABBT2
2 pages
Print Icon
To Next Page IconTo Next Page
Loading...
TIPS FOR INSTALLATION:
Battery Box should be mounted next to (or below) control box so that power harness can connect into main system control
board through the strain relief.
GHOST CONTROLS
®
does not recommend splicing the battery harness wire to extend its length. Battery Box should be
mounted at least three feet above ground to avoid any standing water or snow and to prevent damage from landscaping
equipment such as string trimmers or lawn mowers.
The included mounting screws are designed to be installed into wood or metal posts. If you are installing onto a post or column
made of material other than wood or metal, you must replace the screws (not included) with appropriate mount-ing screws.
INSTALLING YOUR BATTERY BOX
STEP 1: PLAN YOUR INSTALLATION LOCATION
Battery Box Kit must be located within 3 feet of control box and mounted to a solid object such as the fence.
STEP 2: MOUNT BOX WITH MOUNTING SCREWS
Install and tightly secure 4 mounting screws inside of battery box.
BATTERY BOX KIT
INSTRUCTIONS
ABBTIM | REV 2019
©2019 GHOST CONTROLS
®
Question and Answer IconNeed help?

Do you have a question about the Ghost Controls ABBT2 and is the answer not in the manual?

Summary

Ghost Controls Battery Box Kit Instructions

Tips for Installation

Guidance on mounting the Battery Box next to or below the control box, avoiding water and equipment damage.

Installing Your Battery Box

Step 1: Plan Your Installation Location

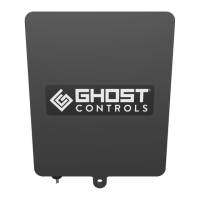
Locate the Battery Box within 3 feet of the control box and mount it to a solid object like a fence.

Step 2: Mount Box With Mounting Screws

Install and tightly secure 4 mounting screws inside the battery box for proper mounting.

Step 3: Attach Power Harness to System Control Board

Feed the power harness from the battery box through its strain relief into the system control box.

Step 4: Turn Power Off and Connect Wires

Turn off system power before connecting battery box harness bullet connectors to the control board.

Step 5: Connect Battery or Batteries in the Battery Box

Connect batteries, ensuring correct polarity: red connector on positive, black on negative terminal.

Step 6: Turn On Main System Control Box

Turn the main system toggle power switch on the control box to the 'on' position.

Step 7: Test the System

Test the system's functionality using a remote, keypad, or push button.

Step 8: Lock the Box (Optional)

Option to purchase a security kit to lock the operator, control box, and battery box with padlocks.

Warranty Information

Ghost Controls ABBT2 Specifications

General IconGeneral
Voltage12V
Battery TypeSealed Lead Acid
Capacity7Ah
Dimensions5.94 x 2.56 x 3.94 inches
CompatibilityGhost Controls gate operators
Terminal TypeF1