EasyManua.ls Logo

Ghost Controls PREMIUM REMOTE - User Manual

Ghost Controls PREMIUM REMOTE
2 pages
Print Icon
To Next Page IconTo Next Page
Loading...
5-BUTTON PREMIUM REMOTE TRANSMITTER
PROGRAMMING AND REMOTE TRANSMITTER OVERVIEW
All GHOST CONTROLS
®
remote transmitters must be programmed before they will operate the Gate Opener System so that the safety and security of your system is
maintained.
PROGRAMMING REMOTE TO GATE CONTROLLER
STEP
LED/ALARM
BEFORE PRESSING
BUTTON(S) SEQUENCE
TO PRESS
LED/ALARM
AFTER PRESSING
DESCRIPTION
1
Press & hold LEARN XMTR
button
on gate system
controller
Gate alarm sounds and LEARN
XMTR LED on system controller
stay
Places gate controller into Learn Remote mode for 10 seconds. NOTE-The gate system
controller will exit the Learn Remote mode after 10 seconds and return to normal operation if
there is no valid remote transmitter signal received.
2
Gate controller LED is
Press & hold
or
for 2 seconds
Gate controller alarm beeps or gate
begins moving
Programs this button into memory.
3
Release the
or
LEARN XMTR LED goes
The new transmitter’s ID has been saved into the memory of the main system controller.
4
No alarm sounds,
LEARN XMTR LED
on main controller is
LED on
remote is
Press and release the or
button
Transmitter LED blinks on when
button is depressed
Test the transmitter button you just programmed. LED on transmitter turns on only when
button is depressed to indicate it is transmitting GhostCode
TM
signal to gate controller. Each
press of this remote button will cycle the gate as follows: OPEN-STOP-CLOSE-STOP-
OPEN. The LED will be flashing rapidly when the transmitter is transmitting. Maximum
transmitting time is approximately 20 seconds to save battery life.
ADD AN ADDITIONAL REMOTE TRANSMITTER TO CONTROL THE GATE
1
Press & hold the on
Remote B
(Learning) for at least 3 seconds
or until the LED goes
Remote LED is
This process assumes that Remote A (Teaching Remote) is ALREADY capable of controlling
the gate. This puts Remote B (Learning Remote) into Learning Mode.
2
Press & hold
or
on Remote A, the Teaching
Remote.
LEDs on both Teaching and
Learning Remote
are
Remote A (Teaching Remote) is in Teach Mode, and Remote B (Learning Remote) is in
Learn Mode.
3
Press & release
or on
Remote B, the Learning Remote.
Remote LED goes
Indicates that the Learning Remote button (Remote B) pressed in this step is now programmed
to operate the same gate as the Teaching Remote (Remote A).
CLONE / COPY BUTTON 1’S ID TO BUTTON 2’S (BUTTON 1 ALREADY CONTROLS THE GATE)
STEP
NOTE
BUTTON(S) SEQUENCE
TO PRESS
LED/ALARM
AFTER PRESSING
DESCRIPTION
1
Press & hold LEARN
button on Remote for AT
LEAST 3 seconds until the
LED turns on
LED on Remote stays
Places remote transmitter into Learning mode.
2
Release the LEARN Button
LED remains
Remote is in Learning Mode.
3
Press and Release Button 1
LED should start
(2 flashes a sec)
Remote is sending button 1’s ID.
4
Press and Release Button 2
LED should go
Button 1’s ID is accepted by button 2. Both buttons should now work the same gate.
CLONE / COPY BUTTON 2’S ID TO BUTTON 1’S (BUTTON 2 ALREADY CONTROLS THE GATE)
STEP
NOTE
BUTTON(S) SEQUENCE
TO PRESS
LED/ALARM
AFTER PRESSING
DESCRIPTION
1
Press & hold LEARN
button on Remote for AT
LEAST 3 seconds until the
LED turns on
LED on Remote stays
Places remote transmitter into Learning mode.
2
Release the LEARN Button
LED remains
Remote is in Learning Mode.
3
Press and Release Button 2
LED should start
(2 flashes a sec)
Remote is sending button 2’s ID.
4
Press and Release Button 1
LED should go
Button 2’s ID is accepted by button 1. Both buttons should now work the same gate.
PREMIUM REMOTE
INSTRUCTIONS
BUTTON 1
Activates
Gate 1 or
Gate 2
BUTTON 2
Activates
Gate 1 or
Gate 2
Transmitting
Receiving
LEARN BUTTON
To Program Additional Remote
LED LIGHT
REMOTE A
(TRAINING)
REMOTE B
(LEARNING)
® ® ®
NOTE:
REMOTES A & B MUST BE
TOUCHING AND ORIENTED
AS SHOWN TO PROGRAM
REMOTE B FROM REMOTE A
Question and Answer IconNeed help?

Do you have a question about the Ghost Controls PREMIUM REMOTE and is the answer not in the manual?

Summary

Programming Remotes to Gate Controller

Program Remote to Gate Controller

Guides the process of programming a remote transmitter to the gate controller for initial setup.

Add Additional Remote Transmitter

Explains how to add a new remote transmitter to an existing gate control system.

Clone Button ID Between Buttons

Copies the functionality of one button to another on the same remote transmitter.

Advanced Remote Functions

PartyMode Function

Enables or disables the PartyMode function to hold the gate open indefinitely.

Gate System Controller Diagnostic Mode

Activates gate controller diagnostics indicators to check system status.

Test Gate System Controller

Tests the gate system controller by checking battery status via the remote transmitter.

Generate New Transmitting Key Code

Creates a new unique key code sequence for the remote transmitter.

Overview

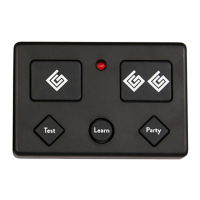
The GHOST CONTROLS® 5-Button Premium Remote Transmitter is designed to operate your gate opener system, ensuring both safety and security. This remote must be programmed to the gate opener system before it can be used.

Programming to Gate Controller

To program the remote to the gate controller:

  1. Enter Learn Remote Mode: Press and hold the "LEARN XMTR" button on the gate system controller. The gate alarm will sound, and the "LEARN XMTR" LED on the system controller will stay on, indicating it's in Learn Remote mode for 10 seconds. If no valid remote signal is received within this time, the controller will exit Learn Remote mode.
  2. Program a Button: While the gate controller is in Learn Remote mode, press and hold either Button 1 or Button 2 on the remote for 2 seconds. The gate controller alarm will beep or the gate will begin moving.
  3. Confirmation: Release the button. The "LEARN XMTR" LED on the system controller will turn off, confirming that the new transmitter's ID has been saved.
  4. Test the Transmitter: Press and release the programmed button. The transmitter LED will blink, indicating it's transmitting a GhostCode™ signal. Each press of the button will cycle the gate through OPEN-STOP-CLOSE-STOP-OPEN. The LED will flash rapidly during transmission, which lasts approximately 20 seconds to conserve battery life.

Adding an Additional Remote Transmitter

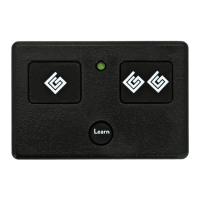
This process allows you to program a new "Learning Remote" (Remote B) using an already programmed "Teaching Remote" (Remote A).

  1. Enter Learning Mode: On Remote B, press and hold the "Learn" button for at least 3 seconds, or until its LED turns on. Remote B's LED will stay on, indicating it's in Learning Mode.
  2. Initiate Teach Mode: On Remote A, press and hold either Button 1 or Button 2. The LEDs on both Remote A and Remote B will flash, indicating Remote A is in Teach Mode and Remote B is in Learn Mode.
  3. Program Remote B: While the LEDs are flashing, press and release the corresponding button (Button 1 or Button 2) on Remote B. Remote B's LED will turn off, confirming that the button is now programmed to operate the same gate as Remote A.

Cloning/Copying Button IDs

You can clone the ID from one button to another on the same remote.

Clone/Copy Button 1's ID to Button 2's:

  1. Enter Learning Mode: Press and hold the "LEARN" button on the remote for at least 3 seconds until its LED turns on. The remote's LED will stay on.
  2. Confirm Learning Mode: Release the "LEARN" button. The LED will remain on.
  3. Send Button 1's ID: Press and release Button 1. The LED will start flashing (2 flashes per second), indicating it's sending Button 1's ID.
  4. Accept ID on Button 2: Press and release Button 2. The LED will turn off, confirming that Button 1's ID has been accepted by Button 2. Both buttons should now operate the same gate.

Clone/Copy Button 2's ID to Button 1's:

  1. Enter Learning Mode: Press and hold the "LEARN" button on the remote for at least 3 seconds until its LED turns on. The remote's LED will stay on.
  2. Confirm Learning Mode: Release the "LEARN" button. The LED will remain on.
  3. Send Button 2's ID: Press and release Button 2. The LED will start flashing (2 flashes per second), indicating it's sending Button 2's ID.
  4. Accept ID on Button 1: Press and release Button 1. The LED will turn off, confirming that Button 2's ID has been accepted by Button 1. Both buttons should now operate the same gate.

PartyMode® (Hold Open) Function

PartyMode® allows the gate to remain open. This function can be enabled or disabled via the remote. The gate will stay in PartyMode® until disabled or the power button on the Control Box is cycled.

To Enable PartyMode®:

  1. Initiate PartyMode® Entry: Press and hold the "Party" button on the remote until its LED turns on. The remote's LED will stay on, indicating it's about to enter PartyMode®.
  2. Confirm PartyMode®: Release the "Party" button. The LED will turn off. The main system controller will enter PartyMode®, opening the gate to its full open position if not already there. All other controls (keypads, other remotes) will be ignored, though acknowledged with two beeps from the gate alarm.

To Disable PartyMode®:

  1. Initiate PartyMode® Exit: Press and hold the "Party" button on the remote until its LED turns on. The remote's LED will stay on, indicating it's about to exit PartyMode®.
  2. Confirm PartyMode® Exit: Release the "Party" button. The LED will turn off. PartyMode® will be disabled, and if AUTOCLOSE was previously enabled, the gate will close automatically.

Gate System Controller Diagnostic Mode

The Diagnostic Mode function activates diagnostic indicators (LEDs and/or alarm codes) on the gate controller. This is useful for troubleshooting. To conserve battery power, the main controller indicators are typically off when the gate is idle for more than 60 seconds (except for UL-325 entrapment protection requirements). Enabling Diagnostic Mode will turn these indicators on for 5 minutes without needing to operate the gate.

Testing Your Gate System Controller

The "Test" button on the remote indicates the status of the gate system controller battery, not the remote's internal CR2032 battery.

To Test Your Gate System Controller:

  1. Initiate Test Mode Entry: Press and hold the "Test" button on the remote until its LED turns on. The remote's LED will stay on, indicating it's about to enter Test Mode.
  2. Confirm Test Mode: Release the "Test" button. The LED will turn off. The gate system controller will use the gate alarm to indicate the battery status:
    • 1 Beep: Battery is good.
    • 2 Beeps: Battery is low.

Generating a New Transmitting Key Code

Each GHOST CONTROLS® remote transmitter has a unique key code sequence. Generating a new key sequence will erase the previous one, requiring the remote to be reprogrammed to the gate opener.

To Generate a New Key Code:

  1. Initiate New Code Generation: Press and hold both Button 1 and Button 2 simultaneously for 10 seconds on the remote until its LED turns on. The remote's LED will stay on, indicating it's about to generate a new code.
  2. Confirm New Code Generation: Release both buttons. The remote's LED will remain on. Steps 2 and 3 must be completed within 5 seconds while the LED is lit.
  3. Finalize New Code: Press and release either Button 1 or Button 2. The LED will turn off, confirming that the remote button pressed in this step is now generating a new code.

Maintenance and Compliance

This device complies with Part 15 of the FCC Rules. Operation is subject to two conditions:

  • The device may not cause harmful interference.
  • The device must accept any interference received, including interference that may cause undesired operation.

Important Note: Changes or modifications to this unit not expressly approved by the party responsible for compliance could void the user's authority to operate the equipment.

The equipment has been tested and found to comply with the limits for a Class B digital device, pursuant to Part 15 of the FCC Rules. These limits are designed to provide reasonable protection against harmful interference in a residential installation. This equipment generates, uses, and can radiate radio frequency energy and, if not installed and used in accordance with the instructions, may cause harmful interference to radio communications. However, there is no guarantee that interference will not occur in a particular installation.

If this equipment does cause harmful interference to radio or television reception, which can be determined by turning the equipment off and on, the user is encouraged to try to correct the interference by one or more of the following measures:

  • Reorient or relocate the receiving antenna.
  • Increase the separation between the equipment and receiver.
  • Connect the equipment into an outlet on a circuit different from that to which the receiver is connected.
  • Consult the dealer or an experienced technician for help.

WARNING: This product can expose you to chemicals including lead, which is known to the State of California to cause cancer. For more information, go to www.P65Warnings.ca.gov.

Ghost Controls PREMIUM REMOTE Specifications

General IconGeneral
TechnologyRadio Frequency
Frequency433.92 MHz
RangeUp to 1, 000 feet
Battery TypeCR2032
ModelAXP1
CompatibilityGhost Controls Gate Opener Systems
Weather ResistanceWeather Resistant
TypeGate/garage door remote

Related product manuals