Do you have a question about the Gianni Ferrari PG 180 Diesel and is the answer not in the manual?
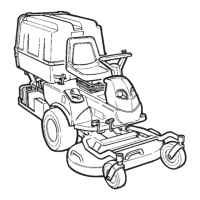
| Engine Type | Diesel |
|---|---|
| Power | 18 HP |
| Engine Power | 18 HP |
| Cylinders | 3 |
| Transmission | Hydrostatic |
| Drive | 4WD |
| Width | 1100 mm |
| Length | 2300 mm |
Overview of primary maintenance tasks and recommended service intervals.
Slip out pin 01A which fixes the deck to the anchorage point.
Slip out mowing deck 02A from the PLAY GREEN.
Approach deck, slip tool-holding arms 01A-01B into seat.
Couple female plug 02B with male plug 02A for perfect connection.
Insert eye pin "R" 05A fixing deck to tool-carrying arm.
Unscrew lever knobs (1-2-3), air filter (4), and fixing screws (5).
Loosen fixing screws (1-2), remove electric plugs (3).
Loosen fixing screws (1-2-3).
Loosen fixing screws (1-2-3).
Lift hopper (1) and slip out the middle body panel.
Dismantle the hopper by removing screws and parts.
Fix screws (1), position lever knobs (-2-3-4), and air filter (5).
Tighten fixing screws (1-2), connect electric terminals (3).
Position and fix screws (1-2-3).
Position and fix screws (1-2-3).
Lift belt tightener 01A to relieve tension on belt 01B.
Remove belt 03A from pulley 03B.
Position the PTO lever as indicated in the figure.
Turn adjusting nuts 07A - 07B and rotate pulleys.
Using a tool, remove spring 09A of the belt tightener.
Slip belts 10A from pulley 10B.
Remove pin 11A and slip out tie-rod of PTO lever cable.
Use lever 15A to force plate 15B and remove belts 15C.
Loosen screw 01A fixing pulley 01B to turbine side.
Remove components inside pulley, respecting sequence shown in Fig. 03.05.
Locate 6 screws 02A holding turbine lid and remove them.
Check wear condition of rotor 04A and replace if necessary.
Use plastic hammer 07A to unlock rotor 07B from shaft 07C.
Check thread of shaft 09A, conical bush 09B, and bearing 09C.
Loosen nut 12A, slip pulley 12B, remove pin 12C, remove protection 12D.
Insert shaft 12H, position seeger 12G, position protection 12D, insert pulley 12B, tighten nut 12A.
Locate and unfasten fake link 01A of the chain 01B.
Ensure pinion and crown are phased by matching hole 03A and tooth 03B.
Loosen screws 06B fixing supports 06C to plate 06D.
Replace bearings 07A, remove seeger 07B.
To remove support 12A, remove seeger 12B.
Dismount shim o-ring 13A.
Position shim o-ring 16A.
Position plate 18A on support 18B, insert screws 18C, lock using hole 18D.
Loosen nut 21A, tighten nut 21B, adjust spacers 21C/21D, lock nut 21A.
Loosen nut 21F, adjust nut 21G, lock nut 21F.
Regularly grease points indicated on Fig. 01.17, 02.17, and 03.17.
Remove oil seal 04A, join pump 04C to box 04D with screws 04E, insert seal 04F.
Unscrew nut 04A, open filter, clean filter, reset microswitch.
Loosen fixing knob 06A or hook 07A to access filter cartridge.
Move control rod 07C to remove grilles 07A-07B.
Remove radiator grid and clean regularly.
Slip out pin 09A to replace turbine belt tensioner pulley.
Position and fix turbine tensioner pulley with pin 11A.
Loosen 4 screws 13A to replace wheels on wheel hub.
Check efficiency of pin 15A and replace if necessary.
Loosen two screws 13A, lift lid 13B, unlock terminal 13C for maintenance.
Detail of fuse box for Briggs & Stratton engine.
Detail of electrical box for Kohler petrol engine.
Detail of fuse box for Kohler petrol engine.
Detail of electrical box for Lombardini diesel engine.
Detail of electrical box for Kubota diesel engine.
Activate microswitch; if display shows no message, it's damaged and needs replacement.
Activate microswitch; if display shows no message, it's damaged and needs replacement.
Activate microswitch; if display shows no message, it's damaged and needs replacement.
Activate microswitch; if display shows no message, it's damaged and needs replacement.
Activate microswitch; if display shows no message, it's damaged and needs replacement.
Activate microswitch; if display shows no message, it's damaged and needs replacement.
Displays error codes for initial test phase related to sensors.
Displays error codes for operating cycle related to safety tests.
Error code for engine exceeding 115°C water temperature.
Error code for full hopper or clogged air filter on Lombardini.
Error codes for short circuits in glow plug, engine stop, or buzzer circuits.
Loosen nuts 01A to remove cutting blades from disc.
Remove center element 02A from blade-carrying dish 02B.
Remove wheel carriage 01A from deck by slipping out pins 'R' 01B.
Remove screws 02A fixing upper guards of mowing deck.
Remove driving unit 05A and divide into two half-units 05B-05C.
Loosen nuts 01A to remove cutting blades from disc.
Remove center element 02A from blade-carrying dish 02B.
Ensure shaft seats A and B are orthogonal at 90° and join shafts.
Position driving unit in its seat on the mowing deck.
Fix cardan shaft by locking screw 03A.
Tighten nuts 01A to assemble cutting blades on disc.
Assemble center element 02A on blade-carrying dish 02B.
Place mowing deck in suitable position for comfortable work.
Position blade disk on driving shaft, aligning deck seat with shaft seat.
Mount blades 90° orthogonal to each other for perfect functioning.
Lift hopper and remove the center body panel.
Slip out fixing pin 03A for hopper lifting cylinder 03B.
Slip out screws 04A fixing hopper to frame and remove hopper 03B.
Prepare machine body 06A with two fixing plates 06B for elevator.
Position elevator on Play Green body using lifting points shown in Fig. 07.01.
Fix hopper to elevator using points 09A and connect terminals 09B.
Disconnect all pipes from the 2-way ventil and remove unused hopper pipes.
Replace 2-way ventil/PTO lever 02A with new 3-way distributor/lever 02B.
Connect hydraulic pipes for the elevator according to the provided scheme.