- 11 -
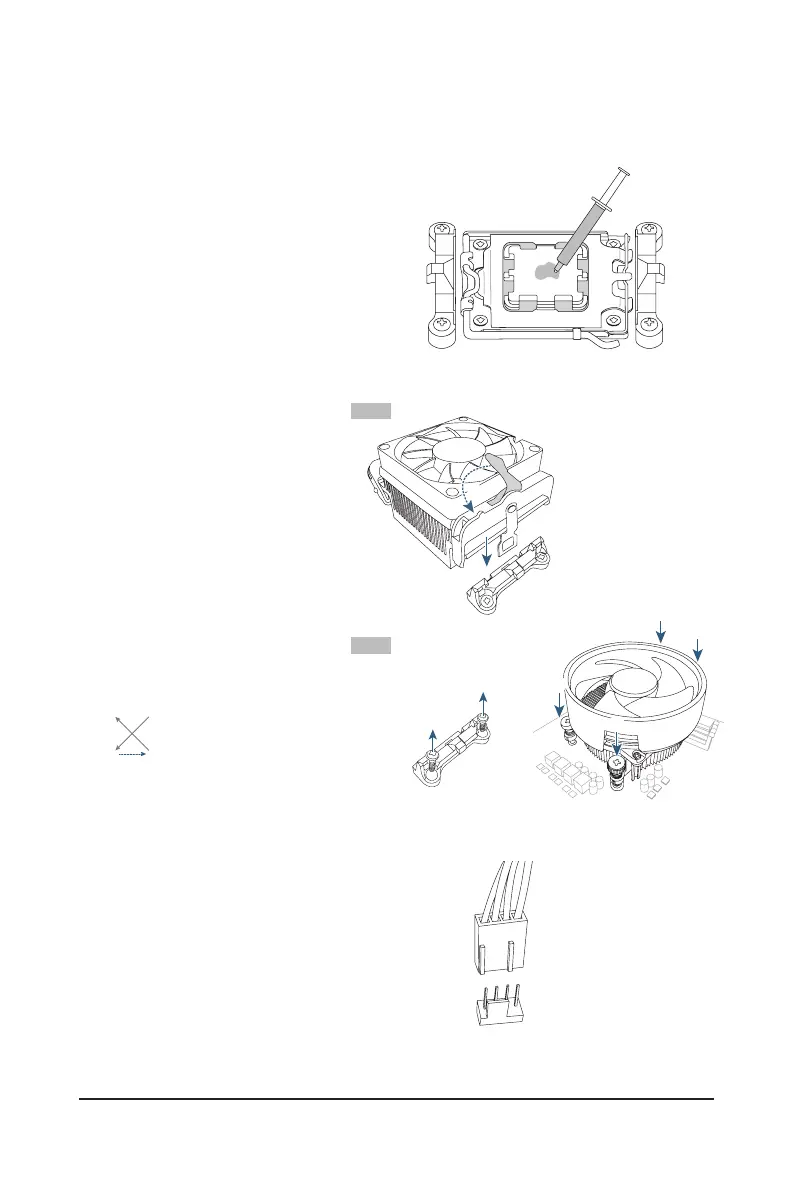
C. Installing the CPU Cooler
Be sure to install the CPU cooler after installing the CPU. (Actual installation process may differ depending the
CPU cooler to be used. Refer to the user's manual for your CPU cooler.)
u
w
Finally, attach the power connector of
the CPU cooler to the CPU fan header
(CPU_FAN) on the motherboard.
CPU_FAN
u
Type B
j
l
v
kk
mm
j
kk
* When using a Type B CPU cooler, it is not
recommended to fasten each screw down all the
way in one step. Follow order 1-2-3-4, fasten screw
clockwise 1 rotation per step. Repeat steps 1-2-3-4
till all screws are fastened.
Type A
Apply an even and thin layer of thermal
grease on the surface of the installed CPU.
v
Type A:
Hook the CPU cooler clip to the mounting
lug on one side of the retention frame. On
the other side, push straight down on the
CPU cooler clip to hook it to the mounting
lug on the retention frame. Turn the cam
handle from the left side to the right side to
lock into place.
Type B:
First remove the four screws from the
CPU retention frame and remove the CPU
retention frame. Then align the four shoul-
der screws on the CPU cooler with the
standoffs from the back plate. Fasten each
shoulder screw in a 1-2-3-4 (x) pattern as
shown on the right.
 Loading...