- 11 -
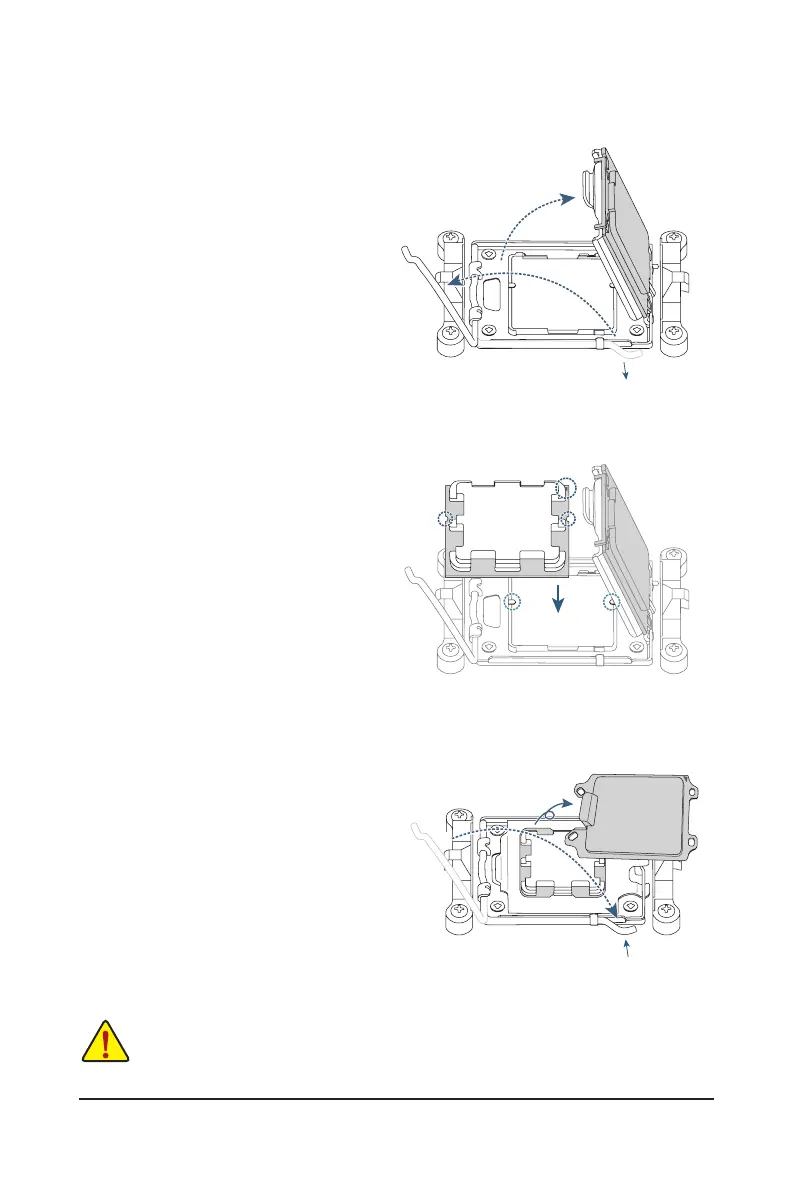
B. Installing the CPU
Follow the steps below to correctly install the CPU into the motherboard CPU socket.
Do not force to engage the CPU socket locking lever when the CPU is not installed correctly
as this would damage the CPU and CPU socket.
j
k
l
Pin One
w
u
v
jGently press the CPU socket lever handle
down and away from the socket.
kCompletely lift up the CPU socket lock-
ing lever.
lWith your ngers, hold the plastic protec-
tive cover attached to the metal load plate
to lift open the metal load plate.
Hold the CPU with your ngers by the edges.
Align the CPU pin one marking (triangle) with
the pin one corner of the CPU socket (or you
may align the CPU notches with the socket
alignment keys) and gently insert the CPU
into position.
Make sure the CPU is properly installed and
then close the load plate. Secure the socket
lever under its retention tab. The plastic
protective cover will pop off by itself and can
be removed.
* Always replace the plastic protective cover
when the CPU is not installed to protect the
CPU socket.
l
k
jj