Do you have a question about the Gigabyte GA-P35-DS4 and is the answer not in the manual?
Motherboard components can be damaged by electrostatic discharge (ESD). Follow safety guidelines.
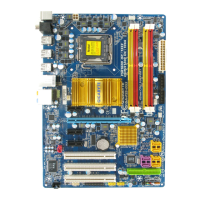
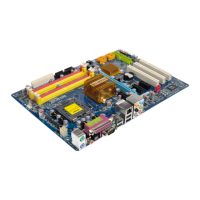
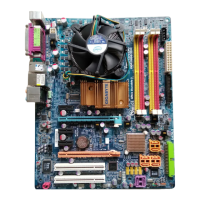
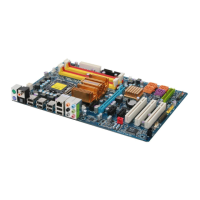
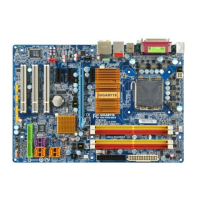
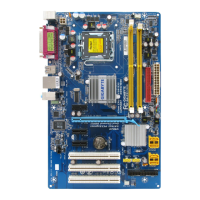
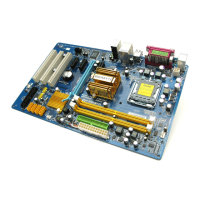
Details CPU, memory, audio, LAN, expansion slots, storage, and IEEE 1394 support.
Guidelines for safely installing the CPU and its cooler onto the motherboard.
Instructions for installing DDR2 memory modules and configuring Dual Channel mode.
Step-by-step guide for installing PCI Express and PCI expansion cards.
How to install the SATA bracket to connect external SATA devices.
Identifies and describes all connectors on the motherboard's back panel.
Details and pinouts for all internal motherboard connectors.
Displays the GIGABYTE logo and POST screen during system boot.
Overview of the BIOS Setup main menu and function keys.
Configure system date, time, and IDE/SATA device settings.
Configure boot order, passwords, CPU features, and display settings.
Enable/disable onboard devices like SATA, USB, LAN, and audio.
Configure ACPI sleep states and power-on options.
Assign IRQ values for PCI slots.
Monitor system voltages, temperatures, and fan speeds.
Adjust CPU, memory, and voltage settings for overclocking.
Load the safest and most stable BIOS default settings.
Load the optimal BIOS default settings for performance.
Set or clear BIOS supervisor and user passwords.
Save BIOS configuration changes and exit the setup utility.
Exit BIOS Setup without saving any changes.
Guide to installing chipset drivers using the GIGABYTE driver disk.
Lists GIGABYTE-developed and free software available on the driver disk.
Provides information about drivers, applications, and tools on the driver disk.
Information about the hardware devices on the motherboard.
Contact information for GIGABYTE headquarters and branch offices.
Utility to compress and back up/restore system data on PATA and SATA drives.
Information about GIGABYTE's BIOS update tools: Q-Flash and @BIOS.
Step-by-step guide to updating BIOS using the Q-Flash utility.
Guide to updating BIOS using the @BIOS utility in Windows.
System overclocking and management tool for Windows.
How to use a USB flash drive to boost Windows Vista performance.
Steps for installing SATA hard drives and configuring RAID/AHCI.
Guide to installing SATA drives and configuring ICH9R controllers.
Guide to installing SATA drives and configuring GIGABYTE SATA2 controller.
How to create a driver diskette for SATA RAID/AHCI installation.
Steps for installing SATA RAID/AHCI drivers and the OS.
How to configure audio jacks for different channel setups.
Guides speaker configuration for 2, 4, 5.1, and 7.1 channel audio.
Instructions for installing the S/PDIF in cable.
How to enable DTS for enhanced audio playback.
Steps to set up microphone recording.
How to use the Sound Recorder application for recording and playback.
Common questions and troubleshooting procedures for system startup issues.
Answers to common questions about BIOS options, power, and beep codes.
A step-by-step flowchart for diagnosing system startup problems.
| Number of memory slots | 4 |
|---|---|
| Maximum internal memory | 8 GB |
| Processor socket | LGA 775 (Socket T) |
| Processor manufacturer | Intel |
| Number of SATA connectors | 8 |
| Floppy disk drive connector | Yes |
| PS/2 ports quantity | 1 |
| USB 2.0 ports quantity | USB 2.0 ports have a data transmission speed of 480 Mbps, and are backwards compatible with USB 1.1 ports. You can connect all kinds of peripheral devices to them. |
| Audio chip | Realtek ALC889A |
| Audio output channels | 7.1 channels |
| Motherboard form factor | ATX |
| Depth | 244 mm |
|---|---|
| Width | 305 mm |