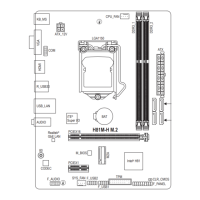
A-2:InstallationinIntelRSTPremiumWithIntelOptaneSystemAccelerationmode
IftheSATAcontrollerhasbeenconguredinIntelRSTPremiumWithIntelOptaneSystemAccelerationmode,
please follow the steps below:
1. After system restarts, go to the BIOS Setup, make sure CSM Support under the BIOS menu is disabled.
2. Go to Peripherals\SATAAndRSTConguration and make sure UseRSTLegacyOROM is disabled. If
you want to enable the Optane
™
memory installed in the M2Q connector, set PCIeStorageDevOnPort21
to RSTControlled; to enable the Optane
™
memory installed in the M2P connector, set PCIeStorageDev
OnPort9 to RSTControlled.
3. Enter the operating system, launch the Intel
®
RapidStorageTechnologyutilityfromtheStartmenu,andthen
enable Intel
®
Optane
™
Memory on the Intel
®
Optane
™
Memory screen.
4. If you install more than one Optane
™
memory, please select which one you are going to use. Then select
which drive to be accelerated. Click Yes to continue. Follow the on-screen instructions to proceed. When
completed, restart the system.
5. Launch the Intel
®
RapidStorageTechnology utility from the Start menu and make sure the Intel
®
Optane
™
Memoryhasbeenenabled.Ifyouwanttoacceleratethesystemdrive,youcanselectspecicfolders,les,or
applications to accelerate using the Intel
®
Optane
™
MemoryPinning function. (The Intel
®
Optane
™
memory
usedmusthaveatleast32GBcapacity.)
• An Optane
™
memorycannotbeusedtoaccelerateanM.2PCIeSSD.
• If more than one Optane
™
memory is installed, you can select only one of them to accelerate your
SATA-basedbootdrive.Theother(s)canonlybeusedasdatadrive(s).
• DonotabruptlyremovetheOptane
™
memory.Doingsowillcausetheoperatingsystemtostop
functioning correctly.
• If you want to change/remove the Optane
™
memory, you must disable it using the Intel
®
Rapid
StorageTechnologyorIntel(R)Optane
™
Memoryapplicationrst.
• After enabling the Optane
™
memory, the related BIOS settings will remain even after a BIOS update.
- 43 -
 Loading...