Gigaset_SL910/SL910A KBA für UK _ A31008-M2300-L101-1-7643 _ 12. December 2011
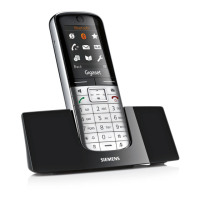
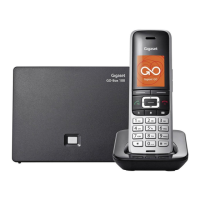
Pack contents
1
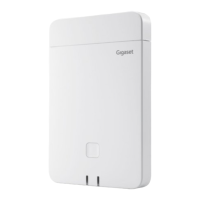
1 one Gigaset Base station
2 one power adapter for the base
3 one phone cord
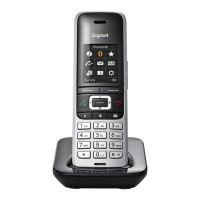
4 one Gigaset handset
5 one batterie
6 one battery cover
7 one charger
8 one power adapter for the charger
9 one user guide plus one Quick start
guide
2
4
6
7
8
3
5
9
Connecting the base station
¤ Insert the phone cable (cable slightly
flattened) into the lower connection
socket 1 at the rear of the base.
¤ Insert the power cable for the power
adapter into the upper connection socket
2 at the rear of the base.
¤ Insert both cables into the appropriate
cable channels 3.
¤ First, connect the power adapter 4.
¤ Then connect the phone jack 5.
Please note:
¤ The power adapter must always be
connected, as the phone will not operate
without a power supply.
¤ Use only the power adapter and phone
cord supplied. Pin connections on
telephone cables can vary.
Connecting the handset charger
¤ Plug the power adapter into the
plug socket 2.
¤ Connect the flat plug on the
power adapter 1.
1
2
3
If you have to remove the plug from the charger again:
¤ Disconnect the power adapter from the mains power
supply.
¤ Press the release button 3 and disconnect the plug 4.
4
Preparing the handset
Charging the battery
¤ First insert battery with the contact surface
facing down 1.
¤ Then press the battery downwards 2 until it
clicks into place.
¤ First, align the protrusions on the side of the
battery cover with the notches on the inside
of the casing.
¤ Then press the cover until it clicks into place.
To reopen the battery cover to replace the battery:
¤ Insert your fingernail into the cavity on the
bottom of the battery cover and pull the battery
cover upwards.
1
2
The battery is supplied with a partial charge. Please
charge it completely before use.
¤ Charge the handset in the charger for 5hours.
¤ Place your handset back in the charger after
every call.
Please note
The handset must only be placed in the
designated charger.
5 h
Issued by
Gigaset Communications GmbH
Frankenstr. 2a
D-46395 Bocholt
© Gigaset Communications GmbH 2011
All rights reserved. Subject to availability.
Rights of modification reserved.
www.gigaset.com
This user guide is made from 100% recycled paper.
Version: 01-12-2011
Setting up the base and handset
Once the battery has been inserted, the time and date symbols flash. The installation wizard
starts automatically as soon as you touch one of the flashing symbols. You can configure the
settings at a later stage by touching the [ Skip Settings] option at the bottom of the
display. The handset then switches to idle status.
¤ To configure the settings:
¤ Touch the ’ icon next to the time to set the
time.
¤ Use the left-hand number wheel to select the
current hour by touching the number wheel with
a finger and moving it upwards or downwards.
¤ Operate the right-hand number wheel in the
same way to select the minutes.
¤ Specify whether you wish the time to be
displayed in 12 hrs or 24 hrs mode. To do this,
touch the corresponding area under Time
Format.
¤ The current setting is highlighted.
¤ Touch the ‘ icon (at the top left of the display)
to return to the Welcome page.
¤ Touch the ’ icon next to Date to set the date.
¤ Use the three number wheels to set the current
date. The procedure is the same as for setting the
time.
The current mode for displaying the date is
displayed under Date Order (here: Day Month
Ye ar). If you want to change the mode:
¤ Touch the ’ icon.
¤ Touch the required mode Day Month Year /
Month Day Year.
The selected mode is marked with Ø.
¤ Touch the ‘ icon to return to the Date page.
¤ Touch the ‘ icon to return to the Welcome page.
L
Time
Time
22 58
23 59
00
:
00
01 01
02 01
Time Format
L
Date
Date
30 Jun 2013
31 May 2012
01
.
Apr
.
2011
02 Mar 2010
03 Feb 2009
Date Order
M
Day Month Year
L
Date Order
Day Month Year
Ø
Month Day Year
±
Setting up the base and handset
The current language is displayed under Display
Language.
If you want to change the setting:
¤ Touch the ’ icon next to the language
displayed.
This brings up a list containing all the available
languages. The current language is marked with Ø.
¤ Touch the required language.
If your language is not displayed, you must then
scroll through the list.
¤ To do this, put a finger on the display and move it
slowly upwards.
Enter the country under Country in which you will
operate the phone and for which it is authorised.
If the setting is not compatible:
¤ Touch the corresponding ’ icon.
¤ Select the desired language as described before.
¤ Touch the ‘ icon to return to the Welcome page.
Finally, you have to enter your area code:
¤ Touch the corresponding ’ icon.
The Local Prefix refers to the country-specific prefix
that is put in front of the area code when you do not
dial the country code. In England this is "0". The
Local Area Code is then 20 for London, for example.
The Local Prefix is only displayed if it is not already
stored in the phone for the selected country.
¤ Use the keypad to enter the Local Prefix if
required (maximum 4 characters) and the Local
Area Code (maximum 8 characters).
Before entering the numbers, briefly touch the
field where the numbers should be entered.
You can correct incorrect entries using $.
¤ Touch è after entering the numbers.
Display Language
English M
L
Display Language
Deutsch
±
English
Ø
Français
±
Area (Dial Code)
(Not configured) M
L
Area (Dial Code)
Local Prefix
Local Area Code
ç ‰
1 2 3
ABC DEF
4 5 6
GHI JKL MNO
7 8 9
PQRS TUV wxyz
0
#
Setting up the base and handset
Handset in idle status (configurable page)
Once you have configured all the necessary settings, your handset switches to idle status.
There are three idle display pages. When you first set up the phone, the configurable page
that you can customise is displayed. Here, you can compile important functions and phone
numbers for quick access. Some are set by default.
Your phone is now ready for use.
The Welcome page is displayed again.
¤ Touch the [ è Save Setting] option to save your
settings.
The handset switches to idle status.
L
Welcome
Time
08:32
M
Date
01.07.2011 M
Display Language
English M
Country
Great Britain M
Area (Dial Code)
020 M
õ
‰
Skip Settings Save Setting
Ð
INT 1
¼ 06:00 V
<
Ä Å Ä
>
Â
Contacts
˜
Call List
April
28
Thursday
Status bar
Contains the internal handset name (e.g.,
INT 1;
if multiple handsets are registered
)
and icons
that display the current settings and the oper-
ating status of the phone. To discover the
meaning of the icons, see user manual
.
Touch the status bar to display the status page
Current date
Time
Open call lists
Open Contacts
Frequently asked questions
Q: There is no dial tone.
A: Press call button for 2 seconds (long press) to obtain dial tone.
A short press opens the redial list.
Q: The line is crackling / not clear.
A: Have you used the new line cable provided? Please do not use an old cable.
Q: The display is not clear / seems to be broken.
A: The display is protected by a plastic film, please make sure you have removed
the protective film.
Q: The handset is not registered.
A: If your handset is not registered, please follow the Registration handset procedure.
(see user manual)
Q: The caller ID is not working.
A: Have you subscribed to this service (CLIP) from your provider?
Q: Message indicator flashing and I cannot retrieve my message.
A: Message indicator will flash to indicate missed calls as well as new messages of text mes-
sages. (see user manual)
Please check:
Have you used the phone cord supplied
Have you fully inserted the power cable into the base station
Have you inserted the batteries correctly
Have you charged the battery for 5 hours
Have you set up the Date/Time
To download the latest manuals, visit our web-site: http://www.gigaset.com
You have questions? As a Gigaset customer, you can take advantage of our comprehensive
service offerings. You can find help quickly in this User Manual and in the service pages of
our Gigaset online portal: http://www.gigaset.com
Product may not be fully compatible with the national telephone network. It is clearly
specified on the box near the CE mark as well as on the bottom of the base station for which
country/countries the equipment has been developed. If the equipment is used in a manner
inconsistent with this advice or with the instructions of the manual and on the product itself,
this may have implications on the conditions for warranty or guarantee claims (repair or
exchange of product).
In order to make use of the warranty, the product purchaser is asked to submit a receipt
which proves the date of purchase (date from which the warranty period starts) and the type
of goods that have been purchased.
If you have problems setting up or operation this product please call
GIGASET UK HELPLINE 0845 3670812
GIGASET IRL HELPLINE 1850 777277
Congratulations
By purchasing a Gigaset, you have chosen a brand that is fully
committed
to sustainability. This product’s packaging is eco-friendly!
To learn more, visit www.gigaset.com.