EasyManua.ls Logo

Gilmour Professional 2000P - User Manual

Default Icon
12 pages
Print Icon
To Next Page IconTo Next Page
Loading...
Tank Sprayer Safety and Operating Instructions
WARNING
This product contains one or more chemicals known to the state of California to cause cancer and birth defects or other
reproductive harm. Wash hands after handling.
Read and understand sprayer manual and chemical warnings before each use. Failure to follow these instructions may result in
personal injury or property damage.
Always mix spray solution following directions on chemical manufacturer instructions. Improper mixing of spray solution may result
in personal injury or property damage.
Wear protective clothing and eye protection.
Check hose, o-rings and fittings are in good condition before each use. Hose, cap and valve must be securely fastened
before pressurizing. Content of tank may leak out and cause personal injury or property damage.
Use only the supplied pump to pressurize the tank. Do not stand over tank while pressurizing or using. Release pressure per
instruction manual. Do not block or alter the valves or pump components. Personal injury or property damage may result.
Do not use flammable, caustic, acidic or corrosive chemicals with sprayer. Personal injury or property damage may result.
Test with water at the beginning of each season. Testing will ensure proper functioning of tank sprayer and pump.
Do not leave tank in direct sunlight or use solutions above 105 °F. The tank may burst or split causing hazards due to increase in
pressure. Damage to pressure seals may result in chemical leakage.
Do not spray people or animals. Injury to bystanders or animals may result.
Never spray on a windy day. Chemical drift could cause personal injury or damage to other plants.
Do not carry sprayer by the hose. Carry only by securely locked pump handle. The hose may detach from the tank sprayer and
allow chemical leakage. Personal injury may result.
Do not store with chemical in tank. Tank, hose and valve must be thoroughly cleaned with soap and water after each use.
Cross-contamination of chemicals may result in personal injury or property damage.
Do not store with the tank pressurized. Personal injury may result if tank unexpectedly pressurizes
RETAIN THIS MANUAL FOR FUTURE USE
AVAILABLE PARTS: AVAILABLE PARTS: AVAILABLE PARTS:
Pump Assembly - 100075 Pump Assembly - 100075 Pump Assembly - 100075I
Hose - R51C Hose - R51C Hose - R51C
Discharge Valve - R58C Discharge Valve - R58C Discharge Valve - R58C
Brass Spray Wand - R14C Brass Spray Wand - R14C Spray Wand - 10176HDI
Polymer Spray Wand - R15C Polymer Spray Wand - R15C Adjustable Nozzle Tip - R16C
Brass Adjustable Nozzle Tip - R10C Brass Adjustable Nozzle Tip - R10C Pickup Tube - 300024A
Polymer Adjustable Nozzle Tip - R16C Polymer Adjustable Nozzle Tip - R16C Pump Maintenance Kit - R11C
Brass Fan Spray Nozzle Tip - R17C Brass Fan Spray Nozzle Tip - R17C
Pickup Tube - 300024A Pickup Tube - 300024A
Pump Maintenance Kit - R11C Pump Maintenance Kit - R11C
Professional -
1000P, 2000P, 3000P
Multi-Purpose -
101P, 201P, 301P
Commercial -
100HDPI, 300HDPI
PREPARING SPRAYER FOR USE
1. Assemble sprayer wand to valve by inserting and holding rod into open end of valve.
2. Attach extension cap securely by hand.
3. Screw pump assembly into the top of the tank securely by hand.
4. For tanks with a carrying handle(1000P, 2000P, 3000P, 100HDPI, 300HDPI): Line up the cutout slots on the handle with
the vertical tabs at the shoulder of the tank. Push the ends in over the tabs and pull up on the handle.
Never use tools to tighten parts. Threads may become stripped and tank will not allow pressurization.
CAUTION
Tank Sprayer Safety Warnings
1
2B
Question and Answer IconNeed help?

Do you have a question about the Gilmour Professional 2000P and is the answer not in the manual?

Summary

Tank Sprayer Safety Warnings

California Proposition 65 Warning

Product contains chemicals known to cause cancer and birth defects. Wash hands.

Read Manual and Chemical Warnings

Understand sprayer and chemical warnings before use to prevent injury or damage.

Proper Spray Solution Mixing

Mix spray solution according to chemical manufacturer's instructions to avoid injury.

Wear Protective Clothing and Eye Protection

Always wear appropriate protective gear, including eye protection, during use.

Pre-Use Inspection of Components

Inspect hose, fittings, and cap for good condition and secure fastening before pressurizing.

Safe Pressurization Practices

Use only the supplied pump, do not stand over tank, and do not alter components.

Chemical Compatibility

Do not use flammable, caustic, acidic, or corrosive chemicals with the sprayer.

Temperature and Sunlight Precautions

Avoid direct sunlight and solutions above 105°F to prevent tank rupture or leakage.

Avoid Spraying People or Animals

Never spray directly at people or animals to prevent accidental injury.

Avoid Spraying in Wind

Do not spray on windy days to prevent chemical drift and potential damage.

Proper Carrying Method

Carry the sprayer by the pump handle only, not the hose, to prevent detachment and leakage.

Post-Use Cleaning and Storage

Clean tank, hose, and valve thoroughly after each use; do not store with chemicals inside.

Storage Pressure Warning

Never store the sprayer with the tank pressurized to avoid unexpected pressure release.

Preparing Sprayer for Use

Assemble Sprayer Wand

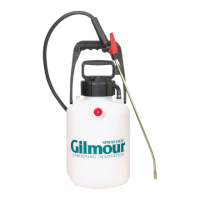
Insert and hold the rod into the open end of the valve to assemble the sprayer wand.

Attach Extension Cap

Securely attach the extension cap by hand to the sprayer.

Attach Pump Assembly

Screw the pump assembly securely into the top of the tank by hand.

Attach Carrying Handle

Align handle slots with tank tabs, push ends over tabs, and pull handle up.

Using Your Sprayer

Mixing and Filling

Mix solution in a separate container, strain it, and fill tank to the marked line.

Nozzle Adjustment

Tighten cap for fine spray, loosen for coarser spray. Do not loosen tip more than 2-3 threads.

Maintaining Pressure

Pump occasionally to maintain tank pressure and desired spray pattern.

Extension Rod Safety

Always point the extension rod away from yourself during operation.

Cleaning and Maintenance

Release Air Pressure

Pull pressure relief valve knob out fully to release all air pressure.

Rinse Sprayer Components

Remove pump assembly, rinse tank and all parts thoroughly with clean water.

Flush Discharge Valve and Wand

Pressurize with clean water and flush discharge valve and wand for 30 seconds.

Nozzle Cleaning

Flush nozzle cap under water. Use a pin or toothpick to open if clogged.

Storage Instructions

Always store the tank empty with the tank cap loose.

Troubleshooting

Sprayer Fails to Pressurize

Check cap tightness, pump assembly, and lubricate pump cup if needed.

Pump Assembly Inspection

Inspect cylinder gasket, pump cup, and check valve for damage or dirt.

Sprayer Leaks

Check extension cap, hose connections, and valve assembly for leaks.

Nozzle Not Spraying or Missing

Clean nozzle, cap, and orifice. Replace nozzle if damaged or lost.

General Spraying Hints

Mixing and Application

Mix solution as directed, spray in cool conditions, and wear protective clothing.

Spray Pattern and Pressure

Use high pressure for fine spray, lower for medium/coarse. Avoid overspraying.

Nozzle Selection

Use fine spray for flowers, medium for shrubs, coarse for weeds.

Post-Use Cleaning

Wash and rinse the sprayer thoroughly after each use.

Customer Support

Contact Information

Contact Robert Bosch Tool Corporation for questions or replacement parts.

Website

Visit www.gilmour.com for more information and support.

Gilmour Professional 2000P Specifications

General IconGeneral
BrandGilmour
ModelProfessional 2000P
CategoryLawn and Garden Equipment
LanguageEnglish

Related product manuals