EasyManua.ls Logo

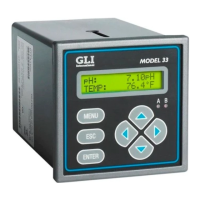
GLI International C53 - User Manual

Default Icon
99 pages
Print Icon
To Next Page IconTo Next Page
Loading...
Rev. 5-1000 Model C53 Conductivity Analyzer (universal-mount 1/2 DIN)
1
OPERATING INSTRUCTION MANUAL
Model C53
Conductivity Analyzer
(Universal-mount 1/2 DIN style;
selectable for conductivity, resistivity, TDS,
and calculated Sensor A and B measurement)
Worldwide Headquarters and Sales:
GLI International, Inc.
9020 West Dean Road
Milwaukee, Wisconsin 53224
U.S.A.
Represented By:
In the interest of improving and updating its equipment, GLI reserves the right to alter specifications to equipment at any time.
A company
Viridor Instrumentation
Phone:
Fax:
E-mail:
Web:
[414] 355-3601
[414] 355-8346
info@gliint.com
www.gliint.com

Table of Contents

Questions and Answers

  • P
    paulericksonAug 3, 2025
    How to check for ground loops in GLI International C53 Measuring Instruments?
    • V
      Vanessa GutierrezAug 3, 2025
      To determine if ground loops exist in GLI International Measuring Instruments, perform this test: 1. Display the conductivity MEASURE screen and put the sensor in a non-conductive container (plastic or glass) filled with a known value conductivity reference solution. Note the analyzer reading. 2. Connect one end of a wire to a known earth ground, such as the analyzer grounding strip or a metal water pipe. Place the other end of this wire into the reference solution next to the sensor. 3. Compare the new analyzer reading with the reading from step 1. A change indicates a ground loop.
  • J
    Juan HarrisAug 9, 2025
    What are the symptoms of ground loop in GLI International C53 Measuring Instruments?
    • M
      Mary TaylorAug 9, 2025
      If your GLI International Measuring Instruments are showing ground loop symptoms, you might observe that the analyzer reading is consistently offset from the actual value, frozen on one value, or is reading off-scale (either upscale or downscale).
  • J
    johnsonrebeccaAug 18, 2025
    How to check electrical connections in GLI International Measuring Instruments?
    • W
      wendyrhodesAug 18, 2025
      When checking electrical connections for GLI International Measuring Instruments, first verify that line power exists at the appropriate analyzer TB3 terminals. Also, ensure all analyzer cable connections are properly connected.
  • P
    pmillerAug 25, 2025
    How to verify analyzer operation in GLI International C53?
    • E
      edward46Aug 25, 2025
      To verify analyzer operation for GLI International Measuring Instruments: * Reconnect line power to the analyzer. Check if the analyzer conductivity reading is full-scale for the applicable range and that the analyzer temperature reading is 0°C. * After disconnecting line power and the sensor(s), connect a 1% tolerance, 1097 ohm resistor between Terminals 18 (blue) and 19 (white) on TB1.

Summary

IMPORTANT SAFETY INFORMATION

SECTION 2 SPECIFICATIONS

2.1 Operational

Details on display, measurement ranges, operating conditions, and relay types.

2.2 Analyzer Performance (Electrical, Analog Outputs)

Specifications for analyzer accuracy, stability, and analog output performance.

PART TWO - INSTALLATION

SECTION 2 MECHANICAL REQUIREMENTS

Guidelines for selecting an installation location and mounting the analyzer.

SECTION 3 ELECTRICAL CONNECTIONS

3.1 GLI Enhanced Performance Contacting Conductivity Sensor(s)

Details on connecting conductivity sensors and temperature elements.

3.2 Analog Outputs

Instructions for connecting and configuring analog outputs.

3.3 Relay Outputs

Information on connecting and configuring relay outputs for control or alarm functions.

SECTION 2 MENU STRUCTURE

SECTION 4 ANALYZER CONFIGURATION

4.2 Configuring Sensor (A and B) Characteristics

Setting up sensor measurements, units, and cell constants.

SELECT CELL K (sensors GLI-certified “K” Value)

Entering the sensor's certified cell constant for accurate measurement.

SET T FACTOR (sensors GLI-certified “T” factor)

Entering the sensor's certified temperature factor for accurate measurement.

4.3 Configuring Calculated Sensor A and B Measurement

4.5 Configuring Analog Outputs (1 and 2)

4.6 Configuring Relays (A, B, C, and D)

SET FUNCTION Mode (alarm, control or status)

Setting the relay's operational mode.

4.7 SET PASSCODE (feature enabled or disabled)

SECTION 5 ANALYZER CALIBRATION

5.2 Zero Procedure (first-time sensor calibration only)

Steps for performing the initial sensor zeroing procedure.

5.3 DRY-CAL Method (highly recommended)

Procedure for DRY-CAL calibration, including setting cell constant and T-factor.

5.4 1 POINT SAMPLE Method (wet calibration)

Steps for performing wet calibration using a reference solution or process sample.

5.5 Analog Outputs (1 and 2) Calibration

SECTION 6 TEST;MAINTENANCE

6.9 RESET DEFAULTS (configuration settings to factory-set values)

SECTION 8 HART OPTION

8.5 HART Preferences Setup

8.6 Device Preferences Setup

SECTION 2 PRESERVING MEASUREMENT ACCURACY

SECTION 3 TROUBLESHOOTING

3.1 Ground Loops

Identifying and troubleshooting potential ground loop issues.

3.2 Isolating Measuring System Problem

Steps to troubleshoot problems with sensors, analyzers, or cables.

SECTION 4 ANALYZER REPAIR;RETURN

GLI International C53 Specifications

General IconGeneral
BrandGLI International
ModelC53
CategoryMeasuring Instruments
LanguageEnglish

Related product manuals