Troubleshooting 13
0020289288_02 MicraCom Installation and maintenance instructions 37
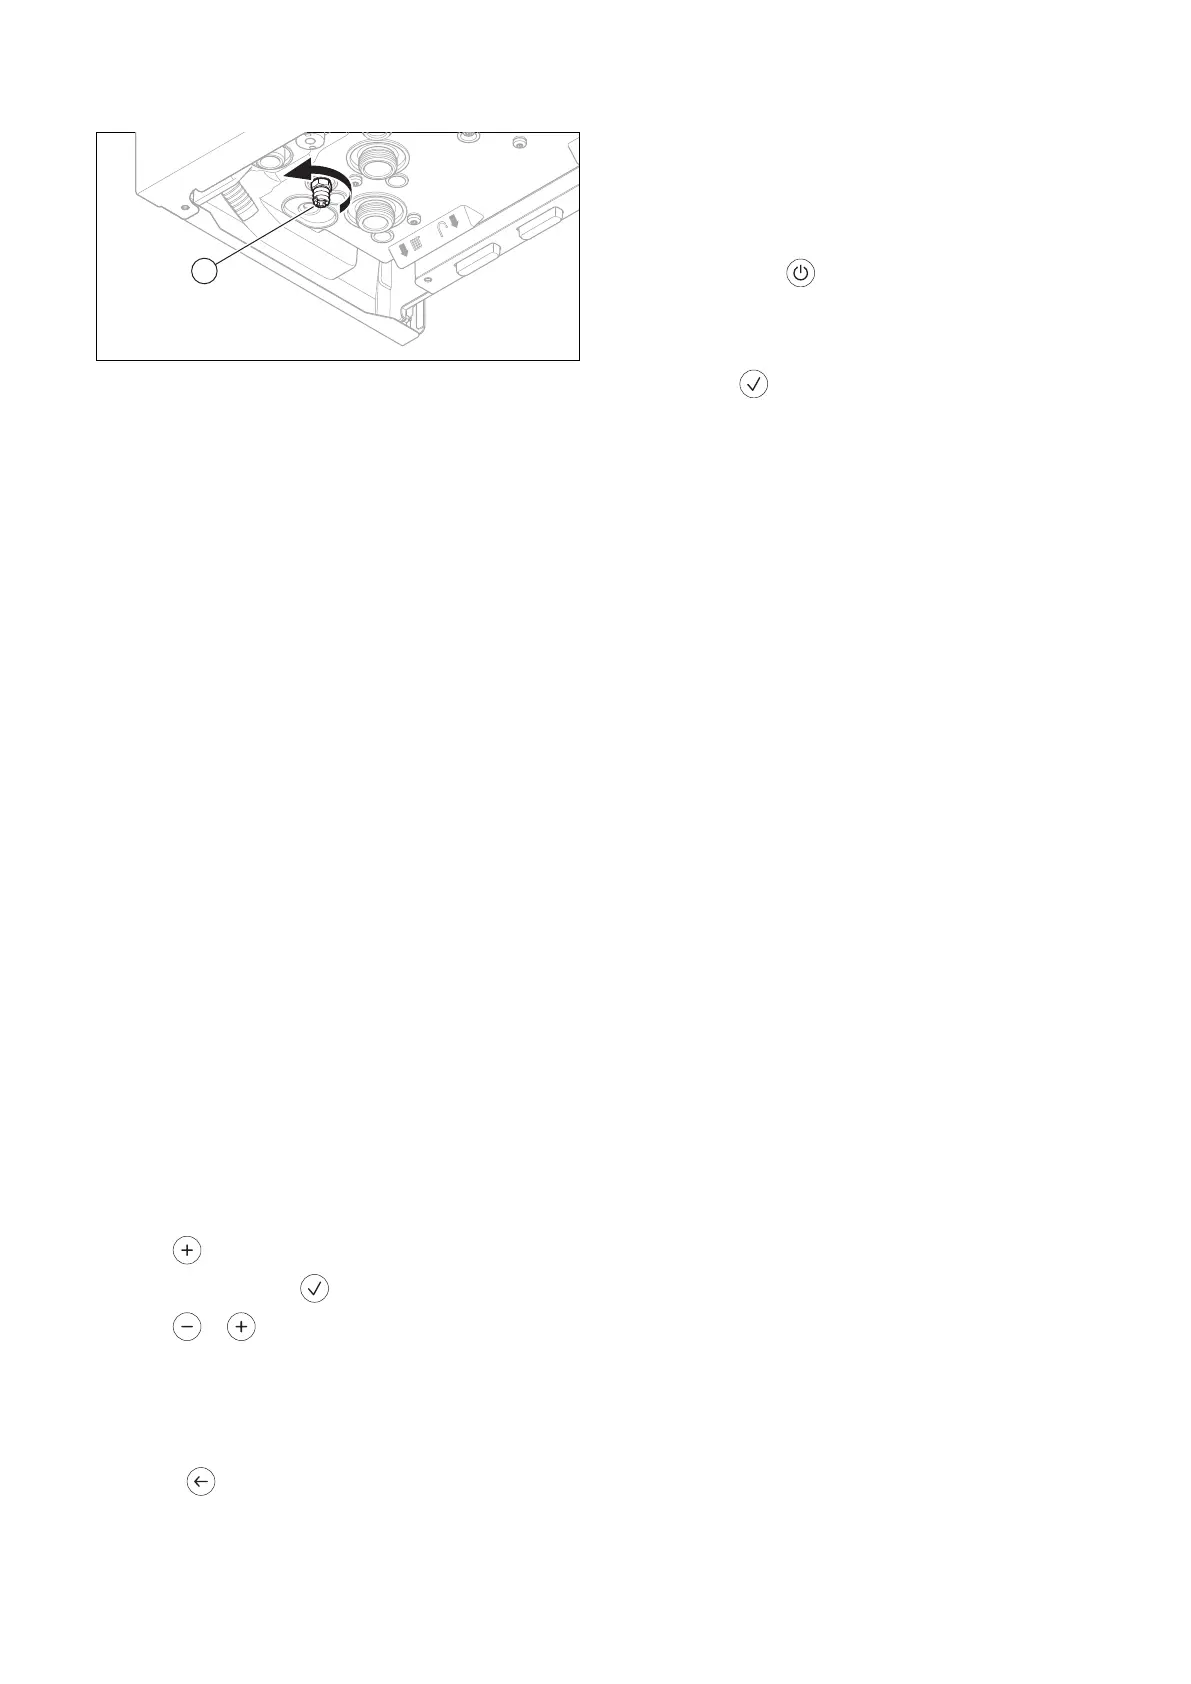
12.5 Draining the product
1. Close the service valves of the product.
2. Remove the front casing. (→ Page 22)
3. Alternatives 1:
▶ Place a container under the drain cock (1).
3.
Alternatives 2:
▶ Connect the drain cock (1) to the sewage system.
4. Unscrew the automatic air vent cap from the internal
pump.
5. Start up the product.
6. Open the drain cock (1).
7. Start check programme P.08. (→ Page 24)
◁
The product (heating circuit) is drained.
8. Close the drain cock as soon as the product has
drained.
9. Turn the cap on the automatic air vent to close it.
10. Install the front casing. (→ Page 27)
11. Temporarily decommission the product. (→ Page 39)
12.6 Completing inspection and maintenance
work
▶ Check the gas connection pressure/gas flow pressure.
(→ Page 26)
▶ Check the CO₂ content. (→ Page 28)
▶ Check the product for tightness. (→ Page 29)
▶ Log the inspection/maintenance work.
▶ Fill out the relevant Service Record section in the Bench-
mark Checklist located at the rear of this document.
13 Troubleshooting
13.1 Querying the fault memory
1. Call up the installer level. (→ Page 23)
2. Use to select the fault memory F. menu.
3. Confirm by pressing .
4. Use or to scroll through the last 10 faults in the
cylinder.
◁ Number 01 in the sequence corresponds to the fault
that occurred last.
◁ The sequence position and fault number are dis-
played alternately.
5. Press to exit the fault memory.
6. Exit the installer level. (→ Page 24)
13.2 Eliminating faults
Active faults appear in the display's basic display.
▶ Call up the fault memory to find out which faults occurred
most recently on the product. (→ Page 37)
▶ Use the table in the appendix to eliminate the faults.
Fault codes (→ Page 44)
▶ Press and hold the button for longer than
three seconds to reset the product (maximum five times).
◁ rE is shown in the display.
▽ rE flashes rapidly after five reset attempts.
▶ Press to stop the flashing and to restart the
product.
▶ If you are unable to eliminate the fault and the fault re-
curs despite several reset attempts, contact Customer
Service.
13.3 Resetting parameters to factory settings
1. Note down the installation-specific settings and the set
values for d.50 and d.51. (→ Page 24)
2. Set diagnostics code d.96 to 1. (→ Page 24)
◁ Parameters are restored to the factory settings.
3. Check the installation-specific settings and the set val-
ues for d.50 and d.51, and adjust these, if required.
4. Exit the installer level. (→ Page 24)
13.4 Replacing defective components
Carry out the preparatory work before replacing any of the
components.
▶ Prepare the repair work. (→ Page 37)
Carry out the completion work after replacing any of the
components.
▶ Complete the repair work. (→ Page 38)
13.4.1 Procuring spare parts
The original components of the product were also certified
by the manufacturer as part of the declaration of conformity.
If you use other, non-certified or unauthorised parts during
maintenance or repair work, this may void the conformity of
the product and it will therefore no longer comply with the
applicable standards.
We strongly recommend that you use original spare parts
from the manufacturer as this guarantees fault-free and safe
operation of the product. To receive information about the
available original spare parts, contact the contact address
provided on the back page of these instructions.
▶ If you require spare parts for maintenance or repair
work, use only the spare parts that are permitted for the
product.
13.4.2 Preparing the repair work
1. Drain the product when you are carrying out work on
hydraulic components. (→ Page 37)
2. Temporarily decommission the product. (→ Page 39)
 Loading...