EasyManua.ls Logo

Go! Gater 1-1-16453-TP02 User Manual

Go! Gater 1-1-16453-TP02
8 pages
To Next Page IconTo Next Page
Page #1 background imageLoading...
Page #1 background image
FOLDABLE LADDERBALL
Assembly Instructions
Model 1-1-16453-TP02, 1-1-16455-TP02
CONTACT INFO
Hours
Monday to Friday
(9am to 5pm EST)
Technical Support
Email us at: consumerservice@eastpointsports.com
Visit us at: www.eastpointsports.com
Call: 973-585-4747
www.eastpointsports.com
Question and Answer IconNeed help?

Do you have a question about the Go! Gater 1-1-16453-TP02 and is the answer not in the manual?

Go! Gater 1-1-16453-TP02 Specifications

General IconGeneral
BrandGo! Gater
Model1-1-16453-TP02
CategoryGame
LanguageEnglish

Summary

Parts Identification

How to Use Parts Identifier

Guide on how to read and understand the parts list for assembly.

Ladder Ball Assembly Instructions

Prepare Parts for Assembly

Inspect and lay out all parts before beginning the assembly process.

Step 1: Assemble Connectors and Poles

Connect 4-Way Yellow connectors with XL Grey poles as the initial step.

Step 2: Insert Large Poles

Insert Large Grey poles into the assembled connectors for the ladder frame.

Step 3: Attach Leg Supports

Slide leg supports onto the poles and ensure clips face outward.

Step 4: Secure Opposite Poles

Lock the leg supports to the opposite poles, repeating for stability.

Step 5: Assemble Second Target

Repeat assembly steps for the second ladder target.

Step 6: Attach Bolo Bag

Attach the Bolo Bag to one of the assembled ladder targets.

Step 7: Install Elbow Connectors

Connect elbow connectors to form the upper structure of the ladder.

Step 8: Add T Connectors and Scorers

Install T-connectors and scorers to complete the ladder frame.

Step 9: Add Medium Poles and Stakes

Attach medium poles and secure the structure with ground stakes.

Step 10: Final Assembly and Rules

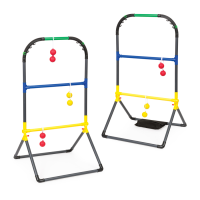
Complete the ladder ball set and consult rules for gameplay.

Packing and Storage Guide

Step 1: Pack Bolos into Bag

Place all bolos into the designated bolo bag for storage.

Step 2: Unlock and Swing Legs

Unlock the leg supports and swing them upwards for folding.

Step 3: Secure Folded Legs

Slide and lock leg supports into poles for compact storage.

Limited Warranty Information

Warranty Coverage Details

Specifies what defects and conditions are covered by the product warranty.

Warranty Exclusions

Lists items and conditions that are not covered under the limited warranty.

Company Responsibilities

Outlines the company's commitment to repair, replace, or remunerate for defects.

How to Obtain Warranty Service

Provides a step-by-step guide for consumers to claim warranty service.