Do you have a question about the Godox AD400Pro and is the answer not in the manual?
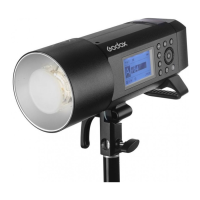
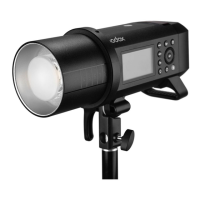
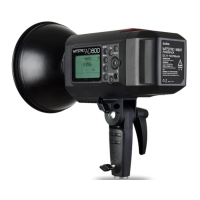
Detailed description of the flash unit's main body and controls.
Explanation of the flash unit's LCD screen interface and indicators.
Step-by-step guide for attaching and replacing accessories on the flash head.
Instructions for correctly installing the flash tube into its socket.
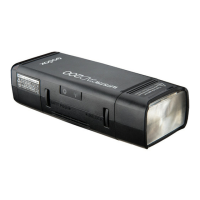
Key features, safety warnings, and charging precautions for the Li-ion battery.
How to select and activate the TTL autoflash mode on the unit.
Adjusting flash exposure compensation from -3 to +3 in 1/3 stops.
Enabling and using High-Speed Sync for synchronization with fast shutter speeds.
Configuring the flash as an optical S1 slave unit for synchronized firing.
Configuring the flash as an optical S2 slave unit, ignoring pre-flashes.
Understanding and viewing flash duration (t=0.1) in Manual mode.
Enabling stable color temperature output within ±75K across power range.
Setting flash frequency, number of flashes, and calculating shutter speed for stroboscopic effect.
Table detailing maximum stroboscopic flashes based on output and frequency.
Activating and configuring wireless settings for radio transmission.
Setting communication channels to avoid interference with other wireless systems.
Assigning slave units to groups (A-E) for control.
Guidelines for optimal placement and understanding transmission range.
Using multiple slave groups for TTL autoflash with flash ratio adjustments.
Solutions for common issues like non-triggering and interference in 2.4G wireless.
Overview of available custom functions and their settings.
Step-by-step guide on how to access and modify custom function settings.
Description of the three operating modes: OFF, Percentage, and PROP.
How to adjust the modeling lamp brightness percentage.
Using the 3.5mm sync cord jack for wired triggering.
Details on the over-temperature protection mechanism and flash count limits.
Explanation of error codes displayed on the LCD and recommended actions.
Key technical specifications for the AD400Pro, including power, duration, and dimensions.
Solutions for underexposed or overexposed flash exposures.
| Power | 400Ws |
|---|---|
| Flash Duration | 1/240 to 1/12820 second |
| Color Temperature | 5600K ± 200K |
| Battery Capacity | 21.6V/2600mAh |
| Radio Frequency | 2.4 GHz |
| Channels | 32 |
| Flash Type | Monolight |
| Power Range | 1/256 to 1/1 |
| Full Power Flashes | Approximately 390 |
| Wireless Range | 100m |
| Guide Number | 72 m (ISO 100, with standard reflector) |
| Power Supply | Lithium Battery |
| Triggering Modes | Optical, Radio |
| Groups | 5 (A, B, C, D, E) |
| Dimensions | 220 x 102 x 128 mm |
| Power Adjustment Range | 1/256 to 1/1 |
| Wireless Control | Yes |
| Modeling Lamp | 30W, Bi-Color LED, Adjustable Brightness/Color Temperature |