EasyManua.ls Logo

Godox V860 II User Manual

Godox V860 II
22 pages
To Next Page IconTo Next Page
Page #1 background imageLoading...
Page #1 background image
INSTRUCTION MANUAL
中英文双语 / Chinese English Bilingual
在使用本产品之前:
请先仔细阅读本手册,以确保您能安全使用。请保存好本手册以备将
来查询参考。
For Canon
Before using this product:
Please read this user manual carefully in order to ensure your safety
and the proper operation of this product. Keep for future reference.
705-V8602C-00
地址/Add: 深圳市宝安区福永镇福洲大道西新和村华发工业园A4栋
Building A4, Xinhe Huafa Industrial Zone, Fuzhou RD West, Fuyong
Town, Baoan District, Shenzhen 518103, China
电话/Tel: +86-755-29609320(8062) 传真/Fax: +86-755-25723423
邮箱/E-mail: godox@godox.com
http://www.godox.com
深圳市神牛摄影器材有限公司
GODOX Photo Equipment Co., Ltd.
Made In China
TTL
Pioneering Camera FlashTTL Li-ion
Question and Answer IconNeed help?

Do you have a question about the Godox V860 II and is the answer not in the manual?

Godox V860 II Specifications

General IconGeneral
Flash Duration1/300 to 1/20000 sec
Zoom Range20-200mm
Color Temperature5600K ± 200K
Channels32
Groups5 (A, B, C, D, E)
TTL FunctionalityYes
Manual Power Adjustment1/1 to 1/128
Strobe ModeYes
PC Sync PortYes
LCD DisplayYes
Overheat ProtectionYes
Guide Number60 (at ISO 100, 200mm)
Recycle TimeApprox. 1.5 Seconds
Wireless FunctionalityYes
CompatibilityCanon, Nikon, Sony, Fujifilm, Olympus/Panasonic
Battery Life650 full-power flashes
Modeling LampYes
Power SourceLi-ion battery pack (VB18)

Summary

Foreword

For Your Safety

Firmware Upgrade

Compatible Camera Models

Maintenance

Name of Parts

Body

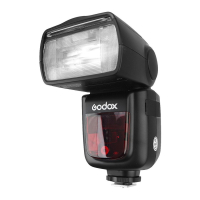
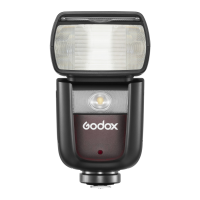
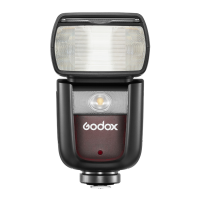
Describes the physical components of the flash unit.

Control Panel

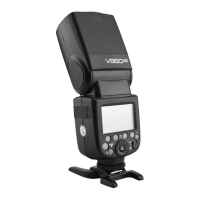
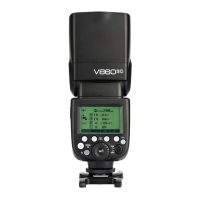
Details the buttons and controls on the flash unit.

Dot-matrix LCD Panel

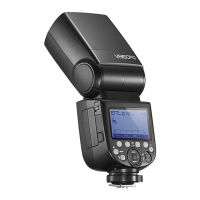
Explains the information displayed on the flash unit's screen.

LCD Panel in Five Modes

Illustrates LCD displays for different flash modes.

What's in the Box of V860IIC Kit?

What's in the Box of V860IIC (only flash unit)?

Separately Sold Accessories

Name of Parts

LCD Panel

Details the display screen and its various modes.

(1)E-TTL Autoflash

LCD display details for E-TTL mode.

(2)M Manual Flash

LCD display details for Manual mode.

(3)Multi Flash

LCD display details for Stroboscopic mode.

Name of Parts

(4) Radio Transmission Shooting/Optic Transmission Shooting

LCD display details for wireless shooting.

Battery

Features

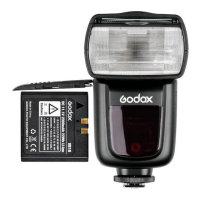
Highlights the Li-ion battery's performance and safety.

Cautions

Important warnings regarding battery handling and safety.

Loading and Unloading the Battery

Step-by-step instructions for battery insertion and removal.

Battery Level Indication

Explains how to interpret the battery level on the LCD.

Attaching to a Camera

Power Management

Flash Mode—E-TTL Autoflash

ETTL Mode

How to use the E-TTL automatic flash mode.

FEC: Flash Exposure Compensation

Adjusting flash output for correct exposure.

FEB: Flash Exposure Bracketing

Taking multiple shots with varying exposures.

FEL: Flash Exposure Lock

Locking flash exposure for a specific subject.

Flash Mode—E-TTL Autoflash

High-Speed Sync

Synchronizing flash with fast shutter speeds.

Second-Curtain Sync

Creating light trails with slow shutter speeds.

M: Manual Flash

Multi: Stroboscopic Flash

Calculating the Shutter Speed

Formula for setting shutter speed with stroboscopic flash.

Wireless Flash Shooting: Radio (2.4G) Transmission

Wireless Flash Shooting: Radio (2.4G) Transmission

Positioning and Operation Range

Guidelines for placing master and slave units.

Wireless Multiple Flash Shooting

Techniques for using multiple slave units.

Shooting with a Different Flash Mode set for Each Group

Setting varied modes for different groups.

Wireless Settings

Master Unit Setting

Configuring the master unit.

Slave Unit Setting

Configuring the secondary flash unit.

Master Unit's Flash OFF

Disabling the master unit's flash.

Setting the Communication Channel

Adjusting wireless channels for interference.

ETTL: Fully Automatic Wireless Flash Shooting

Master Unit Setting

Master unit setup for E-TTL.

Slave Unit Setting

Slave unit setup for E-TTL.

ETTL: Fully Automatic Wireless Flash Shooting

Using Fully Automatic Wireless Flash

About Master Unit

Using multiple master units with slave units.

ETTL: Use the Wireless Shooting of Flash Ratio

Auto Flash Shooting with Two Slave Unit

Balancing illumination between two slave groups.

ETTL: Use the Wireless Shooting of Flash Ratio

Auto Flash Shooting with Two Slave Unit

Balancing illumination between two slave groups.

Setting the flash groups of slave unit.

Assigning slave units to groups A or B.

Setting < MENU 2 >.

Adjusting menu settings for flash ratio.

Setting <RATIO A:B>.

Setting the power ratio between groups.

Setting flash ratio.

Fine-tuning the flash ratio.

Taking the picture.

Final step for shooting with ratios.

Auto Flash Shooting with Three Slave Unit

Setting up three slave groups.

About Slave Group Control

Managing slave unit groups.

M: Wireless Flash Shooting with Manual Flash

M: Wireless Flash Shooting with Manual Flash

Setting the number of flash groups.

Assigning groups for manual flash.

Setting flash output.

Adjusting manual flash power.

Taking the picture.

Shooting with manual flash groups.

Setting <M> Flash Mode

Setting the master unit to manual mode.

Multi: Wireless Flash Shooting with Manual Flash

Gr: Shooting with a Different Flash Mode for Each Group

Set the flash mode to <Gr>

Selecting the group mode.

Set the firing group of the slave units

Assigning units to groups.

Set the flash mode

Setting mode for each group.

Take the picture

Final shooting step.

Wireless Flash Shooting: Optic Transmission

Positioning and Operation Range

Guidelines for optical transmission setup.

Wireless Settings

Master Unit Setting

Configuring the master unit.

Slave Unit Setting

Configuring the slave unit.

Master Unit's Flash OFF

Setting the Communication Channel

ETTL: Fully Automatic Wireless Flash Shooting

Using Automatic Wireless Flash with a Single Slave Unit

Setting up one slave for E-TTL optical.

Master Unit Setting

Master unit setup for optical E-TTL.

Slave Unit Setting

Slave unit setup for optical E-TTL.

ETTL: Fully Automatic Wireless Flash Shooting

Using Automatic Wireless Flash with Multiple Slave Units

Using multiple slave units with optical E-TTL.

Using Fully Automatic Wireless Flash

About Master Unit

Using multiple master units.

ETTL: Use the Wireless Shooting of Flash Ratio

Auto Flash Shooting with Two Slave Unit

Balancing illumination between two slave groups.

Setting the flash groups of slave unit.

Assigning slave units to groups.

Setting < MENU 2 >.

Adjusting menu for flash ratio.

Setting <RATIO A:B>.

Setting power ratio between groups.

Setting flash ratio.

Fine-tuning the ratio.

Taking the picture.

Final shooting step.

Auto Flash Shooting with Three Slave Unit

Setting up three slave groups.

About Slave Group Control

Managing slave unit groups.

M: Wireless Flash Shooting with Manual Flash

M: Wireless Flash Shooting with Manual Flash

Setting the number of flash groups.

Assigning groups for manual flash.

Setting flash output.

Adjusting manual flash power.

Taking the picture.

Shooting with manual flash groups.

Setting <M> Flash Mode

Setting the master unit to manual mode.

Multi: Wireless Flash Shooting with Manual Flash

Other Applications

Wireless Control Function

Using the FT-16S remote for wireless control.

Sync Triggering

Connecting a trigger via sync cord.

Modeling Flash

Previewing lighting effects with the modeling lamp.

Auto Focus Assist Beam

How the AF assist beam functions.

Bounce Flash

Creating a Catchlight

ZOOM: Setting the Flash Coverage and Using the Wide Panel

Using the Wide Panel

Expanding flash coverage with the built-in wide panel.

Low Battery Warning

Indication of low battery power on the LCD.

C.Fn: Setting Custom Functions

Control with the Camera's Menu Screen

Setting Camera Flash Functions

Controlling flash via the camera's menu.

Custom Functions of Camera Flash

Customizing specific flash functions via camera menu.

Clear All Flash Custom Functions

Resetting all custom flash settings.

Protection Function

1. Over-Temperature Protection

How the flash prevents overheating.

2. Other Protections

Additional protective measures.

Technical Data

Troubleshooting

Firmware Upgrade

Compatible Camera Models

Maintenance

Related product manuals