Do you have a question about the Goldwing GL1800 2019 and is the answer not in the manual?
Instructions on activating/deactivating the Honda SMART Key system using its ON/OFF button.
How to verify the Honda SMART Key system status via the LED indicator on the key.
Steps to activate the electrical system and start the engine with the ignition switch.
Procedure for turning off the electrical system and locking the steering.
Steps to activate Walking Speed mode for slow, precise maneuvering of the motorcycle.
How to move the motorcycle forward/backward using shift switches while in Walking Speed mode.
Procedure to stop the motorcycle and deactivate Walking Speed mode.
Steps to activate the reverse mode for backing the motorcycle out of parking spaces.
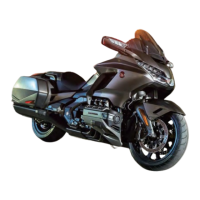
This document provides a helpful guide for new owners of the 2019 Honda Gold Wing GL1800, offering quick instructions on select riding controls and convenience features. It's important to note that this guide covers features from all Gold Wing trim levels, so some descriptions may not apply to every specific model. This guide is intended to supplement, not replace, the comprehensive Owner's Manual, which should always be consulted for complete operating and safety information.
The Honda Gold Wing features a sophisticated SMART Key System that enables motorcycle operation through a two-way authentication process between the motorcycle and the registered SMART Key. To activate or deactivate the SMART Key system, simply press and hold the ON/OFF button on the key for more than one second. To check the system's status, press the ON/OFF button for less than one second; the LED on the SMART Key will blink three times for activation (indicating authentication can be performed) or light briefly for deactivation (indicating authentication cannot be performed).
Operating the ignition switch requires the SMART Key to be activated and within the motorcycle's operating range, which is depicted as a shaded area around the motorcycle. Once the key is recognized, turn the ignition switch to ON to activate the electrical system and enable engine starting. For detailed engine starting procedures, refer to the Owner's Manual. To turn off the electrical system, turn the ignition switch to OFF or to the "Lock" position, then either leave the operating range with the SMART Key or deactivate the SMART Key system. Always ensure the ignition switch is OFF when not in use. The ignition switch has several positions: "Lock" for steering lock, "OFF" to turn off the engine, "ON" to turn on the electrical system for starting/riding, and "ACC" to turn on the electrical system for the audio system and other accessories. The switch can be turned clockwise or counterclockwise to select these positions.
The Gold Wing offers ample storage with its Travel Trunk & Saddlebags. The GL1800/D/DA models are equipped with a travel trunk, saddlebags, and a fairing pocket, while the GL1800B/BD models feature saddlebags and a fairing pocket. To open these compartments, ensure the Honda SMART Key is activated and within the operating range. To open the travel trunk, press the dedicated travel trunk release button, which unlocks and opens the trunk. Similarly, pressing the saddlebag release button unlocks and opens each saddlebag. To close a compartment, press down firmly on the edges of its lid until it is securely closed. It's crucial to verify that the "OPEN" indicator for the travel trunk and saddlebags is not blinking before riding, confirming they are properly secured.
The Fairing Pocket provides convenient storage. To open it, ensure the Honda SMART Key is activated and within the operating range, then press the fairing pocket opener. The pocket will unlock and open. When closing, push the lid until it firmly locks. It's important not to store a deactivated Honda SMART Key in the fairing pocket and to avoid storing valuables there. Always ensure the fairing pocket is closed before riding.
Refueling the Gold Wing involves a few steps. First, open the fairing pocket. Then, slide the fuel lid opener to open the fuel lid. Turn the fuel fill cap counterclockwise to remove it. For the complete refueling procedure, consult the Owner's Manual. After refueling, tighten the fuel fill cap clockwise until it clicks, then close the fuel lid by pushing it until it locks, and finally, close the fairing pocket.
For maneuvering in tight spaces, the Gold Wing GL1800BD/D/DA models feature a Walking Speed Mode. This mode assists the rider at slow speeds. It's essential to operate the engine in a well-ventilated area, ensure no obstacles or people are in the vicinity, and avoid steep or uneven surfaces. Carrying a passenger in Walking Speed mode is not recommended due to increased difficulty in maintaining balance and control. To engage Walking Speed mode, sit astride the motorcycle in your normal riding position with both feet on the ground. Ensure the transmission is in neutral (N indicator on) and the side stand is up. Start the engine (refer to the Owner's Manual for starting procedures). Then, press the Walking Speed mode switch while applying the brake lever or pedal; the Walking Speed mode indicator will display. The motorcycle may take a few seconds to start moving. If the engine stops in Walking Speed mode, the clutch will disengage, causing an abrupt loss of traction. Avoid pressing the engine stop switch in Walking Speed mode unless it's an emergency, as this will also lead to an abrupt loss of traction.
To move the motorcycle backward in Walking Speed mode, press and hold the shift down switch (-) and then release the brakes. To move forward, press and hold the shift up switch (+) and release the brakes. The motorcycle will move as long as a shift switch is held. When the shift up switch (+) (forward) is pressed, "F" is displayed on the gear position indicator. When the shift down switch (-) (backward) is pressed, "R" is displayed. Guide the motorcycle cautiously with your legs for balance, especially on loose surfaces (sand, dirt, gravel) or slick pavement. To stop, apply the brake lever or pedal. To end Walking Speed mode, apply the brake lever or pedal, and after the motorcycle has stopped, press the Walking Speed mode switch again while operating the brake lever or pedal, or press the N side of the N-D switch. Confirm that the Walking Speed mode indicator turns off and the N indicator comes on.
The GL1800 also includes a Moving in Reverse system, allowing the motorcycle to back out of parking spaces at slow speeds. As with Walking Speed Mode, ensure no obstacles or people are in the travel path, avoid steep or uneven surfaces, and refrain from carrying a passenger while reversing due to balance and control challenges. To use the reverse system, sit astride the motorcycle with both feet on the ground, ensure the transmission is in neutral (N indicator on) and the side stand is up. Start the engine (refer to the Owner's Manual). Press the Reverse mode switch to turn on the reverse mode; the system cannot be activated if the engine is not running. When ready to back up, press and hold the Reverse button. The motorcycle will move in reverse as long as the button is held, with "R" displayed on the gear position indicator. To prevent battery discharge, do not hold the Reverse button for more than one minute. Guide the motorcycle backward cautiously, using your legs for balance, taking extreme care on loose or slick surfaces. Releasing the Reverse button will stop the motorcycle. After stopping, press the Reverse mode switch to turn off the system, ensuring the N indicator comes on. The Reverse mode is designed for a constant slow speed. If the motorcycle moves slower or faster due to obstacles or a steep angle, press the Reverse mode switch to turn off the system, roll the motorcycle to a more level, unobstructed surface, and then restart.
The Audio & Navigation System Controls are located on both the center panel and the left handlebar. The center panel features an Ignition switch and an Interface dial (ENTER). The Interface dial can be rotated or moved in eight directions to select options, and pressing it sets the selection. A Home button returns to the Home screen, and a Back button returns to the previous screen. An AUDIO button switches the audio output source between paired Bluetooth® headsets and speakers. An INFO button displays the information bar on the multi-information display.
On the left handlebar (GL1800BD/D/DA shown), there's a Voice control switch to receive, reject, or end calls, and to start Siri if Apple CarPlay is available. A VOL lever adjusts the audio system volume up or down. A Home switch returns to the Home screen, and a Back switch returns to the previous screen. A 4-way key/ENT switch allows selection of choices using four directions and pressing the switch to set the selection. A SOURCE/Private Mode switch changes the audio mode, and pressing and holding it enables/disables private mode, mutes the volume, and pauses a track.
The Audio System includes a navigation system, AM/FM radio, audio player (iPhone®, iPod®, USB flash drive, or Bluetooth® device), Apple CarPlay™, and Bluetooth® Handsfree Calling. For detailed operations, settings, and connections, refer to the Owner's Manual. The Home Screen, displayed after the ignition is turned ON or ACC and a brief Notice message, provides access to various functions and setup options, including Clock (12-hour display), Audio Source, Navigation, Phone, Vehicle Setting, Audio Setting, and Apple CarPlay (when available). To change the audio mode, press the SOURCE switch, which cycles through FM, AM, SXM (option), USB, iPod, Bluetooth, and AUX (option). Volume settings for speakers and headsets can be adjusted separately using the VOL lever, with unique volume levels for Audio, Navi, Ring tone, Phone, and CB (option) modes.
The Navigation System is a sophisticated system offering visual and voice guidance using satellites and a map database to guide you to your destination. The Map Menu displays the map screen and allows operation of navigation features. Select [Navigation] on the Home screen, then press the (Enter) on the center panel or the ENT switch on the left handlebar. The map menu appears at the bottom of the map screen. The Map Scroll feature allows moving the interface dial up, down, left, right, and diagonally to scroll the map. Zoom In/Out is controlled by rotating the interface dial clockwise/counterclockwise. The Navigation Menu, accessed from the map menu, provides main functions, settings, and useful information, including Go Home (sets route to home), Destination Input (selects destinations by favorites, recent, POI, address, or map location), Emergency (searches for emergency services or displays current location), Routes (creates/saves/edits routes with multiple destinations), Information (displays different information), and Setup (customizes navigation settings).
The Map Screen Legend clarifies map orientation (North Up, Heading Up, Heading Up 3D), GPS icon, street, map scale, feature area, current vehicle position, and POI icon. During Route Guidance, the Map Screen (Route List Mode) shows calculated route, arrival time, travel distance, next three maneuvers, waypoint, and current street name. The Guidance Screen displays the next maneuver, street name, remaining distance, current location, lane information, and a countdown bar. For safety, some system operations and controls are automatically disabled while the motorcycle is in motion. Only the Navigation System's handlebar controls and audio system controls remain operational while riding.
Always consult the Owner's Manual for comprehensive operating and safety information.
| Engine Type | 1833cc liquid-cooled horizontally opposed six-cylinder |
|---|---|
| Compression Ratio | 10.5:1 |
| Final Drive | Shaft |
| Front Tire | 130/70R-18 |
| Wheelbase | 66.7 inches |
| Seat Height | 29.3 inches |
| Fuel Capacity | 5.5 gallons |
| MPG | 42 MPG |
| Bore x Stroke | 73mm x 73mm |
| Induction | PGM-FI |
| Front Brake | Dual 320mm discs |
| Rear Brake | Single 316mm disc |
| Transmission | 6-speed manual with overdrive |
| Rear Tire | 200/55-16 |