EasyManua.ls Logo

Golight Stryker ST Series - User Manual

Golight Stryker ST Series
2 pages
Print Icon
To Next Page IconTo Next Page
Loading...
Golight
®
Stryker
®
ST Series
Hardwired Remote
Instruction Guide
Congratulations
You are now the owner of one of the finest remote control
searchlights available today. Thank you for letting Golight®
assist you in your lighting application needs. We’re proud
of our products and the technology that we’ve developed to
ensure our customers the most durable, versatile and power-
ful searchlights in the lighting industry.
Please read these instructions before using your new
Golight® Stryker® ST.
Instruction Guide
This spotlight should not be turned on when snap on lens cover
(rockguard) is attached.
Any violation of the above referenced misuses or warnings will
be considered grounds for warranty refusal
PARTS / ACCESSORIES
Stryker® ST parts and accessories may be purchased through
Golight, Inc. Visit our web store at:
http://store.golight.com or contact us at 308.278.3131 or
800.557.0098.
FIVE YEAR LIMITED WARRANTY
Golight, Inc. warrants the Stryker® ST against any deemed
defects that are due to workmanship for parts or faulty
materials, except halogen lamps, for five years from the date
of the original purchase. This warranty does not cover damage
resulting from unreasonable use or misuse, unreasonable
maintenance or loss, or labor costs.
Warranty information must be filled out within 30 days of
purchase at: http://golight.com/products/registration.html, for
warranty protection.
If the Stryker® ST does fail to operate under warranted
specifications, please call 1-800-557-0098 for a Return Goods
Authorization number. After receiving an RGA#, send the light
and remote controls postage paid to:
Golight, Inc.
Attn: RGA# _____________
37146 Old Hwy 17
Culbertson, NE 69024-8226.
No C.O.D.’s accepted. Only the above manufacturer is
authorized to perform warranty repair or replace product.
Any consequential damages to person or property are excluded
from this warranty. Some states do not allow the exclusion and
limitation of incidental or consequential damages, therefore
the above limitations or exclusions may not apply to you. This
warranty gives you specific legal rights and you may also have
other rights.
END OF USEFUL LIFE
For information regarding the proper disposal/recycling of the
spotlight contact Golight at 800.557.0098
5. If more than one spotlight is connected to the remote, depress-
ing the spotlight selector key will toggle to control operating
either of the two lights individually or both lights simultaneous-
ly. Note that the indicator LEDs on the remote will show which
spotlight is activated.
6. Depressing the home key will rotate the spotlight fully forward
and level.
PROPER USAGE:
This light is intended for off-road and utility use only
This light is intended to be mounted outside the vehicle while in
use
This light may only be disassembled and repaired by an authorized
representative
PRODUCT SAFETY WARNINGS
WARNING: You risk death or serious injury to yourself and
others if you do not follow the instruction highlighted by the
warning symbol. Failure to follow the specific warnings and in-
structions could result in personal injury, fire or electrical shock.
WARNING: This light is for off-road and utility use only. It is
not designed or approved for road use as a driving light.
WARNING: The portable mount Stryker® ST spotlight must
be removed from the vehicle’s exterior while traveling at exces-
sive speeds and in strong wind conditions.
WARNING: Changes or modifications made by the user not
expressly approved by Golight, Inc. for compliance could void
the user’s authority to operate the equipment.
WARNING: This spotlight is not approved for use inside a
vehicle or enclosure and power should be disconnected prior to
placing the light in such circumstance.
WARNING: This spotlight is not approved for underwater use.
WARNING: This spotlight is not approved for inverted mount-
ing.
WARNING: This spotlight should not be turned on when snap
on lens cover (rockguard) is attached.
WARNING: This spotlight may be damaged if operated in icing
conditions.
PRODUCT MISUSE
This spotlight is not approved for inverted mounting
This spotlight may be damaged if operated in icing conditions
This spotlight may only be disassembled and repaired by an
authorized Golight® representative
OPERATION OF STRYKER® ST
1. Connect the power wires as detailed under the Mounting
Instructions.
2. Using the remote, turn on the light by depressing the on/off
key. See Figure 5. The dash remote keys will be backlit when
the light is on.
3. With the 4-Way arrows on the remote, rotate or tilt your
spotlight to the desired position. The spotlight can be rotated
and tilted simultaneously.
4. The speed of the spotlight rotation or tilt can be controlled by
depressing the speed selection key one time and by depress-
ing it again to restore the original speed.

Other manuals for Golight Stryker ST Series

Question and Answer IconNeed help?

Do you have a question about the Golight Stryker ST Series and is the answer not in the manual?

Summary

Product Operation

Remote Connection

Connect the remote to the wiring harness through the dash.

Spotlight Control

Use the 4-Way arrows on the remote to rotate or tilt the spotlight.

Speed Adjustment

Control spotlight rotation or tilt speed by pressing the speed selection key.

Multi-Spotlight Operation

Toggle spotlight selector to control individual or simultaneous operation.

Home Command Function

Depress the home key to rotate the spotlight fully forward and level.

Safety Warnings

Off-Road and Utility Use

Warning: Light is for off-road and utility use only, not approved for road use.

Exterior Mounting Safety

Warning: Remove portable mount spotlight from vehicle exterior during high speeds or wind.

Unauthorized Modifications

Warning: User modifications not approved by Golight void authority to operate.

Enclosed Space Precautions

Warning: Not approved for use inside a vehicle or enclosure; disconnect power.

Underwater Use Prohibition

Warning: Spotlight is not approved for underwater use.

Inverted Mounting Restriction

Warning: Spotlight is not approved for inverted mounting.

Rockguard Operation

Warning: Do not turn on spotlight when snap-on lens cover (rockguard) is attached.

Icing Conditions Warning

Warning: Spotlight may be damaged if operated in icing conditions.

Parts and Accessories

Limited Warranty

Mounting Instructions - Dash Remote

Dash Remote Location

Determine location, drill holes for screws and electrical connector.

Remote Connection

Route connector through hole and connect to wiring harness.

Optional Possibilities

Single Remote, Two Spotlights

Use ST-3020-Y splitter to control two spotlights with one remote.

Two Remotes, Single Spotlight

Use ST-3020-X splitter to control one spotlight with two remotes.

Mounting Instructions - Spotlight

Spotlight Location

Determine flat surface location, considering 185° left/right rotation and 90° up/45° down tilt.

Mounting Plate Preparation

Remove dog point screw, save it, and remove mounting plate from base.

Mounting Plate Installation

Drill holes and secure mounting plate using appropriate hardware.

Wiring Harness Routing

Drill center hole for wiring harness and route harness from remote.

Electrical Connection

Connect red/black wires to fused 12V DC source, observing polarity.

Gasket and Sealing

Ensure gasket is properly placed; do not use sealant around it.

Final Assembly

Hook front bracket, seat rear bracket, and secure with dog point screw.

Overview

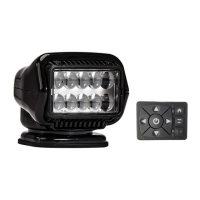
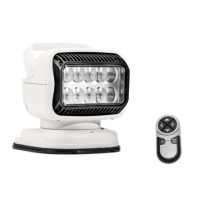
The Golight® Stryker® ST Series Hardwired Remote is a remote-controlled searchlight designed for permanent vehicle mounting and operation. This device offers robust functionality and is built for durability and versatility in various lighting applications.

Function Description:

The Stryker® ST spotlight provides 370° horizontal rotation and 135° vertical tilt, allowing for precise aiming of the light beam. It is controlled via a hardwired dash remote, which features directional arrows for rotation and tilt, an on/off key, a speed selection key, a home key, and a spotlight selector key. The spotlight selector allows control of either one or two connected spotlights, enabling individual or simultaneous operation. The dash remote keys are backlit when the light is on, enhancing visibility during use. The home key automatically returns the spotlight to a fully forward and level position.

Important Technical Specifications:

  • Rotation: 370° horizontal
  • Tilt: 135° vertical (45° down, 90° up)
  • Swing Diameter: 286 mm (11.3 inches) from the center of the mounting plate
  • Power Requirements (Halogen Models - 3020ST, 3021ST, 3026ST):
    • Max Current Draw: 5.5A @ 13.8V
    • Recommended Fuse: 7.5A to 10A
  • Power Requirements (LED Models - 30204ST, 30214ST, 30264ST):
    • Max Current Draw: 3.5A @ 13.8V
    • Recommended Fuse: 5A
  • Wiring Harness Length: 20 feet (6 meters)
  • Mounting Hardware: Includes three #8-16 x 3/4 inch panhead stainless steel self-tapping screws.

Usage Features:

The Stryker® ST is intended for off-road and utility use only and must be mounted outside the vehicle. It is not designed or approved for road use as a driving light. The remote control allows for simultaneous rotation and tilt, and the speed of these movements can be adjusted. For installations involving multiple spotlights, optional Y-splitters (ST-3020-Y) or X-splitters (ST-3020-X) are available to enable control of two spotlights with one remote, or one spotlight with two remotes, respectively. The spotlight selector function on the remote allows users to control spotlights independently or in tandem.

Installation Instructions (Dash Remote):

  1. Location Selection: Choose a suitable location on the dash.
  2. Drilling: Drill two 4.5 mm (3/16 inch) holes for mounting screws and one 24 mm (15/16 inch) hole for the electrical connector. A template is provided for precise drilling.
  3. Wiring: Route the connector through the dash hole and connect it to the wiring harness.

Installation Instructions (Spotlight):

  1. Location Selection: Determine a flat surface on the vehicle for mounting. The small arrow on the base indicates the normal forward direction. Consider the light's rotation (185° left, 185° right) and tilt (45° down, 90° up) ranges to maximize usability, keeping the 286 mm swing diameter in mind for clearance.
  2. Mounting Plate Removal: Remove the dog point screw from the mounting plate and then remove the mounting plate from the base. Save the screw for reinstallation.
  3. Mounting Plate Installation: The mounting plate can be secured using the supplied sheet metal screws or a combination of cap screws, nuts, and washers. Drill holes in the mounting surface according to the hole pattern dimensions (Figure 4) or use the mounting plate as a template.
  4. Wiring Harness Hole: Drill a 27 mm (1 1/16 inch) center hole in the mounting surface for the wiring harness.
  5. Electrical Connection: Connect the red wire (positive) to the vehicle's fused 12V DC positive source and the black wire (negative) to the vehicle's chassis ground. Ensure correct polarity. Use appropriate wire gauge and fuse based on the specified current draw for halogen or LED models.
  6. Wiring Harness Routing: Route the wiring harness from the remote through the vehicle to the mounting bracket.
  7. Connector Connection: Connect the electrical connector on the spotlight to the mating connector on the wiring harness.
  8. Sealing: Use silicone sealant to fill the center hole around the wiring harness. Leave 75 mm (3 inches) of cord under the light to ensure full 370° rotation.
  9. Gasket Placement: Ensure the gasket is properly placed on the perimeter of the base. Do not use silicone or other sealants around the gasket, as this will limit water drainage.
  10. Surface Preparation: Wet the mounting surface with a small amount of water to ease installation.
  11. Spotlight Attachment: Tip the front of the light down, push it forward, then pull backward to hook the front bracket into the mounting plate.
  12. Securing the Base: Seat the rear bracket and base onto the mounting plate. Peel back the tab at the rear of the mounting gasket to access the screw hole. Install the dog point screw through the base and rear bracket, then tighten it into the mounting plate.

Maintenance Features:

The device is designed for durability, but certain actions can void the warranty. It is crucial to follow all warnings and instructions.

  • Disassembly and Repair: Only an authorized Golight® representative may disassemble and repair the light. Unauthorized modifications or changes will void the user's authority to operate the equipment.
  • Warranty: Golight, Inc. offers a five-year limited warranty against defects in workmanship or faulty materials, excluding halogen lamps. This warranty does not cover damage from unreasonable use, misuse, maintenance, loss, or labor costs. Warranty registration must be completed within 30 days of purchase online.
  • Warranty Claims: For warranty service, call 1-800-557-0098 for a Return Goods Authorization (RGA) number. After receiving an RGA#, send the light and remote controls postage paid to Golight, Inc. No C.O.D.'s are accepted.
  • End of Useful Life: For proper disposal and recycling information, contact Golight at 800.557-0098.

Product Safety Warnings:

  • Failure to follow instructions and warnings can result in death, serious injury, fire, or electrical shock.
  • The portable mount Stryker® ST spotlight must be removed from the vehicle's exterior when traveling at excessive speeds and in strong wind conditions.
  • This spotlight is not approved for use inside a vehicle or enclosure. Power should be disconnected before placing the light in such circumstances.
  • This spotlight is not approved for underwater use.
  • This spotlight is not approved for inverted mounting.
  • Do not turn on the spotlight when the snap-on lens cover (rockguard) is attached.
  • The spotlight may be damaged if operated in icing conditions.
  • Any violation of the referenced misuses or warnings will be considered grounds for warranty refusal.
  • Consequential damages to person or property are excluded from this warranty. Some states do not allow the exclusion and limitation of incidental or consequential damages, therefore the above limitations or exclusions may not apply to you. This warranty gives you specific legal rights and you may also have other rights.

Golight Stryker ST Series Specifications

General IconGeneral
BrandGolight
ModelStryker ST Series
CategorySpotlight
LanguageEnglish

Related product manuals