General Notes
Read this user‘s manual completely and carefully. It is part of the product and contains important
notes for operating. Keep this document for other users or for personal reference. This user‘s manu-
al is a Quick Start Guide. Find further information on delivered CD-ROM and/or online via www.goobay.
de as download version where applicable or postal via the address at the end of this page.
Safety Instructions
Risk of life by suffocating
>>Protectsmallpartsandinsulationmaterialagainstunintentionallyuse.
Risk of injury by tripping and falling
>> Let a professional do the installation work.
>> Place,transportandinstallproduct,partsandacceoriesinasafeway.
>> Letasecondpersonhelpyou.
Risk of injury by cutting
>>Protectpackagingmaterialsagainstunintentionallyuse.
Risk of self-intervention and misuse
>> Donotmodifyoraltereithertheproductortheaccessories!
Description and Function
This product is a weather protection for LNBs and is made to protect satellite LNBs from wind and precipitation. It‘s tiltable individu-
allyandtstoallcommecrialsatellitedishes.Differentusecauseslossofwarranty.
Scope of Delivery
Installation material Packing content Description
Screws 2 x M6x60 (A)
4 x M6x10 (B)
Nuts 2xM6butterynut (C)
4xM6SW10 (D)
Washers 2 x M6 (E)
Weather protection 1 x (F)
Holder top 1 x (G)
Holder bottom 1 x (H)
Preparing
>> Checkthepackingcontentbycomparingittothescopeofdeliveryregardingcompletenessandintegrity.
>> Comparethespecicationsofalluseddevicesandproductsandmakesuretheyarecompatibletoeachother.
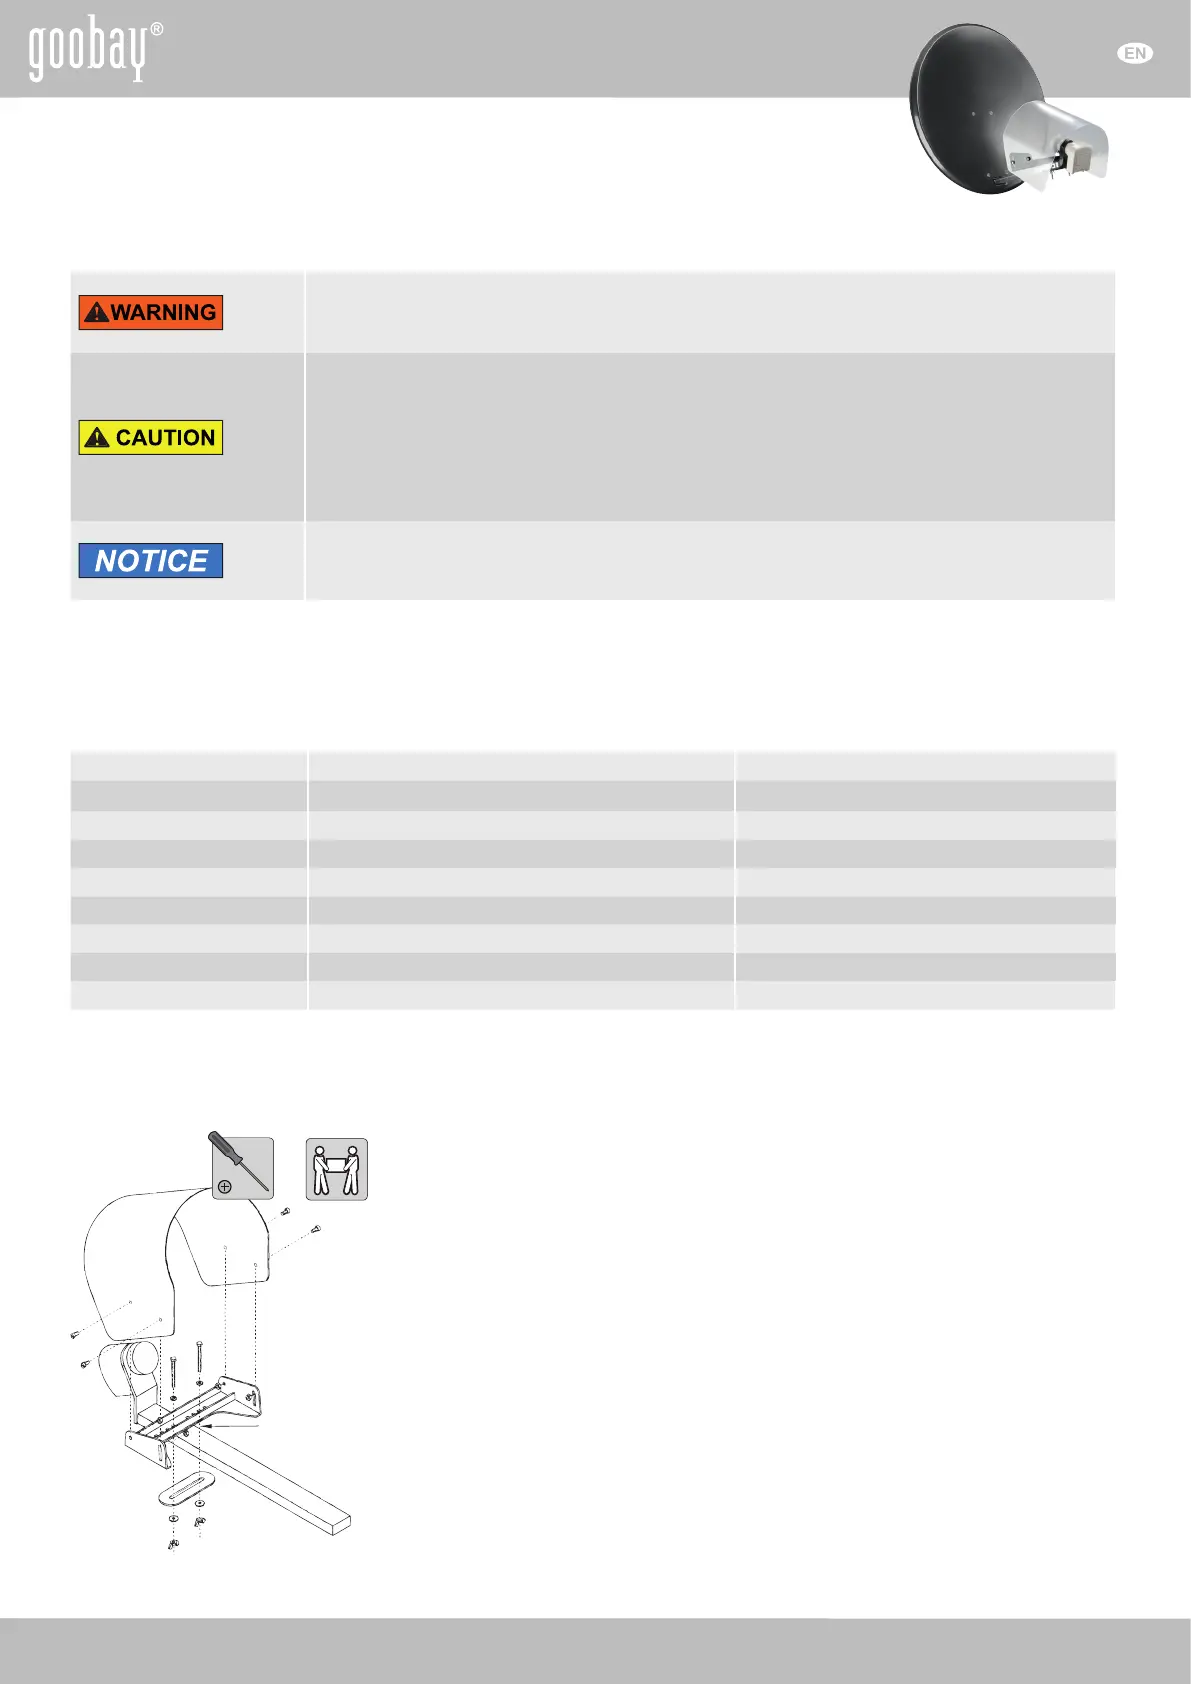
Installing 1. Connecttheholdertop(G)totheweatherprotection(F)byscrews(B)and
nuts(D)likeshown.
Figure 1
2. Setthepartcombinationof1.ontotheLNBholderarmofyoursatellitedishclose
to the LNB.
Figure 1
3. Connecttheholderbottom(H)totheholdertop(G)byusingthescrews(A),the
washers(E)andthenuts(C).
Figure 1
4. Attendtofollowingadjustments:
>>AdjusttheweatherprotectioncenteredtotheLNBintopview.
Figure 2
>> Install the weather protection parallel to the LNB.
Figure 3
Figure 1 >> Let minimum 2 cm distance between LNB and weather protection.
Figure 3
User‘s manual for
Weather protection for LNBs
1/2

 Loading...