EasyManua.ls Logo

GOOD LIFE Bark Control Pro - User Manual

GOOD LIFE Bark Control Pro
4 pages
Print Icon
To Next Page IconTo Next Page
Loading...
Bark Control ProInstruction Manual
Included In Your Package
Sold Separately
Bark Control Pro
Remote
Control
Rain Jacket
AC Adapter
(sold separately)
Getting Started
1. Choose Power Source
Option 1: Insert Battery
Insert a 9v battery (not included)
into the battery compartment.
Note: The battery may last 1
week or less during the initial
training period. Battery life should
improve as the dog is trained.
OR
Option 2: Plug It In
Insert the AC Adapter (sold
separately) into the DC Jack and
plug into a wall outlet.
Note: To prevent damage or
voiding your warranty, please only
use the official AC Adapter.
OR
Option 3: Use the Extension & Plug It In
Insert one end of the 60ft Extension (sold
separately) into the AC Adapter and the other
end into the DC Jack and plug into an outlet.
Note: To prevent damage to the Bark Control
Pro or voiding your warranty, please only use
the official AC Adapter.
2. Turn It On
Turn the Bark Control
Pro on by pushing the
Power Switch upwards.
Stop when you get to
the Audio setting.
To confirm the unit is
working, press the Remote
Control.
The unit will then emit
sound for 3-5 seconds and
the front LED Indicator
Lights will blink.
Question and Answer IconNeed help?

Do you have a question about the GOOD LIFE Bark Control Pro and is the answer not in the manual?

Summary

Included In Your Package

Bark Control Pro Unit

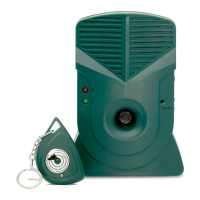
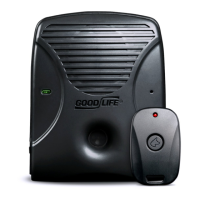
The primary device for bark control.

Remote Control

A remote for manual operation of the bark control unit.

Rain Jacket

Protective cover for outdoor use against moisture.

Sold Separately

AC Adapter

Optional power source for continuous operation.

60 ft Extension Cord

Optional extension for AC adapter placement.

Getting Started

Choose Power Source

Select between battery, AC adapter, or extension cord for power.

Turn On Device

Power on the unit by pushing the switch upwards to the Audio setting.

Adjust Bark Sensitivity Dial

Sensitivity Dial Operation

Adjust dial to control sensitivity to barking, avoid low/high extremes.

Optimal Sensitivity Factors

Distance and dog size affect optimal sensitivity settings.

Choose Sound Setting

Audio Setting

Unit emits audible and ultrasonic sound; both LEDs light up.

Ultra Setting

Unit emits ultrasonic sound; only green LED blinks.

Installation

Placement Options

Use fold-out feet on flat surfaces or mounting bracket on walls/fences.

Outdoor Use Protection

Use rain jacket for outdoor installations to protect from moisture.

Remote Control Usage

Manual Activation

Use remote to manually activate the unit within 75ft range.

Training Process Notes

Training Timeframe

Allow 2-3 weeks for optimal training results.

Protective Barking

Distinguish nuisance barking from instinctual or protective barking.

Low Power Indicator

Low battery may cause erratic behavior; replace or use AC adapter.

Features & Specifications

Device Capabilities

Covers sound distance, bark detection, remote range, and output.

Troubleshooting

No Immediate Reaction

Dogs may need time; check sensitivity, battery, and activation.

Barking Increased Initially

Initial increase in barking is a normal training stage.

Unit Emitting Sound Randomly

Check sensitivity dial, battery, or AC adapter for erratic sound.

GOOD LIFE Bark Control Pro Specifications

General IconGeneral
BrandGOOD LIFE
ModelBark Control Pro
CategoryPet Care Product
LanguageEnglish

Related product manuals