04
08
EN Installation FR Installation
PL Montaż RO Instalare
[07]
[08]
[09]
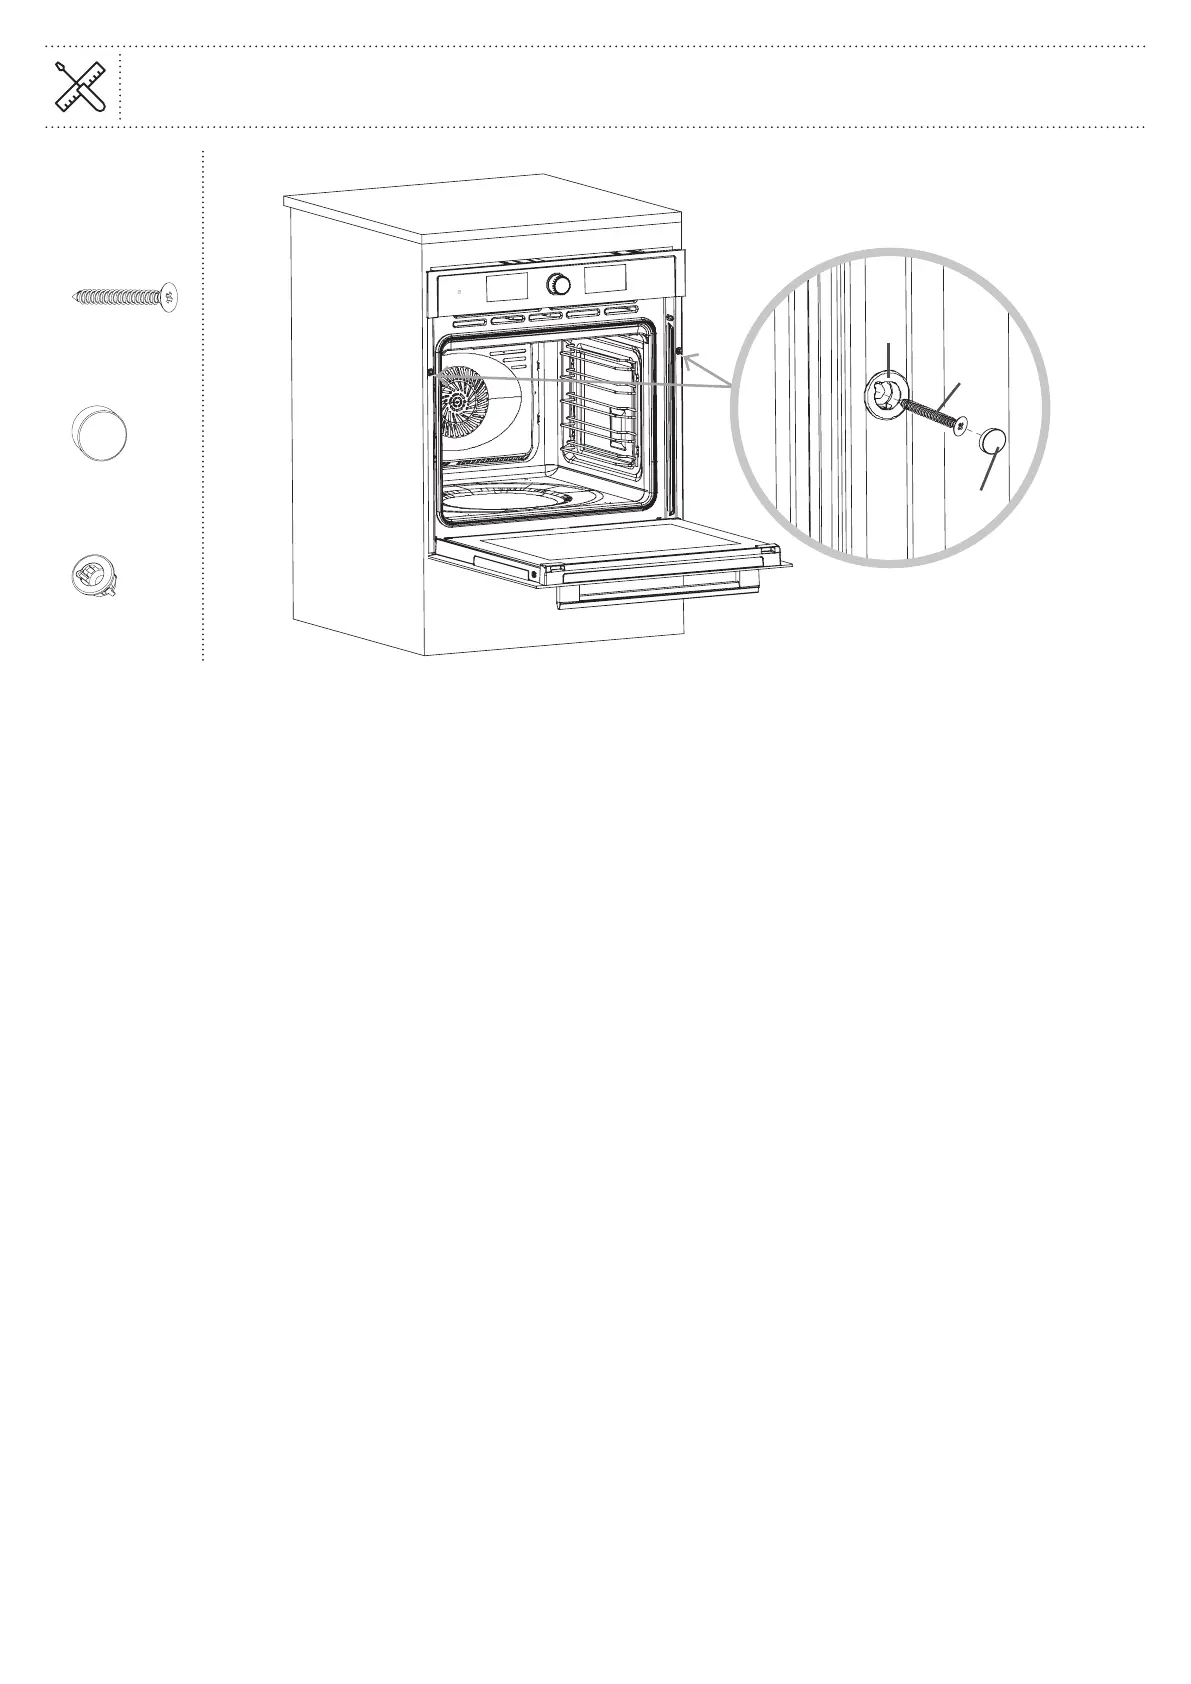
EN
Once the oven has been lifted into place inside the appliance housing, locate the two holes in the casing of the
oven and fix it into place using [07], [08] and [09].
Caution: Do not over tighten the screws [07] to avoid damage to the oven or appliance housing - use a
screwdriver only!
FR
Une fois que le four est placé à l’intérieur du meuble de l’appareil, repérer les deux trous dans l’enveloppe du
four et les fixer à l’aide de [07], [08] et [09].
Avertissement: ne pas trop serrer les vis [07] pour éviter d’endommager le meuble de l’appareil ou le four.
Utiliser uniquement un tournevis!
PL
Po umieszczeniu piekarnika we właściwym miejscu wewnątrz obudowy urządzenia należy zlokalizować dwa
otwory w obudowie piekarnika i zamocować go za pomocą elementów [07], [08] i [09].
Przestroga: Nie dokręcać zbyt mocno śrub [07], aby uniknąć uszkodzenia piekarnika lub obudowy urządzenia
— należy używać wyłącznie wkrętaka!
RO
După așezarea cuptorului în interiorul carcasei, identificați cele două găuri din carcasa cuptorului și fixați-l în
poziție, utilizând [07], [08] și [09].
Atenție: Nu strângeți excesiv șuruburile [07], pentru a evita deteriorarea cuptorului sau a carcasei - utilizați
doar șurubelnița!
[07] x 2
[08] x 2
09
x 2
 Loading...