EasyManuals Logo

Google Nest Protect User Manual

Google Nest Protect
24 pages
To Next Page IconTo Next Page
To Previous Page IconTo Previous Page
Page #10 background imageLoading...
Page #10 background image
1
22
2
2
1 1
10
7. Remove the old back plate
Unscrew the back plate from the ceiling or dry lining
box. Save the screws for installing the new back
plate later. You’ll see one or two cables coming from
the ceiling.
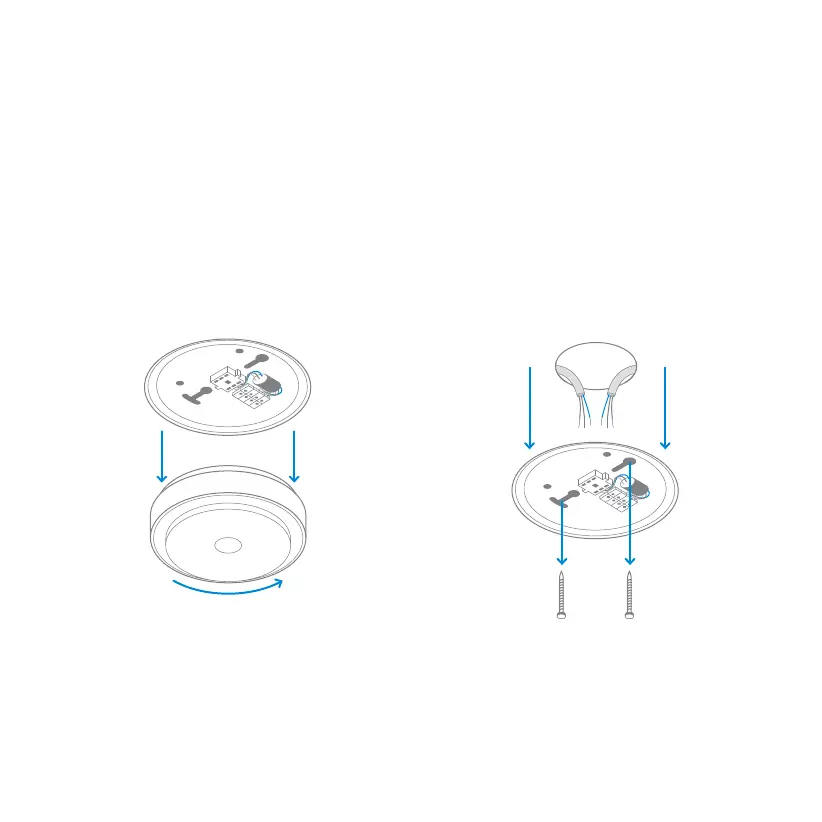
6. Remove your old smoke alarm
To prevent electric shock, make sure that the green
power light is o on the alarm. You may have to twist
the alarm to release it. Remove it carefully to avoid
damaging your ceiling or wall. There will be two or
four wires aached to the old back plate. Disconnect
them all.
Tip: Your old smoke alarm might make a loud noise
when you disconnect it.

Other manuals for Google Nest Protect

Questions and Answers:

Question and Answer IconNeed help?

Do you have a question about the Google Nest Protect and is the answer not in the manual?

Google Nest Protect Specifications

General IconGeneral
LED colorRed / Green / Blue
Detector typeCarbon monoxide detector
Maximum range15 m
Mounting typeSurface-mounted
Product colorWhite
Speaker power2 W
Alarm decibels85 dB
Number of LEDs6
Housing materialPlastic
Languages supportItalian
Placement supportedHorizontal/Vertical
Wireless connectionYes
Number of simultaneously connected devices (max)18
Package typeBox
Quantity per pack1 pc(s)
Wi-Fi frequency2.4 GHz
Wi-Fi standards802.11b, 802.11g, Wi-Fi 4 (802.11n)
Bluetooth version4.0
Connectivity technologyWireless
Number of screws4
Power sourceBattery
Battery voltage1.5 V
Battery technologyLithium
Compatible battery sizesAA
Operating temperature (T-T)4 - 38 °C
Operating relative humidity (H-H)20 - 80 %
Weight and Dimensions IconWeight and Dimensions
Depth38.5 mm
Width135 mm
Weight379 g