EasyManua.ls Logo

Gorenje K 337 2 CLA - User Manual

Gorenje K 337 2 CLA
8 pages
Print Icon
To Next Page IconTo Next Page
Loading...
Instructions for Use
12
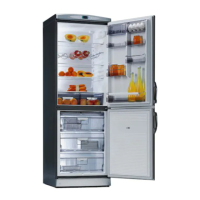
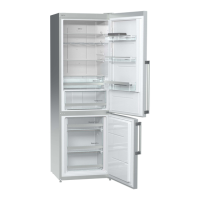
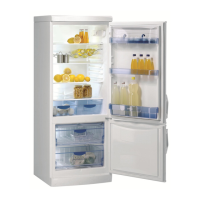
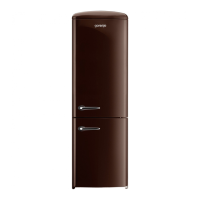
Upright Refrigerator - Freezer GB
Thank you for your trust and for buying this appliance.
We hope it will successfully serve the purpose for many years.
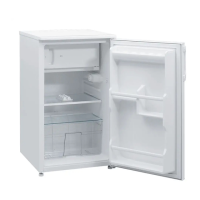
Upright Refrigerator - Freezer is a houshold appliance and it
consists of the refrigerator (the upper part) and freezer (the
lower part).
Refrigerator is for domestic use only and is used for storing
fresh foods at the temperature of 0°C and higher.
Freezer is for domestic use and is used for freezing fresh
foods and storing frozen foods (up to one year, depending on
the kind of food you store).
Before Putting Into Use................................................ 12
Instructions for Use
We Care for the Environment
Tips for Energy Savings
Important ...................................................................... 13
Storing Time During Power Supply Interruption
Disposing of the Worn Out Appliance
Placing and Installation ............................................... 13
Choosing the Right Place
Placing the Appliance
Connection to Power Supply
Description of the Appliance ....................................... 14
Refrigerator (A)
Freezer (B)
REFRIGERATOR........................................................ 15
Freezer (B)
Temperature Selection
Use.................................................................................. 15
Storing Fresh Foods
FREEZER......................................................................16
Operation Control
Control panel
ON/OFF Switch (1)
Operation Mode Selection Switch (2)
Sound alarm button, red light (3)
Temperature Selection (4)
External Temperature Meter
Use ..................................................................................16
Freezing Fresh Foods
Storing Frozen Foods
Defrosting of Frozen Food
Changing the Direction of Opening the Door .............17
Maintenance and Cleaning...........................................18
Automatic Defrosting of the Refrigerator
Freezer Defrosting
Cleaning the Appliance
Switch Off the Appliance When Not In Use
Trouble-Shooting Guide ...............................................18
Refrigerator
Freezer
Before Putting Into Use
Before connecting the appliance to the mains supply, leave it
stand for about 2 hours, which will reduce a possibility of
malfunctions in the cooling system due to transport handling.
Clean the appliance, and be thorough, especially in the
interior (See Cleaning and Maintenance).
In case the interior accessories are not correctly placed,
rearrange them as described in chapter Description of the
Appliance.
Instructions for Use
These instructions for use are intended for the user. They
describe the appliance and its correct and safe use. They were
prepared for various types/models of appliances therefore you
may find in it description of some functions and accesories that
your appliance does not have.
We Care for the Environment
Our products use environmentally friendly packaging, which
can be either recycled or disposed of in an environmentally
friendly manner. To this end, individual packaging materials
are clearly marked.
These instructions are printed either on recycled paper or
chlorine free bleached paper.
When your appliance finally wears out, please try not to
burden the environment with it; call your nearest authorised
service agent. (See Disposing of the Worn Out Appliance)
Tips for Energy Savings
This is especially important if you have an upright model.
Every now and then check if the appliance is sufficiently
ventilated (adequate air circulation behind the appliance).
Set thermostat to lower settings as soon as possible
(depends on the amount of food loaded, ambient
temperature etc).
Never use continuous operation unless unnecessarily
required; switch the operation mode selection switch to the
setting for automatic operation as soon as possible.
Before loading the appliance with packages of fresh foods,
make sure they are cooled to ambient temperature.
Ice and frost layer increase energy consumption, so do
clean the appliance as soon as the layer is 3-5 mm thick.
If the gasket is damaged or if it turns out that the sealing is
poor, the energy consumption is substantially higher. To
restore efficiency, replace the gasket.
The condenser on the rear wall should be always clean, free
of dust or any impurities.
Always consider instructions stated in sections Positioning
and Energy Saving Tips, otherwise the energy consumption
is substantially higher.

Questions and Answers

Summary

Appliance Overview and Safety

Upright Refrigerator - Freezer Introduction

Basic description of the appliance and its dual refrigerator and freezer functionality.

Important Safety Precautions

Crucial warnings and precautions before operating the appliance.

Storing During Power Interruption

Guidance on how to protect food during power outages.

Appliance Disposal

Instructions for environmentally responsible disposal of the appliance.

Installation and Connection

Placing and Installation Guide

Guidance on selecting an optimal location and positioning the appliance.

Connection to Power Supply

Details on connecting the appliance safely to the power outlet.

Appliance Description

Refrigerator (A) Components

Details on the refrigerator compartment and its features.

Freezer (B) Components

Details on the freezer compartment and its features.

Refrigerator Usage

Storing Fresh Foods

Guidelines for properly storing fresh food items.

Fresh Food Storage Time

Table indicating recommended storage times for various foods.

Freezer Operation and Usage

Freezer Operation Control

Overview of freezer controls, switches, and indicators.

Freezer Use Guidelines

Instructions for switching on, freezing, and storing frozen foods.

Food Storage and Defrosting

Storing Commercially Frozen Foods

Guidance on storing pre-frozen commercial food products.

Defrosting Frozen Food

Advice on handling partially or fully defrosted food items.

Customization and Maintenance

Changing Door Opening Direction

Instructions for reversing the door swing direction.

Maintenance and Cleaning

Procedures for cleaning and maintaining the appliance.

Switch Off When Not In Use

Instructions for safely shutting down the appliance for extended periods.

Troubleshooting

Refrigerator Issues

Troubleshooting common problems with the refrigerator section.

Freezer Issues

Troubleshooting common problems with the freezer section.

Noise Explanation

Information regarding normal and unusual operating noises.

Overview

Upright Refrigerator - Freezer

This appliance is a household unit comprising a refrigerator (upper part) and a freezer (lower part). The refrigerator is designed for domestic use, storing fresh foods at 0°C and above. The freezer is also for domestic use, intended for freezing fresh foods and storing frozen foods for up to one year, depending on the food type.

Before Putting Into Use

Before connecting to the mains supply, allow the appliance to stand for approximately 2 hours to reduce the possibility of malfunctions in the cooling system due to transport handling. Thoroughly clean the appliance, especially the interior. If interior accessories are not correctly placed, rearrange them as described in the "Description of the Appliance" chapter.

Instructions for Use: These instructions are for the user, describing the appliance and its correct and safe use. They cover various types/models, so some functions and accessories described may not be present on your specific appliance.

Environmental Care: The product uses environmentally friendly packaging, which is recyclable. Packaging materials are clearly marked. The instructions are printed on recycled or chlorine-free bleached paper. When the appliance reaches the end of its life, contact an authorized service agent for proper disposal to minimize environmental impact.

Energy Saving Tips:

  • Ensure adequate ventilation behind the appliance.
  • Set the thermostat to lower settings when possible, depending on food load and ambient temperature.
  • Avoid continuous operation unless necessary; switch to automatic operation mode as soon as possible.
  • Cool fresh foods to ambient temperature before loading.
  • Defrost the appliance when the ice/frost layer is 3-5 mm thick to reduce energy consumption.
  • Replace damaged or poorly sealing gaskets to restore efficiency.
  • Keep the condenser on the rear wall clean and free of dust.
  • Follow all positioning and energy saving tips to prevent higher energy consumption.

Important Safety Information

If replacing an old appliance with a lock, ensure the lock is broken to prevent children from becoming trapped. The appliance must be correctly connected to the mains supply. Discard food with strange smells or colors as it may be spoiled and dangerous. Disconnect the appliance from power before repairs (only by qualified technicians), cleaning, or bulb replacement. Do not use electric devices (e.g., hair dryers) or sharp tools to defrost or scrape ice. Protect the rear wall (condenser unit or tubes) and other parts of the refrigerating system from damage during movement. The refrigerating system contains refrigerant and oil, so handle with care and dispose of according to environmental regulations. A heating element around the rim prevents the door gasket from freezing to the freezer housing. If the supply cord is damaged, it must be replaced by the manufacturer, service agent, or a qualified person to avoid hazards. The rating plate is located inside the appliance or on the rear wall.

Disposal of Worn Out Appliance: When the appliance is no longer functional, dispose of it properly. If it has a lock, break it to prevent accidents. The refrigerating system contains refrigerant and insulating substances that require separate treatment; contact an authorized service agent or specialized servicing center. Avoid damaging the tubes on the rear wall to prevent pollution.

Storing Time During Power Supply Interruption: Do not open the freezer during a power failure to prevent warm air intrusion.

Placing and Installation

Choosing the Right Place: Place the appliance in a dry, well-ventilated room. The allowed ambient temperature depends on the appliance's class (indicated on the rating plate). Avoid placing it near heat-emitting devices (cookers, radiators, water heaters) or direct sunlight. Maintain at least 3 cm distance from electric/gas cookers and 30 cm from oil/coal stoves; use insulation if necessary. Ensure at least 200 cm² of free space behind the appliance and 5 cm above it (for high kitchen units) for adequate condenser ventilation.

Ambient Temperature Classes:

  • SN (sub-normal): +10°C to +32°C
  • N (normal): +16°C to +32°C
  • ST (sub-tropical): +18°C to +38°C
  • T (tropical): +18°C to +43°C

Placing the Appliance: Place the appliance firmly on a solid base. Some models have adjustable feet for leveling. Two spacers attached to the upper edge of the condenser must be fitted to prevent the appliance from being installed too close to the wall. Turn and fix spacers according to the condenser's distance from the wall.

Connection to Power Supply: Connect the appliance to a grounded power supply socket outlet using the provided cable and plug. The required nominal voltage and frequency are on the rating plate. Connections must comply with current standards and regulations. The appliance tolerates temporary voltage fluctuations of -15% to +10%.

Description of the Appliance

Refrigerator (A): Used for storing fresh foods for a few days.

  • Shelf (1): Number varies by model. Shelves can be placed on guides, protected against pulling out. To remove, slightly lift the back and pull out. Perishable food should be stored at the back (coldest part).
  • Bottle Rack: In some models. For storing bottles, with two installation positions (horizontal or lifted front) and a stopper. Protected against pulling out; lift the rear and pull to remove.
    • Warning: If the door has storing shelves, ensure the rack position allows the door to close. The rack can hold up to 9 bottles of 0.75 L or more (max. 13 kg) – check the label under the thermostat box.
  • Defrost Water Outlet (2): The refrigerator interior is cooled by a plate in the rear wall. A channel and outlet under the plate collect defrost water. Regularly check and clean the outlet and channel to prevent clogging.
  • Fruit and Vegetable Container (3): Located at the bottom under the glass shelf, for storing fruits and vegetables. Provides adequate humidity to reduce dehydration.
  • Door Liner: Contains various shelves/holders for eggs, cheese, butter, yogurt, small packages, tubes, cans. The lower shelf is for bottles.
  • Illumination: The interior light turns on when the door is opened, independent of the thermostat knob.

Freezer (B): Used for freezing fresh foods and storing already frozen foods.

  • Freezing Compartment (4): Used for freezing fresh foods.
  • Storage Compartment (5): For storing already frozen food.
  • Defrost Water Outlet (6): (See Cleaning and Maintenance).
  • Cold Accumulators (7): In some models. Two accumulators in the upper part of the freezing compartment. Before first use, remove and reinsert them after the red light turns off.
    • Maintain uniform temperature for frozen foods, ensuring higher quality and reducing energy consumption.
    • Removing accumulators allows the compartment to be used for freezing fruits (e.g., berries) or ice making.
    • Can be used to maintain lower temperatures for food/bottles during trips or picnics.
  • Bottle Stopper (8): In some models. Prevents bottles from moving in the door rack.
  • Fan (9): In some models. Improves temperature distribution and reduces dew on storage racks. Stops when the refrigerator door is opened.

Refrigerator Use

Freezer (B) Control: Controlled by a thermostat knob in the upper right part inside the refrigerator. Turn clockwise from STOP (0) towards 7 and backwards.

Temperature Selection:

  • Higher settings (towards 7) result in lower (colder) refrigerator temperatures, potentially below 0°C. Use higher settings only when necessary. Medium setting is recommended for normal ambient temperatures.
  • Ambient temperature changes affect the refrigerator's interior temperature; adjust the thermostat knob accordingly.
  • In STOP (0) position, the refrigerator does not operate (cooling system off), but power supply is not interrupted (light is on when door opens).
  • Refrigerator temperature also depends on door opening frequency.

Storing Fresh Foods: Proper use, adequate packing, correct temperature, and hygienic precautions significantly influence food quality.

  • Pack foods properly (polyethylene bags, aluminum foil, covered containers) to prevent moisture/odor mixing.
  • Remove excessive packaging (e.g., multi-package yogurt) before storing.
  • Pack systematically; ensure foodstuffs don't touch each other to prevent odor mixing and allow adequate air circulation.
  • Never store flammable, volatile, or explosive substances.
  • Store high-alcohol beverages in tightly sealed bottles, vertically.
  • Food should not touch the rear wall.
  • Cool foods before storing.
  • Store crispy/delicate foods in the coldest parts.
  • Avoid frequent door opening.
  • Set the thermostat to lower temperatures gradually to avoid freezing foods.
  • Use a thermometer to measure compartment temperatures (place in a glass of water; readings are reliable a few hours after steady state).
  • Some organic solutions (volatile oils in lemon/orange peel, acid in butter) can damage plastic surfaces or gaskets over time, causing accelerated aging.
  • Unpleasant odor indicates food spoilage or a need for cleaning. Eliminate odors by washing the interior with a mild water/vinegar solution. Activated carbon filters can also clean the air.
  • For long journeys, remove perishable items before leaving.

Fresh Food Storage Time (in days):

  • Butter: 7 days
  • Eggs: 10 days
  • Meat (fresh uncut): 2 days
  • Meat (chopped): 1 day
  • Meat (smoked): 10 days
  • Fish: 1 day
  • Marinade: 10 days
  • Root vegetables: 8 days
  • Cheese: 4 days
  • Sweets: 2 days
  • Fruit: 2 days
  • Prepared dishes: 2 days
  • Legend: + recommended storage time, = possible storage time

Freezer Use

Operation Control: The freezer is controlled by two switches and a thermostat knob in the upper part.

Control Panel:

  • ON/OFF Switch (1): Green light on when appliance is on, off when off.
  • Mode Selection Switch (2): Selects continuous or automatic operation.
    • Continuous Operation ("super" function) - yellow light on: Cooling system operates continuously. Use for freezing large amounts of fresh food or deep-freezing already frozen food.
    • Automatic Operation - yellow light off: Interior temperature controlled by thermostat. Cooling system on/off frequency depends on thermostat setting, door opening frequency, and ambient temperature.
  • Sound Alarm Button, Red Light (3): Alarm triggers and red light illuminates if freezer compartment temperature is incorrect.
  • Temperature Selection (4): In automatic mode, interior temperature is thermostat-controlled. Medium setting (between max 7 and min 1) is recommended. Settings towards max (7) accelerate cooling (e.g., before loading fresh food or when ambient temperature requires it). Settings towards min (1) save energy for smaller loads. Ambient temperature changes affect interior temperature; adjust thermostat knob accordingly.
  • External Temperature Meter (5): Shows approximate freezer temperature. -18°C or colder is ideal for long-term storage. Storage conditions depend on thermostat setting, ambient temperature, load, and door opening frequency. Temperature changes are noted on the meter about 48 hours after thermostat adjustment.

Switching On the Empty Freezer: Turn on the freezer. The sound alarm will activate due to inappropriate temperature; press the alarm button to switch it off. Set the mode selection switch to continuous operation (all three signal lamps on). Place fresh food into the freezer several hours after the red signal lamp turns off.

Freezing Fresh Foods: Proper use, adequate packing, correct temperature, and hygienic precautions are crucial for freezing food quality.

  • Select high-quality food suitable for freezing.
  • Choose correct packaging: airtight, well-sealed (prevents vitamin loss and dehydration); foils/bags should tightly wrap food.
  • Mark packages with food type, amount, and loading date.
  • Freeze food as quickly as possible. Use smaller packages and cool food before loading.
  • The maximum amount of fresh food that can be loaded in 24 hours is on the rating plate. Overloading reduces freezing quality.

Freezing Procedure:

  • For large amounts of fresh food, set the operation mode switch to continuous operation (yellow light on). After 24 hours, load the freezing compartment.
  • 24 hours after loading, transfer frozen packages to baskets; new fresh food can be loaded. Do not let fresh packages touch frozen ones.
  • About 24 hours after the last load, set the switch to automatic operation (yellow light off).
  • No need for continuous operation for small loads (1-2 kg).

Storing Frozen Foods: Store frozen packages in baskets. If baskets are removed, packages can be stored directly on cooling shelves.

Storing Commercially Frozen Foods: Storage time and recommended temperature are on the packaging. Follow manufacturer's instructions. When shopping, choose adequately packed foods with complete data, stored in freezers at -18°C or lower. Avoid packages with frost, indicating prior thawing. Temperature rise shortens storage time.

Frozen Food Storage Time (in months):

  • Vegetable: 9 months
  • Fruit: 9 months
  • Bread, pastries: 9 months
  • Milk: 9 months
  • Ready-made meals: 9 months
  • Meat (Beef): 9 months
  • Meat (Veal): 9 months
  • Meat (Pork): 9 months
  • Meat (Poultry): 9 months
  • Meat (Game): 9 months
  • Meat (Minced meat): 9 months
  • Smoked sausages: 9 months
  • Fish (lean): 9 months
  • Fish (fat): 6 months
  • Offal: 3 months
  • Legend: + recommended storage time

Defrosting of Frozen Food: Partially thawed or defrosted foods should be used as soon as possible. Cold air preserves food but doesn't destroy microorganisms, which rapidly activate after defrosting, making food perishable. Partial defrosting reduces nutritional value, especially for fruits, vegetables, and ready-made meals.

Changing the Direction of Opening the Door

If the door opening direction is inconvenient, it can be changed. Holes on the opposite side are factory-prepared.

  1. Unscrew and remove the kick-plate.
  2. Unscrew the lower hinge and remove the lower door with the middle hinge washer.
  3. Unscrew the middle hinge and remove the upper door with the upper hinge washer. Remove the fastener from the opposite side (where the middle hinge was fixed).
  4. Unscrew the upper hinge fastener and fix it on the opposite side.
  5. Remove, change, and replace the door hinge fixture and fixture plugs.
  6. Place the upper hinge washer and upper door on the upper hinge fastener.
  7. Rotate the middle hinge 180° and fix it on the opposite side. Place the middle hinge washer and lower door on the hinge from the lower side.
  8. Place the lower hinge on the lower door and fix it.
  9. Replace the cover plate of the lower hinge to the opposite side of the kick-plate and place it on the appliance.
  10. If your appliance has a side-mounted handle, remove and replace it on the other side (repeat for multiple handles). Some screws are covered with caps; remove them before unscrewing.
  11. Use decorative caps and plugs for remaining middle hinge holes and side handle holes.
  12. Check the gasket: it should not be creased and must seal well. If the seal doesn't adhere perfectly, heat it from a suitable distance (e.g., with a hair dryer) and lightly stretch it to the required height.

Diagram Components:

  1. Upper hinge fastener
  2. Upper hinge washer
  3. Middle hinge
  4. Middle hinge washer
  5. Lower hinge
  6. Base plate
  7. Cover plate of the lower hinge
  8. Fixture plug of the door hinge
  9. Door hinge fixture

Maintenance and Cleaning

Automatic Defrosting of the Refrigerator: The refrigerator automatically defrosts; ice on the inner back wall melts during compressor off-cycles, and water drains through an outlet into a pan above the compressor, where it evaporates.

Freezer Defrosting: Defrost the freezer when the frost layer is 3-5 mm thick.

  1. 24 hours before defrosting, set the switch to continuous operation (yellow light on) to ensure food packages are well frozen. Empty the freezer, keeping packages frozen.
  2. Disconnect from mains supply.
  3. Insert the enclosed pipe into the groove at the bottom and place a vessel underneath to collect defrost water. Defrosting accelerates if the door is left open.
  4. Avoid defrosting sprays, as they can damage plastic parts and be hazardous.

Cleaning the Appliance: Disconnect power before cleaning.

  • Do not use coarse or aggressive cleaning agents. Remove any cleanser residue.
  • Clean the exterior with water and detergent. Varnished surfaces can be cleaned with a soft cloth and alcohol-based cleaners (e.g., glass cleaners, ethanol, isopropyl alcohol). Abrasive or aggressive cleaners (e.g., stainless steel cleaners) are not suitable for plastic or coated parts.
  • Remove detachable accessories and clean with water and liquid detergent. Plastic parts cannot be machine washed.
  • Wash the interior with lukewarm water and one or two spoonfuls of vinegar.
  • Wipe the condenser on the rear wall occasionally with a soft non-metal brush or vacuum cleaner.
  • Clean the defrost water receptacle above the refrigerator compressor (do not remove it). After cleaning, reconnect the appliance and reload packages.

Switch Off the Appliance When Not In Use: If not using for a long period, set the refrigerator thermostat knob to STOP (0), switch off the freezer ON/OFF switch, disconnect power, remove food, defrost, and clean. Leave the door slightly open.

Trouble-Shooting Guide

Some issues can arise from improper handling and can be easily resolved.

Refrigerator:

  • Fails to Operate After Connecting to Mains Supply: Check outlet supply and ensure appliance is switched on (thermostat in operating position).
  • Continuous Operation of Refrigerating System:
    • Door frequently opened or left open too long.
    • Door not properly closed (sagging, polluted, or damaged gasket).
    • Overloaded with fresh foods.
    • Inadequate ventilation of compressor/condenser (ensure air circulation, wipe condenser).
  • Ice Formation on Inner Rear Wall: Automatic defrosting is assured as long as water drains to the channel and pan. If ice formation increases (3-5 mm), manually defrost.
    • Set thermostat to STOP (0) and leave door open. Do not use electric devices or sharp objects. After defrosting, turn knob to desired position and close door.
    • Increased ice formation causes: poor door seal (clean/replace gasket), frequent/long door openings, warm food, or food touching the inner back wall.
  • Water Leaking From Refrigerator: Caused by clogged discharge water outlet or defrost water dripping over the channel.
    • Clean clogged opening (e.g., with plastic straw).
    • Manually defrost increased ice layer.
  • Bulb Replacement: Disconnect power. Press the cover at the rear (arrow 1) and remove the plastic cover (arrow 2). Replace with a new E14, max. 15 W bulb. Old bulbs are not organic waste.

Freezer:

  • Appliance Fails to Operate After Connecting to Mains Supply: Check outlet supply and ensure appliance is switched on (green light on).
  • Sound Alarm Button, Red Light is On:
    • Door frequently opened or left open too long.
    • Door not properly closed (sagging, polluted, or damaged gasket).
    • Power supply interruption for a long period.
    • Overloaded with fresh foods.
    • To stop alarm, press the alarm button. Red light turns off when malfunctions are resolved and temperature reaches appropriate level.
  • Continuous Operation of Cooling System:
    • Set operation mode switch from continuous to automatic.
    • Inadequate ventilation of compressor/condenser (ensure air circulation, wipe dust).
  • Freezer Door is Hard to Open: After closing, warm air enters, cools, and creates underpressure, sealing the door. It will open easily after a few minutes (5-10).

Noise: Cooling in refrigerating-freezing appliances produces noise from the compressor. Noise level depends on placement, usage, and age.

  • During operation: Noise of liquid is heard; when compressor is off, refrigerant flow is heard. This is normal and doesn't affect appliance lifetime.
  • After starting: Compressor and refrigerant flow may be louder initially, gradually reducing. This is normal.
  • Unusual/stronger noise: Often due to inadequate placement.
    • Place and level appliance firmly on solid base.
    • Ensure it doesn't touch walls or kitchen units.
    • Check interior accessories for correct placement; ensure bottles, tins, and other vessels don't touch and rattle.

Note: The manufacturer reserves the right to alter specifications without influencing appliance operation.

Gorenje K 337 2 CLA Specifications

General IconGeneral
BrandGorenje
ModelK 337 2 CLA
CategoryRefrigerator
LanguageEnglish

Related product manuals