This document is a user guide for the GPO Display Panoramic Display, specifically version 3.0. It covers important safety instructions, OSD controls, content layout, supported timing, and OSD menu overviews for different display models.
Function Description:
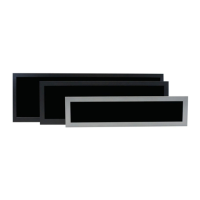
The GPO Panoramic Display is a commercial-grade display designed for various applications. It supports different signal resolutions and aspect ratios, allowing for flexible content display. The display is capable of showing specific portions of an input signal (e.g., top one-third, two-fifths, or one-half) depending on the model, or displaying content based on a fixed EDID using the full input resolution. It features an On-Screen Display (OSD) menu for adjusting various settings, including picture, display, color, and advanced options. The display can be controlled via a remote controller, which provides dedicated buttons for power, menu navigation, selection, and volume control.
Important Technical Specifications:
Content Layout & Resolution:
Panoramic Displays accept 4:3 and 16:9 aspect ratio signals. They display specific portions of the signal based on the model:
- 1/3 Native Portion: Models like PA12H (1024x256), PA16H (1366x238), PA19H (1920x360), PA27H (1920x360), and PA48H (1920x359) display one-third of the optimal input resolution.
- 1/2 Native Portion: Models such as PA14H (1280x398), PA20H (1920x539), PA28H (1920x540), PA37H (1920x540), and PA50H (1920x540) display one-half of the optimal input resolution.
- 2/5 Native Portion: PA14H (1280x398) displays two-fifths of the optimal input resolution.
- Full (Fixed EDID): All models support displaying content using their native resolution, often 1920x540 for panoramic displays, by using a fixed EDID.
- PA12H (12"): 1024 x 768
- PA14H (14"): 1280 x 960
- PA16H (16"): 1366 x 768
- PA19H (19"): 1920 x 1080
- PA20H (20"): 1920 x 1080
- PA27H (27"): 1920 x 1080
- PA28H (28"): 1920 x 1080
- PA37H (37"): 1920 x 1080
- PA48H (48"): 1920 x 1080
- PA50H (50"): 1920 x 1080
Supported Timing (Examples):
The manual provides a comprehensive list of supported timings, including Pixel Freq (MHz), Horizontal Freq (KHz), Vertical Freq (Hz), and corresponding active pixels/lines.
- 640x350@70Hz: Pixel Freq 25.144 MHz, Horizontal Freq 31.43 KHz, Vertical Freq 70.00 Hz
- 1920x1080@60Hz: Pixel Freq 148.500 MHz, Horizontal Freq 67.50 KHz, Vertical Freq 60.00 Hz
- 2560x1600@60Hz(RB): Pixel Freq 268.500 MHz, Horizontal Freq 98.71 KHz, Vertical Freq 59.97 Hz
Accessories:
- HDMI Cable
- RS232 Cable
- Remote Controller
- Batteries (AAA x 2)
- Power cord
- AC/DC Power Adapter
- Optional: Wall Mount, Trim, Adapter Bracket (appearance varies by screen size/model)
Usage Features:
OSD Controls:
The display features an OSD menu accessible via the remote controller.
- LED Indicator: Green for normal operation, Off for off mode, Green Blinking for no signal.
- POWER Button: Turns the display on/off.
- MENU Button: Displays the OSD menu, exits sub-menus.
- SELECT Button: Selects highlighted functions.
- DOWN Button: Selects previous menu items, decreases slider values.
- UP Button: Selects next menu items, increases slider values.
Selecting Display Position:
- Panoramic Displays accept 4:3 and 16:9 signals but only display a specific portion (top one-third, two-fifths, or one-half) depending on the model.
- To change the display position (toggle between top and bottom portions), press the "down" directional button on the remote controller four times in succession.
- Signal resolutions equivalent to the display's native resolution are supported for all models.
The OSD menu is structured into several main categories with sub-menus:
- Picture Setting:
- Backlight (0-100)
- Brightness (0-100)
- Contrast (0-100)
- Sharpness (0-4)
- Display Setting:
- H Position (0-100) - VGA Only
- V Position (0-100) - VGA Only
- Clock (0-100) - VGA Only
- Phase (0-100) - VGA Only
- Color Setting:
- Gamma (OFF, 1.8, 2.0, 2.2)
- Temperature (9300K, 7500K, 6500K, 5800K)
- Color Effect (Standard, Game, Movie, Photo)
- Advance Settings:
- Aspect Ratio (Full, 16:9, 4:3, 5:4)
- Over Scan (ON/OFF)
- Over Drive (ON/OFF, OD Gain)
- DDCCI Control (ON/OFF)
- Display Rotation Control (0, 180, LR Mirror, UD Mirror)
- RS232 Set ID (0-255)
- Ultra Vivid (OFF, L, M, H)
- DP Version (1.1, 1.2)
- DP MST (1, 2)
- Clone Mode (ON/OFF)
- Input Source Select:
- Auto Select
- A0: VGA
- D1: DP
- D2: HDMI
- D3: HDMI
- Other Settings:
- Reset (Factory Reset)
- Menu Time (OSD menu timeout)
- OSD H Position
- OSD V Position
- Transparency (OSD menu transparency)
- OSD Menu Rotation (0, 90, 270, 180 degrees)
OSD & Structure (for PA12H, PA14H, and PA16H):
These models have a slightly different OSD menu structure:
- Picture: Brightness, Contrast, Sharpness, H Position, V Position, Clock, Phase.
- Color: Color Status Management (User, Warm, Normal, Cool), Red, Green, Blue, Auto Color (To Start).
- OSD: Language (English), H Position, V Position, Transparency (33), OSD Time (10 seconds), Source (RGB, HDMI, AUTO).
- SETUP: Factory reset (To Start), Aspect (Off/On), Backlight DIM (Off/On), Set ID (Off/On), Volume (62), Mute (Off/On).
Maintenance Features:
Safety Instructions:
- Always pull the plug head, not the cord, when disconnecting from an electrical outlet.
- Do not expose the appliance to rain, moisture, or liquids.
- Do not place liquid-filled items near the display.
- Use only a properly grounded plug and receptacle.
- Servicing should only be performed by qualified service personnel. Do not remove the cover or back.
- Refer servicing if the display is damaged, exposed to liquids, dropped, or not operating normally.
- Clean only with a dry microfiber cloth.
- Do not block ventilation openings.
- Do not install near heat sources.
- Protect the power cord from being walked on or pinched.
- Use only manufacturer-specified attachments/accessories.
- Exercise caution when moving the display on a cart to avoid tip-over.
- Unplug during lightning storms or long periods of disuse.
- The mains plug of the power supply cord must remain readily operable.
- Class I construction displays must be connected to a wall socket outlet with a protective grounding connection.
- This device is a Class A digital device designed for commercial use, and users should be mindful of EMI issues.