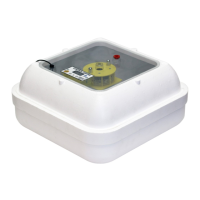
MODEL 1588 HOVABATOR
PARTS
Unpack the incubator from box. Check
for the components listed below.
1588 Top with heat
el em en t, fa n, pi lo t
light, thermostat, &
vent plugs installed.
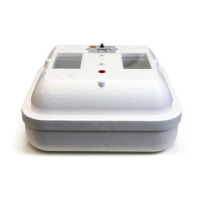
Hova-Bator Bottom
Plastic Liner
Power Supply
THE GENESIS
POOR HATCH
There are many factors involved with the hatching process and any one can hamper or stop chick development. Old eggs, infertile eggs, damaged
or dirty eggs, poor ock health, and eggs not properly turned during incubation are some of the factors. Some chicks may only partially emerge
from the shell. These chicks after time may be assisted out of the shell but due to their weak condition often do not survive. It is not unusual in a
large batch of eggs to have a few of these even with good hatches.
Check the unhatched eggs. Take note of the exact number of days it took to hatch any eggs (counting the day they were set as day one) or
note the number of days for any eggs to pip the shell. Check unhatched eggs for chick development and note the number of these eggs in the
batch. If all or most of the eggs have no development (clear inside) then the microscopic embryo had died before or at time of incubation or the egg
was never fertile. If over 70% of the developed eggs hatched then there is little adjustment that can be done with humidity or temperature
to improve this. If many of the unhatched eggs are developed or partially developed into chicks and if eggs were of good quality and properly
handled then perhaps adjustments in temperature or humidity may be required.
If eggs hatched on time, then begin any adjustments with the humidity rst. Review the section under MOISTURE for adjustments. Make only
one adjustment and then test it on a setting of eggs before making any other adjustments.
If eggs have been determined to hatch late or pip late (one day or more), rst check for too much humidity then look for too low of a temperature
setting. If eggs pip or hatch early (one day or more) then look for too high of a temperature. Eggs hatching early or late due to temperature are
probably within one degree of the proper temperature setting.
LIMITED WARRANTY
GQF Manufacturing Co., Inc. guarantees against defect for a period of 1 year from date of purchase. This warrantee is void for product more than 3 years old when not
sold direct from GQF to the consumer. Notify GQF Mfg. Co. of any defective items, giving catalogue number and name of item and what is wrong with item. Send copy
of invoice showing date of purchase. GQF Mfg. Co. will send replacement, or replacement parts, or notify regarding return. Shipping charges for express shipping or
shipments outside of the continental USA are to be paid by the customer. Product being used outside of the continental USA may need to be returned to GQF at user’s
expense for warrantee work. Returning of items without written permission will be at owner’s expense.
Whereas GQF Mfg. Co. has no control over usage of equipment and product supplied, it assumes no responsibility for losses or damage from the equipment or product
other than replacement of defective parts. No guarantee on hatchability of eggs. GQF assumes no responsibility for losses due to shipping damage, late shipment or
arrival of product.
Do not expose electrical parts to water. Installation of electrical parts should be done by a qualied electrician. Use of replacement parts other than intended by GQF Mfg.
Co. is not permitted. GQF not responsible if product does not comply with local product codes or codes outside of the USA.
* % Weight loss: Total weight loss from beginning to end of Incubation should be 12%-16%.
% Weight Loss = Original wt. - Present wt.
Original wt.
Average Daily Wt. = Original wt. X .14 (Based on 14% total loss)
Loss Required Incubation Period
INCUBATION PERIODS FOR SEVERAL SPECIES OF BIRDS
Pheasant Peafowl
Chicken,
Bantam
23-24 17 42-48 43-50 35-40 28 35-37 28-34 28 23-28 28-30 21 28 23-24 25 17
Requirements
Incubation period (days)
Ostrich Emu Rheas Duck
Bobwhite
Quail
Cotumix
Quail
Muscovy
Duck
Goose Guinea Turkey
Chukar
Partridge
Grouse Pigeon
For help or comments contact our technical support at:
Ph 912-236-0651 / Fax 912-234-9978 / e-mail: sales@GQFmfg.com or mail to:
IF THE EQUIPMENT IS USED IN A MANNER NOT SPECIFIED BY
THE MANUFACTURER, THE PROTECTION PROVIDED BY THE
EQUIPMENT MAY BE IMPAIRED.
INPUT: AC 100-240V 50/60 Hz 1.5A OUTPUT: 12V 3000mA
GQF Manufacturing Co., Inc.
PO Box 1552
Savannah, GA 31402-1552
1.4.1 Normal environmental conditions - This equipment designed to be safeat least under the following conditions: a) indoor use; b) altitude up to 2000m; c) temperature 5
o
C to 40
o
C; d) maximum
relative humidity 80% for temperatures up to 31
o
C decreasing linearly to 50% relative humidity at 40
o
C; e) mains supply voltage uctuations up to
+
10% of the nominal voltage; f) transient overvoltages
typically present on the mains supply (impulse withstand category II 1500 V transient; g) pollution degree 2.
T U V L i s t e d
P/N H1588
SETUP
Incubator Floor
Notch
Unpack the incubator from the box
and remove the top half from the
bottom.
Place liner in Hova-Bator
bottom, and arrange as shown using
the water troughs and turner power
cord notch as reference. Place the
plastic Incubator Floor on top of the
liner.
In most climates, ll trough #1
(highlighted in yellow) with water.
Surface area, not depth, determines
humidity; rell trough as necessary
to prevent it from drying out.
NOTICE: Humidity troughs should
be filled with cool tap water.
Careful to avoid spilling excess
water outside of trough as it will eect humidity. Humidity should be between 45
and 55% for SETTING and 55 to 65% for HATCHING. Humidity above 65% is not
recommended as it may cause condensation to form on the windows and can
decrease hatch percentage.
Plug the thin power cord from the incubator’s top into the power supply. Plug
the cord set for the power supply into the appropriate wall socket. The fan should
then run and the small heat indicator light on the thermostat box should be lit.
Allow the incubator to warm up for one hour. When the light begins blinking
regularly, the incubator is nearing its set point.
1588 Genesis TUV 2020 11X17.indd 1 10/7/2020 10:36:24 AM