Do you have a question about the GQF HOVA-BATOR 2370 and is the answer not in the manual?
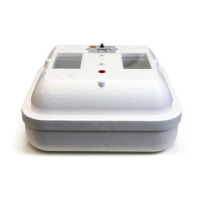
The main unit containing the heat element, fan, and thermostat.
A component placed inside the incubator base to manage humidity.
The base housing of the incubator.
The floor component that fits within the incubator base.
Instructions for placing the liner, floor, and arranging troughs/cord notch.
Guidance on filling water troughs and maintaining humidity levels.
Specifies ideal humidity percentages for setting and hatching eggs.
Steps for connecting power and initial incubator warm-up.
Recommends a stable room temperature between 70°F and 80°F for best results.
Advises against direct sunlight and ensures the incubator is level.
Instructions for using '+' and '-' buttons to set desired temperatures.
How to switch temperature display units by holding the '+' button.
Procedure to disable the fan for still air incubation.
Details the alarm that sounds for temperatures outside 80°F-104°F.
Guidance on refilling water troughs, typically trough #1, twice weekly.
Techniques for reducing humidity by covering troughs or using smaller ones.
Instructions to stop turning eggs and fill troughs #1 and #2 before hatching.
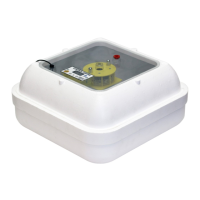
Placement instructions for the automatic egg turner within the incubator.
Notes on the turner's slow operation and checking rack angle.
Explains the importance of humidity for preventing egg moisture loss.
Details on the vent plug's use for altitude or reducing internal humidity.
Guidance on removing chicks, drying, and leaving unhatched eggs.
Instructions for cleaning the incubator after a hatch using soap and water.
Advice on providing a warm, dry brooder with appropriate temperature.
Key advice including not tampering with the thermostat and keeping eggs clean.
Factors affecting hatching and how to analyze unhatched eggs.
How to adjust humidity/temperature for eggs hatching late or early.
A table listing incubation durations for various bird species.
Details the one-year limited warranty and its exclusions.
Advisories on electrical safety, replacement parts, and local codes.
Provides phone, fax, email, and mailing address for assistance.
The device described is the GQF Hova-Bator Electronic Thermostat Circulated Air Model 2370, an incubator designed for hatching eggs.
The Hova-Bator 2370 is an electronic thermostat circulated air incubator. Its primary function is to maintain a controlled environment, specifically temperature and humidity, necessary for the successful incubation and hatching of various bird eggs. The incubator uses a heat element and a fan to circulate air, ensuring a consistent temperature throughout the incubation chamber. An electronic thermostat monitors and regulates the temperature, with a small heat indicator light signaling its operation. The device is designed to bring normal room temperature to the desired incubation temperature, ideally between 70°F and 80°F, with fresh air and no direct sunlight.
The incubator also manages humidity, which is crucial for egg development. It features a plastic liner with four troughs of varying sizes to hold water, allowing users to adjust the surface area of water exposed to the air, thereby controlling humidity levels. The recommended humidity range is 45-55% for setting and 55-65% for hatching. An alarm system is integrated to alert users if the incubator temperature falls below 80°F or exceeds 104°F, indicating a potential temperature failure. In the event of a fan failure, the incubator can be operated in a still-air mode.
Setup: To set up the Hova-Bator 2370, first unpack all components: the top with the heat element, fan, and thermostat installed; the plastic liner; the Hova-Bator bottom; and the incubator floor. Place the plastic liner in the Hova-Bator bottom, then position the incubator floor on top of the liner, aligning it with the water troughs and the turner power cord notch. For most climates, fill trough #1 (the largest) with cool tap water. The surface area of the water, not its depth, determines humidity. Refill as needed to prevent drying out, being careful not to spill water outside the trough.
Once assembled, plug the cord set into a wall socket. The fan should start, and the heat indicator light on the thermostat box should illuminate. Allow the incubator to warm up for approximately one hour. The incubator is nearing its set point when the light begins blinking regularly.
Operation: The incubator's temperature is typically set close to 100°F. To adjust the temperature, use the (+) button to increase or the (-) button to decrease. Each press will show a change value in whole and tenths, which is the amount of change to be applied to the display temperature. For example, to change from 100.0 to 99.5, press the (-) button to display (-.5) and allow time for the change to stabilize. Fine-tuning may be necessary based on the LCD reading.
The device offers several functional features:
Humidity Management: Water should be added to trough #1 every few days, typically twice weekly. The amount of moisture is controlled by the surface area of water. In high humidity conditions or for specific egg types, less humidity may be required. This can be achieved by covering a portion of a trough with aluminum foil or by switching to smaller troughs. While egg humidity has a broad range, it's generally better to have less rather than more, except for the final 2-3 days before hatching. During this period, stop turning the eggs and fill both trough #1 and #2 with water. In high humidity climates, smaller troughs (e.g., trough #2 for setting, then #2 and #3 for hatching) may be necessary. In extreme low humidity climates, a combination of troughs (e.g., trough #1 and #4) might be used.
Automatic Turner (if applicable): If using an automatic egg turner, place it on the incubator floor. The turner motor uses metal gears and operates very slowly; visible movement upon installation is not expected. Proper operation is detected by noting the rack angle over time. Three days before hatching, remove eggs from the turner and lay them on their side on the incubator floor. Do not attempt to hatch eggs while the turner is in the incubator, as it could crush chicks. When the turner is removed, maintain temperature by placing a thermometer on top of the eggs.
Vent Plug: A red vent plug is located on the top of the incubator. This plug should be removed when the incubator is used at altitudes greater than 6000 feet above sea level. It can also be removed after the hatch is complete if water drops appear on the window due to high humidity, which helps dry chicks and the incubator. If removing the plug isn't enough to reduce humidity, the top can be propped up slightly, ensuring proper temperature maintenance. Alternatively, the top can be quickly removed, and moisture wiped from the windows. Replace the plug after chicks are removed.
After Hatch: Chicks can be removed 24 hours after they begin to hatch. Extremely wet chicks should remain in the incubator to dry. If they don't dry within 8 or more hours, move them to a brooder or heat lamp with temperatures of 95-100°F. Plan to remove chicks once a day to avoid chilling wet chicks, as opening the incubator causes warm, moist air to escape. Some chicks may hatch late, so unhatched eggs can be left for up to 2 days longer.
Brooding: Once chicks are removed from the incubator, they need a warm, dry brooder. A brooder should have a heated section (100°F for the first week) and an unheated section for exercise. Food and water should be placed partially in the heated area. The temperature should be reduced by 5 degrees each week until it reaches 70 degrees. The incubator top is not suitable as a brooder due to insufficient heat and the risk of chicks pecking it.
Cleaning: After the hatch is complete, clean the incubator with soap and water only. The plastic liner for the Hova-Bator bottom can be cleaned using detergents or disinfectants.
Troubleshooting Poor Hatch: Many factors can affect hatching success, including old, infertile, damaged, or dirty eggs, and poor flock health. If a poor hatch occurs, check the unhatched eggs. Note the exact number of days it took for eggs to hatch or pip, and check for chick development. If over 70% of developed eggs hatched, minor adjustments to humidity or temperature may be needed. If many unhatched eggs are developed or partially developed, and the eggs were of good quality, adjustments to temperature or humidity might be required.
If eggs hatch late or pip late (one day or more), first check for too much humidity, then for too low a temperature setting. If eggs pip or hatch early (one day or more), check for too high a temperature. Eggs hatching early or late due to temperature are likely within one degree of the proper temperature setting. When making adjustments, start with humidity, make only one adjustment at a time, and test it on a new setting of eggs before making further changes.
General Advice:
Limited Warranty: GQF Manufacturing Co., Inc. provides a 1-year warranty against defects from the date of purchase. This warranty is void for products older than 3 years not sold directly from GQF to the consumer. For defective items, notify GQF Mfg. Co. with the catalogue number, item name, and description of the issue, along with a copy of the invoice showing the purchase date. GQF Mfg. Co. will send replacements or parts, or advise on returns. Shipping charges for express shipping or shipments outside the continental USA are the customer's responsibility. Products used outside the continental USA may need to be returned to GQF at the user's expense for warranty work. Returns without written permission will be at the owner's expense.
GQF Mfg. Co. does not control equipment usage and assumes no responsibility for losses or damage other than replacement of defective parts. There is no guarantee on egg hatchability. GQF assumes no responsibility for losses due to shipping damage, late shipment, or product arrival.
Do not expose electrical parts to water. Installation of electrical parts should be done by a qualified electrician. Use of non-intended replacement parts is not permitted. GQF is not responsible if the product does not comply with local product codes or codes outside the USA.
| Type | Incubator |
|---|---|
| Power Source | Electric |
| Construction | Plastic |
| Windows | Yes |
| Weight | 7 lbs |
| Capacity | 42 Chicken Eggs |
| Humidity Control | Yes |
| Thermostat | Adjustable |
| Voltage | 120V |