Do you have a question about the Graco 3251681-064 - Lauren Classic Convertible Crib and is the answer not in the manual?
| Brand | Graco |
|---|---|
| Model | 3251681-064 - Lauren Classic Convertible Crib |
| Category | Baby & Toddler Furniture |
| Language | English |
Guidance on maintaining optimal room humidity for furniture longevity and preventing wood damage from extremes.
Recommends specific temperature and relative humidity ranges for wood furniture to prevent shrinkage or expansion.
Explains why doors/drawers may stick due to humidity changes and offers solutions like dehumidifiers or wax.
Warns against direct sunlight fading finishes, causing cracks, and yellowing white finishes.
Advises against storing furniture in damp basements or hot attics, recommending air movement.
Provides essential tips on protecting surfaces, avoiding damage, and proper cleaning methods.
Provides detailed steps for contacting customer service via email, fax, or phone for issue resolution.
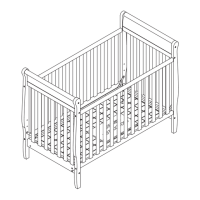
Connects the left and right legs to the bottom crib ends using dowels and specific bolts and barrel nuts.
Joins the top crib ends to the bottom crib ends using bolts inserted through the legs.
Secures the first fixed side panel to the crib ends using bolts and barrel nuts.
Fastens the bottom stretcher bar to the crib ends using specific bolts and barrel nuts.
Mounts the metal spring support platform to the legs using bolts, ensuring the smooth side faces upward.
Fastens the second fixed side panel to the crib structure using bolts and barrel nuts.