EasyManua.ls Logo

Graham Field Lumex Set N' Go User Manual

Graham Field Lumex Set N' Go
2 pages
To Previous Page IconTo Previous Page
Page #2 background image
2
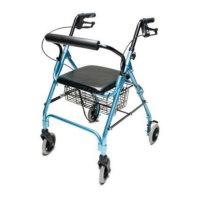
6. Make sure the brake lever is NOT in the
locked position. While supporting the cable with
the pliers, loosen the locking screw on the brass
cable stop.
Next lift the cable stop up while pulling down on
the cable with pliers. There should be about 2
millimeters of space between the brake shoe and
the tire. (Thickness of two pennies stacked).
Confirm the brake is functional and adjust if
needed.
7. You must use adhesive to reinstall the grip.
Spray is recommended but epoxy, gorilla glue
and rubber cement are suitable adhesives.
Apply a moderate amount of spray adhesive (or
a few drops of a recommended alternative glue)
to handle tubing.
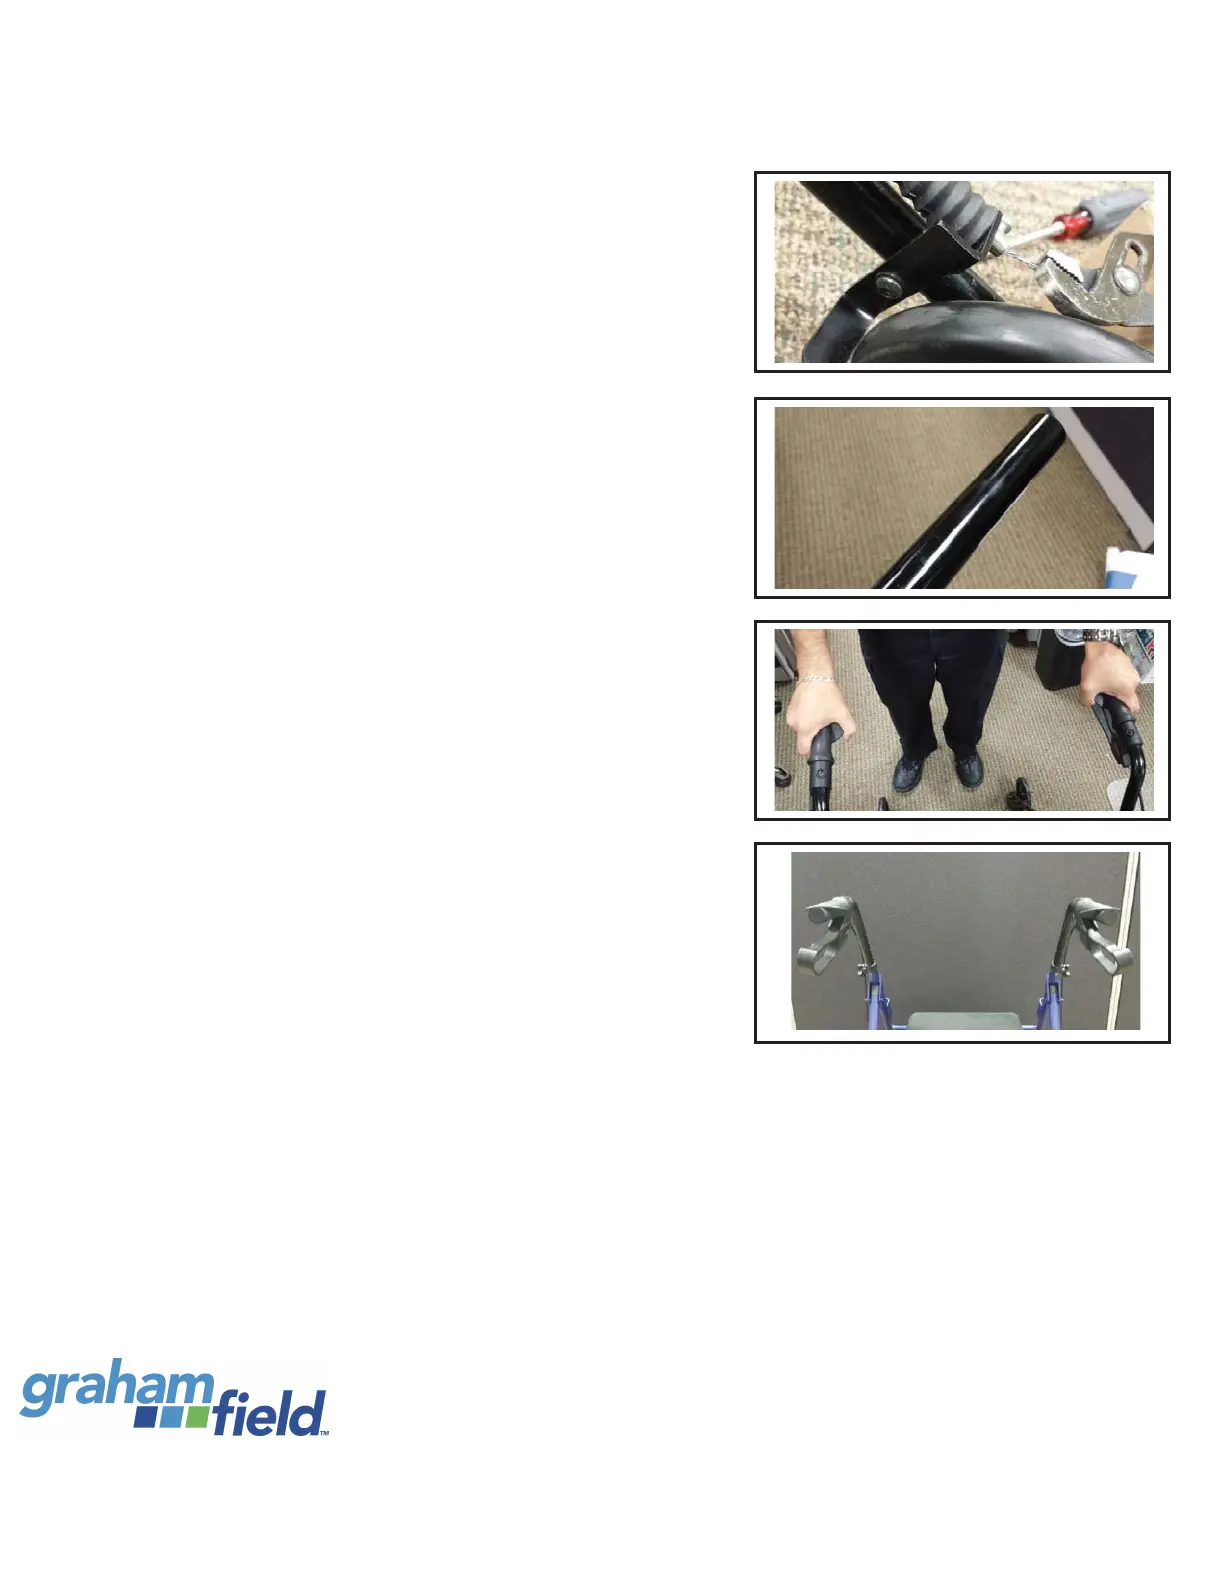
8. Position the handles at the same height and
secure with knob and bolt. Slide the grip over
the adhesive completely to the brake assembly.
Before allowing the adhesive to set, grasp the
handles as if you are operating the rollator and
twist to ensure they are positioned correctly and
feel the same on both sides.
9. After following the recommended instructions
to apply the adhesive, allow adhesive to set
before using the rollator.
* It is recommended that you seek the assistance
of a local provider in replacing your rollator
handbrakes if and when possible.
GF1500064RevA15
© 2015 GF Health Products, Inc.
Atlanta, GA 30360
www.grahamfield.com
Question and Answer IconNeed help?

Do you have a question about the Graham Field Lumex Set N' Go and is the answer not in the manual?

Graham Field Lumex Set N' Go Specifications

General IconGeneral
BrandGraham Field
ModelLumex Set N' Go
CategoryMobility Aid
LanguageEnglish

Summary

Lumex Rollator Brake Replacement Guide

Required Tools and Parts

Lists necessary tools like pliers, towel, and replacement handbrake for brake replacement.

Remove Old Handgrip

Details removing the old handgrip using a towel and pliers to break adhesive.

Disconnect Brake Cable

Explains how to loosen the brass cable lock and remove the end cable cap.

Install New Brake Handle and Cable

Guides installing the new brake handle, feeding the cable, and attaching the brass cable stop.

Position Brake Shoe and Cable Stop

Describes compressing the spring to fit the brake shoe and correctly positioning the cable stop.

Adjust Brake Cable Tension

Details loosening the screw, pulling the cable, and setting the gap between shoe and tire.

Apply Adhesive to Handle Tube

Instructs applying suitable adhesive to the handle tubing for grip reinstallation.

Reinstall Handgrip

Guides positioning and securing the handles, then sliding the grip over adhesive.

Allow Adhesive to Cure

Advises allowing the adhesive to set before using the rollator.

Related product manuals