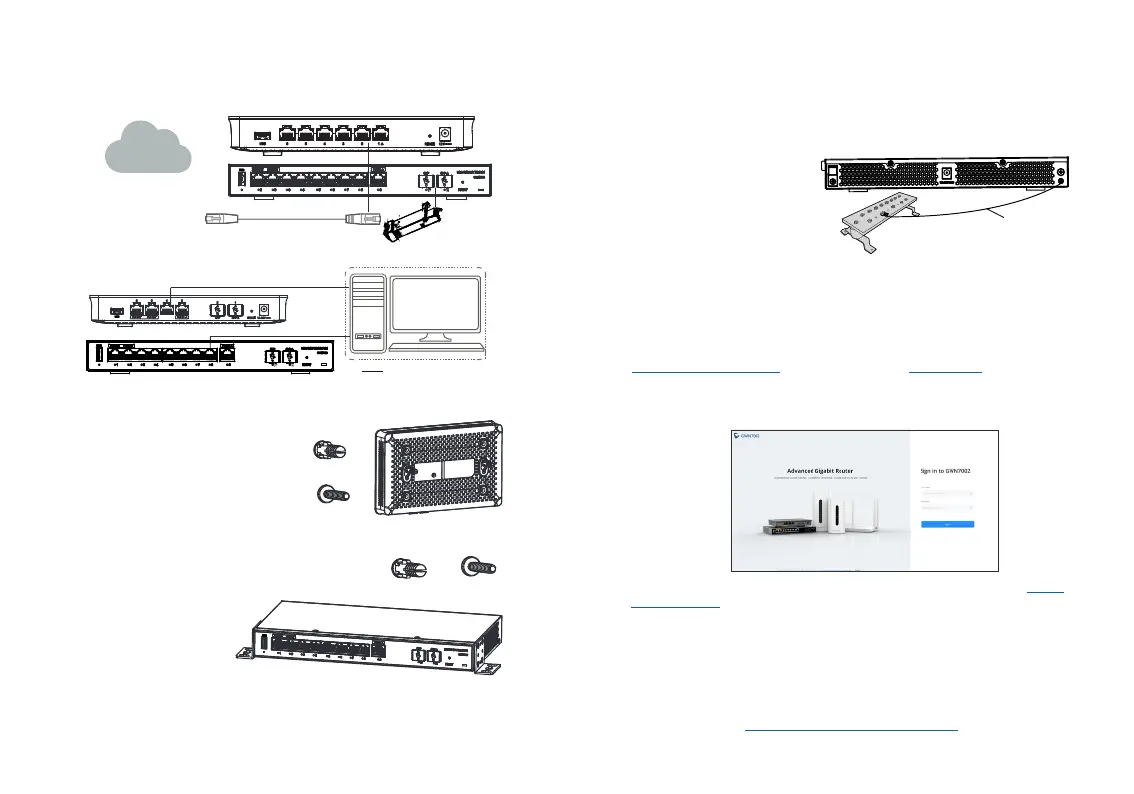
Ethernet Cable
1. Using a drill, make tw o holes in the
wall with 135.0mm spacing, 6.0mm
diameter. Put a plastic anchor and
screw (not provided) on each hole.
2. Mount the GWN7001/7002 router
on the mounting screws.
Mounting GWN7003 to the Wall
3. Use a screwdrive r to tight en the screws (prepared by yoursel) that have
passed through the L-shaped mounting brack ets to ensure that the GWN7003
router is rmly installed on the wall.
Mounting GWN7001/7002 to the Wall
Bottom o the
GWN7001/GWN7002
Router
1. Use the provided screws to x the two L-shaped
Mounting bracket (rotated 90°) on both sides o
the GWN7003 router.
2. Stick the router port up
and horizontally on the
selected wall, mark the
position o the screw
hole on the L-shaped
mounting brackets with a
Front o the GWN7003 Router
Connect yo ur computer to one o the LAN ports.
ACCESSING THE CONFIGURATION INTERFACE
Now that you are connected to the GWN7001/GWN7002/GWN7003’s LAN port
with networ k cable, you can access into its conguration interace with:
myrouter.grandstream.com or deault IP address (192.168.80.1), then enter the
password to login.
Note: GWN7001/GWN7002/GWN7003’s deault password inormation is printed
on the MAC tag at the bottom o the un it.
To manage GWN7001/GWN7 002/GWN7003 over cloud, please reer to https://
www.gwn.cloud.
The GNU GPL license terms are incorporated into the device rmware and an be
accessed via the Web user interace o the device at my_device_ip/gpl_license. It can
also be accessed here: https://www.grandstream.com/legal/open-source-sotware
To obtain a CD with GPL source code inormation please submit a written request to:
ino@grandstream.com
Reer to online documents and FAQ or more detailed inormation:
https://www.grandstream.com/our-products
1. Remove the ground screw
rom the back o the router,
and connect one end o the
ground cable to the wiring
terminal o the router.
2. Put the ground screw back into
the screw hole, and tighten it
with a screwdriver.
3. Connect the other end o the ground cable to other devic e that has been
grounded or directly to the terminal o the ground bar in the equipment room.
Grounding GWN7003
Plastic anchor
Screw
Plastic anchor
Screw
marker. Then, drill a hole at the marked position with an impact drill, and drill
the plastic anchors (prepared by yoursel) into th e drilled hole in the wall.
Ground Wire
 Loading...