CONFIGURATION SERVER IP ADDRESS
Select voice menu option 14 to configure the IP address of the configuration server.
UPGRADE PROTOCOL
Select the menu option 15 to choose firmware and configuration upgrade protocol between TFTP, FTP, FTPS, HTTP and HTTPS. Default is HTTPS.
FIRMWARE UPGRADE MODE
Select voice menu option 17 to choose firmware upgrade mode among the following three options:
“Always check, check when pre/suffix changes, and never upgrade”.
WAN PORT WEB ACCESS
Select voice menu option 12 to enable/disable web access from WAN port. Press 9 in this menu to toggle between enable / disable.
Register a SIP Account
The HT841 supports 1 SIP account for FXS port, and 4 accounts for FXO ports, While the HT881 supports 1 SIP account for FXS port, and 8 accounts
for FXO ports.
Please refer to the following steps in order to register your accounts via web user interface.
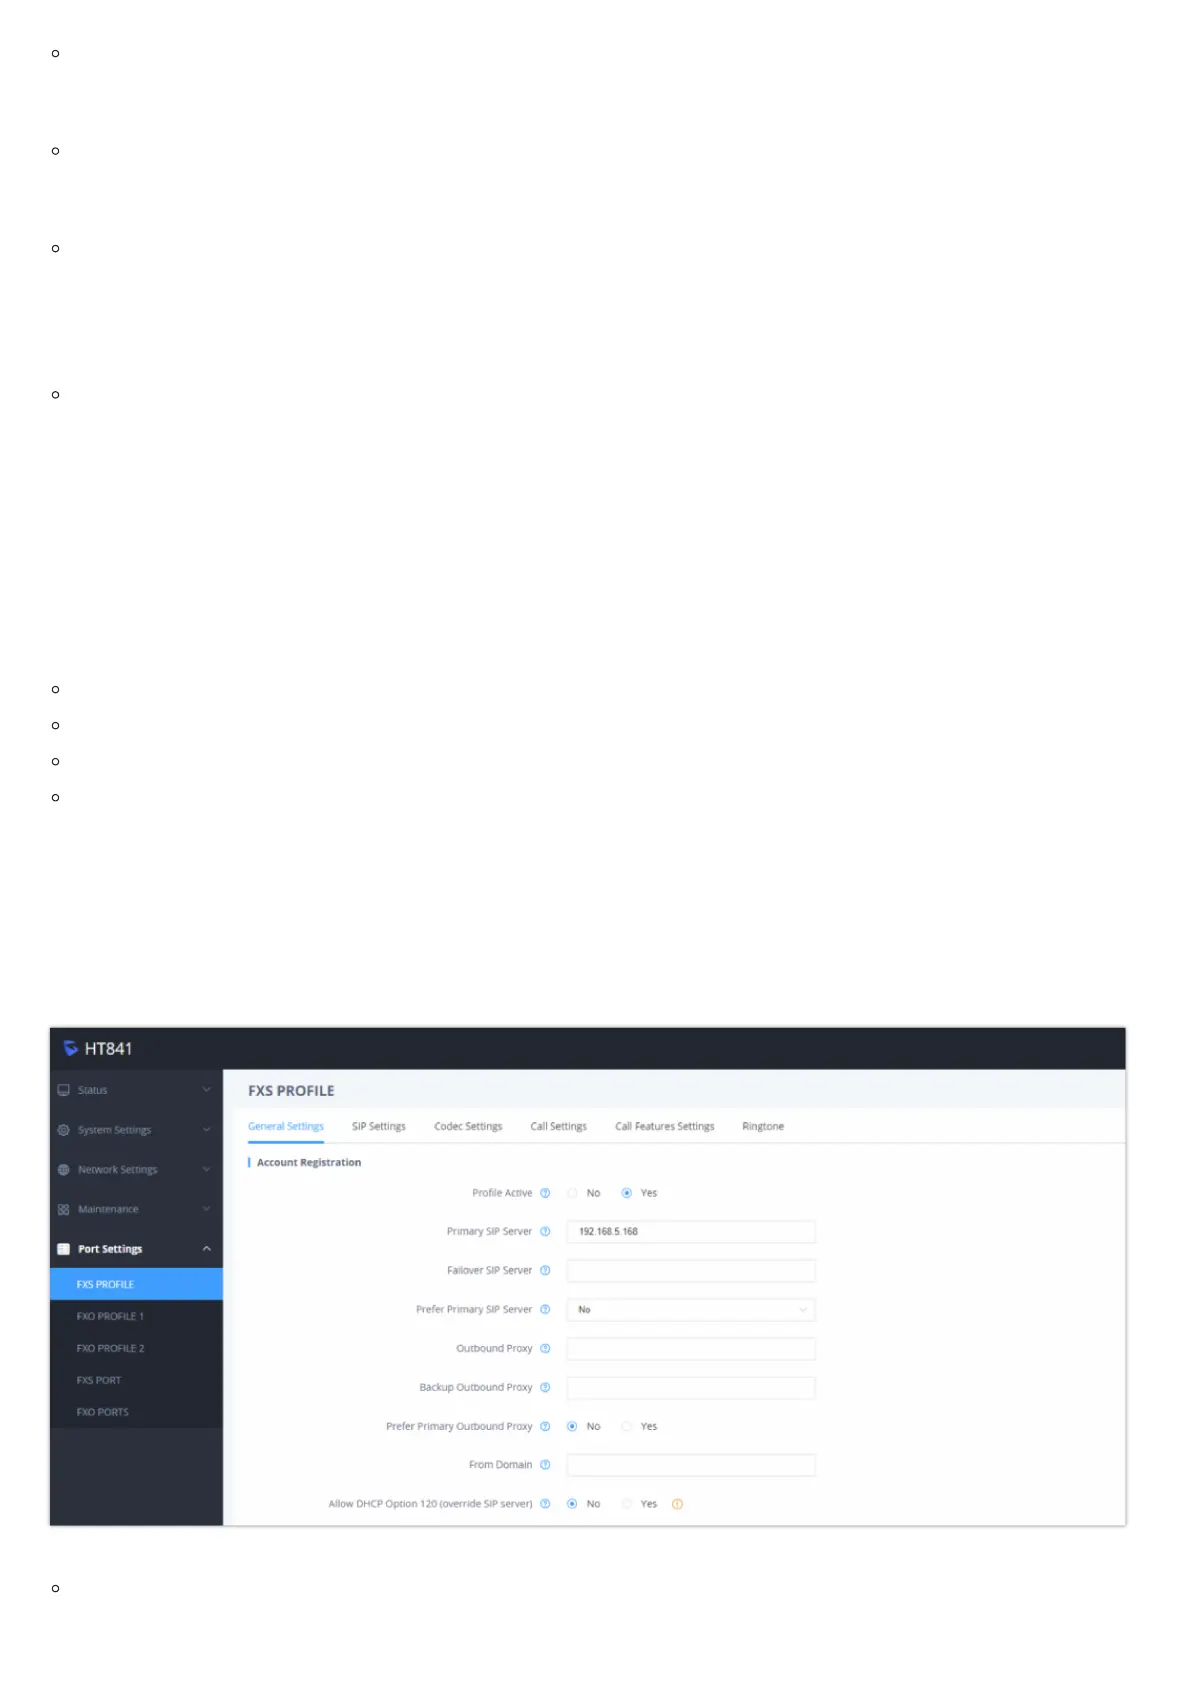
Access your HT841/HT881 web UI by entering its IP address in your favorite browser.
Enter your admin password (default: found on the sticker on the back of the unit).
Press Login to access your settings.
Go to FXS Profile (same steps for FXO Profile 1&2) web pages and set the following:
1. Account Active to Yes.
2. Primary SIP Server field with your SIP server IP address or FQDN.
3. Failover SIP Server with your Failover SIP Server IP address or FQDN. Leave empty if not available.
4. Prefer Primary SIP Server to No or Yes depending on your configuration. Set to No if no Failover SIP Server is defined. If “Yes”, account
will register to Primary SIP Server when failover registration expires.
5. Outbound Proxy: Set your Outbound Proxy IP Address or FQDN. Leave empty if not available.
Configure SIP Server
Go to FXS Port web page and set the following
 Loading...