19
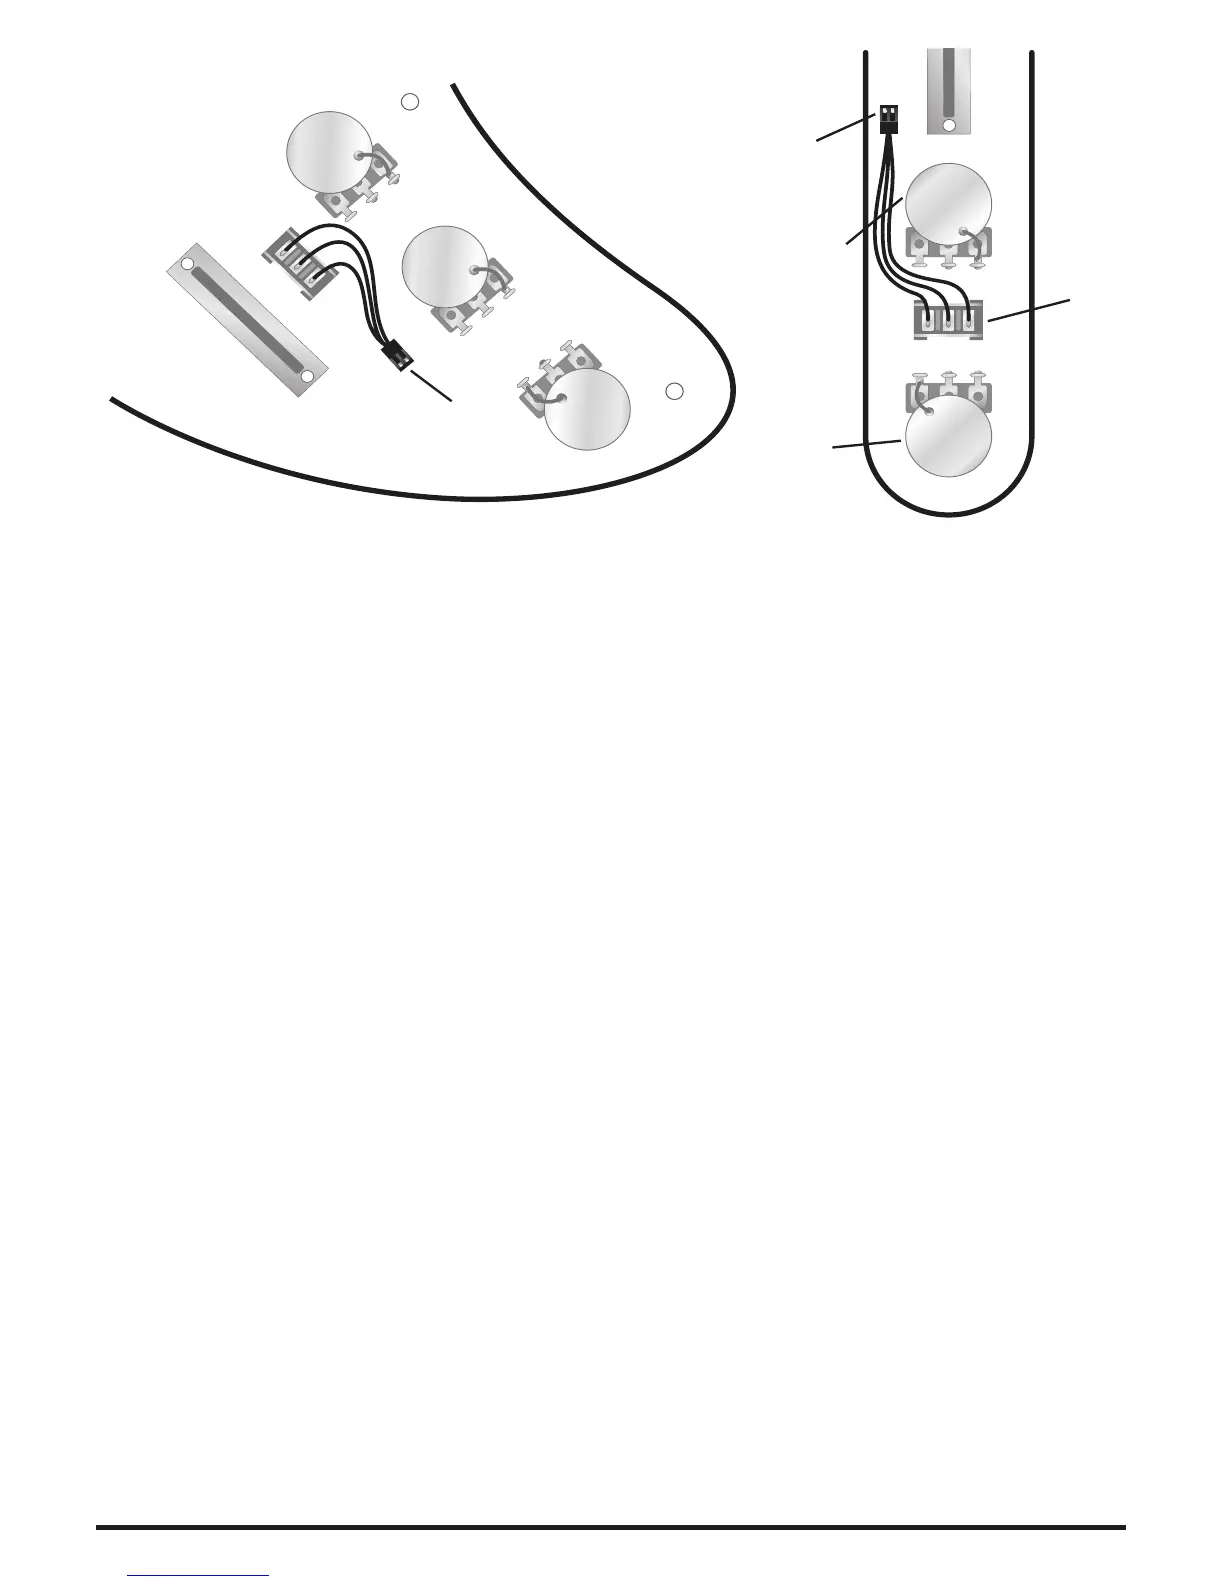
Strat Style Instruments Tele Style Instruments
Quick
Switch
Magnetic
Volume
Magnetic
Tone
GHOST
Volume
Magnetic
Volume
GHOST
Volume
Quick
Switch
STEP 6: Auxiliary Power Out
STEP 7: Setup
If you do NOT require auxiliary power out, skip to STEP 7, below. The
Acousti-Phonic Intelligent Pre-amp includes a circuit to switch on battery power
when a plug is inserted into the stereo jack. If you have another electronic device
(such as an active pickup system) inside the guitar cavity that requires a nine volt
supply, you may power it from the auxiliary power output of the Acousti-Phonic
Intelligent Pre-amp. The auxiliary power output is switched on and off with the
Acousti-Phonic Intelligent Pre-amp.
Connect your device to the PWR pins of the Acousti-Phonic Intelligent Pre-amp.
The pin next to the PWR marking is positive. The pin near the edge of the board
is negative.
The maximum current that may be drawn from the auxiliary power output is
50mA. However, for long battery life the current drawn should be kept to no more
than a few mA. Do not exceed the maximum current (in particular, do not short
the output) or the Acousti-Phonic Intelligent Pre-amp may be damaged.
Once you are nished installing the GHOST system you need to set up your action
and intonation.
Step 1: To set up your action, set each string’s height using the two Allen screws
on each saddle. Once it is close, tune it up. Do any nal height adjustments. You
want to set the height for each string high enough so notes don’t buzz when
played, but low enough to play easily.
Diagram 11.
To QSW pin
contact on
pre-amp.
To QSW pin
contact on
pre-amp.
 Loading...