EasyManua.ls Logo

GRASS VALLEY ADVC-110 - User Manual

GRASS VALLEY ADVC-110
3 pages
Print Icon
To Next Page IconTo Next Page
Loading...
Revised 2/12/2015
CONVERTING VHS TAPE TO DVD
1. Setup
2. Converting VHS tape to DVD
SETUP
Make sure to point the remote at the VCR, not the computer. Also,
remote commands show up on the Quicktime screen, not the VCR.
1. Open up Quicktime Player. No windows will pop up, but
youll see the Quicktime title appear in the upper left corner
of the screen.
2. Go to File > New Movie Recording.
3. This opens a new window where you can see whats going on with the conversion. The
Quicktime window is acting as the TV.
4. Make sure the VCR/DVD unit is powered on.
5. Push DVD on the remote.
6. Make sure the Canopus (White box atop VCR/DVD unit) is set to analog (the blue light
switches between analog and digital by pushing the silver button). This will turn the
screen in Quicktime blue.
CONVERTING VHS TAPE TO DVD
Make sure to point the remote at the VCR, not the computer.
1. Insert your blank DVD first. You must insert the DVD first for this to work correctly. Wait
for it to load.
ANALOG/DIGITAL SWITCH
EJECT
POWER
DUBBING
VCR MODE
DVD MODE
REC MODE
Question and Answer IconNeed help?

Do you have a question about the GRASS VALLEY ADVC-110 and is the answer not in the manual?

Summary

Setup for VHS to DVD Conversion

Open Quicktime Player

Launch Quicktime Player, which will display its title in the screen's upper left corner.

Start New Movie Recording

Navigate to File > New Movie Recording to open the conversion preview window.

Configure VCR;DVD Unit

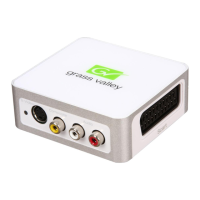
Ensure the VCR/DVD unit is powered on and set to DVD mode, with the Canopus device set to analog input.

Convert VHS Tape to DVD

Prepare for Recording

Insert a blank DVD, power on the VCR/DVD unit, and select VCR mode.

Set Recording Mode and Position

Select the desired recording time length (e.g., 2 or 4 hours) and rewind/fast-forward the VHS tape to the start point.

Start and Monitor Recording

Initiate recording using the Dubbing or Record button and monitor the VHS unit's status.

Finalize DVD and Eject

Stop recording, allow the DVD to close, finalize it for compatibility, and eject both the DVD and VHS tape.

Overview

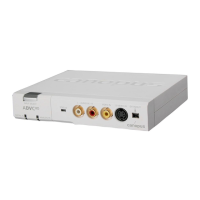
This document describes the process of converting VHS tapes to DVD using a Toshiba VCR/DVD combo unit and a Canopus ADVC110 analog-to-digital converter, along with Quicktime Player software.

Device Function Description:

The primary function of this setup is to digitize analog video content from VHS tapes and record it onto DVD discs. This allows users to preserve their old VHS recordings in a more modern, durable, and accessible format. The system leverages a multi-component approach:

  1. Toshiba VCR/DVD Combo Unit (SE-R0295 remote shown): This unit serves as both the playback device for VHS tapes and the recording device for DVDs. It integrates a VCR for playing VHS cassettes and a DVD recorder for burning the digitized content onto blank DVD media. The remote control provides essential functions for both VCR and DVD operations, including power, input selection, playback controls (play, stop, pause, rewind, fast forward), recording controls (record, dubbing), menu navigation, and eject functions for both media types.
  2. Canopus ADVC110 (ADVCIIO) Analog-to-Digital Converter: This external device acts as a bridge between the analog output of the VCR and the digital input of a computer. It takes analog video and audio signals (from the VCR) and converts them into a digital format (e.g., FireWire/DV) that can be processed by a computer. The device features an analog/digital switch, allowing users to select the appropriate input mode. A blue light on the unit indicates its current mode (analog or digital).
  3. Quicktime Player Software: This software running on a computer is used to preview the incoming video signal from the ADVC110 and manage the recording process. It effectively acts as the "TV screen" during the conversion, displaying what is being played from the VHS tape.

Important Technical Specifications (Inferred):

  • Input/Output:
    • Analog Inputs (ADVC110): L-AUDIO IN-R, VIDEO IN, S VIDEO IN (for connecting the VCR's analog output).
    • Digital Input/Output (ADVC110): DV IN/OUT (for connecting to the computer, likely via FireWire).
    • VCR/DVD Unit: Capable of playing VHS tapes and recording onto DVD discs.
  • Recording Modes: The DVD recorder offers different time length options (e.g., two or four-hour mode) for recording, allowing users to select the appropriate duration based on the length of the VHS tape.
  • Remote Control (Toshiba SE-R0295): Features dedicated buttons for VCR mode, DVD mode, Dubbing (for direct VCR-to-DVD recording), Rec. Mode (for selecting recording duration), playback controls, menu navigation, and eject functions.
  • Conversion Process: Analog video and audio are converted to digital via the ADVC110, then captured and displayed by Quicktime Player on a computer. The actual recording to DVD is handled by the Toshiba combo unit.

Usage Features:

  • Step-by-Step Conversion Guide: The manual provides a clear, sequential guide for the entire conversion process, from setting up the hardware and software to finalizing the DVD.
  • Remote-Controlled Operation: Most operations, including selecting modes, controlling playback, and initiating recording, are managed via the Toshiba remote control, simplifying user interaction.
  • Real-time Monitoring: Quicktime Player allows users to monitor the video signal in real-time during the conversion, ensuring that the correct content is being captured and providing visual feedback.
  • Dubbing Functionality: A dedicated "Dubbing" button on the remote enables a direct, one-touch recording from the VHS player to the DVD recorder within the combo unit, streamlining the conversion.
  • Recording Mode Selection: Users can choose different recording durations (e.g., 2-hour or 4-hour) to optimize disc space for their VHS content.
  • Automatic Stop: The recording automatically stops if the DVD disc fills up, preventing data overflow.
  • Automatic DVD Closing: After recording, the DVD unit automatically "closes" the recording, making the disc playable on other DVD players.
  • Optional Finalization and Menu Editing: Users have the option to finalize the DVD (making it compatible with other players) and even edit menu setups or chapter titles before finalization, offering some level of customization.
  • Troubleshooting Tips: The guide includes practical tips, such as moving the mouse to wake up a sleeping computer if the Quicktime screen goes black during recording, and how to handle the VCR powering off after rewinding.
  • Clear Button Identification: The remote control diagram clearly labels all important buttons, such as EJECT, POWER, INPUT SELECT, SETUP, NAVIGATION ENTER, VCR MODE, DVD MODE, DUBBING, and REC. MODE, aiding users in identifying the correct controls.
  • Dual Eject Mechanism: Separate eject mechanisms for the DVD tray and the VHS tape are clearly explained, ensuring users can safely remove both media types.

Maintenance Features:

  • No specific maintenance features are detailed in the provided text. However, general maintenance for such devices would typically involve:
    • Keeping the units clean and free of dust.
    • Using high-quality blank DVD media to ensure reliable recording.
    • Ensuring proper ventilation for the electronic components.
    • Handling VHS tapes and DVDs carefully to prevent damage.
    • Regularly checking cable connections for secure fit.

In summary, this system provides a comprehensive solution for converting legacy VHS content to modern DVD format, emphasizing ease of use through a guided process and remote control operation, while leveraging both dedicated hardware and software for effective analog-to-digital conversion and recording.

GRASS VALLEY ADVC-110 Specifications

General IconGeneral
BrandGRASS VALLEY
ModelADVC-110
CategoryMedia Converter
LanguageEnglish

Related product manuals