4.1
4.2
PU
PU PE
PU
EM2
CN
EM1
EM2
EM2
T2
EM1
CN
PE CN
CN PE
A
A
A
C
C
C
C
C
C
C
C
CN
1000 x
550 cm
4
915 x
470 cm
4
800 x
470 cm
3
EM1 EM2
1000 x
550cm
3+3 2+2
915 x
470cm
3+3 2+2
800 x
470cm
2+2 2+2
EM1 EM2
730 x
375cm
2+2 2+2
610 x
375cm
1+1 2+2
500 x
300cm
1+1 2+2
CN
730 x
375 cm
3
610 x
375 cm
2
500 x
300 cm
2
A
EM2 PU
EM1 EM2
PE
CN
EN
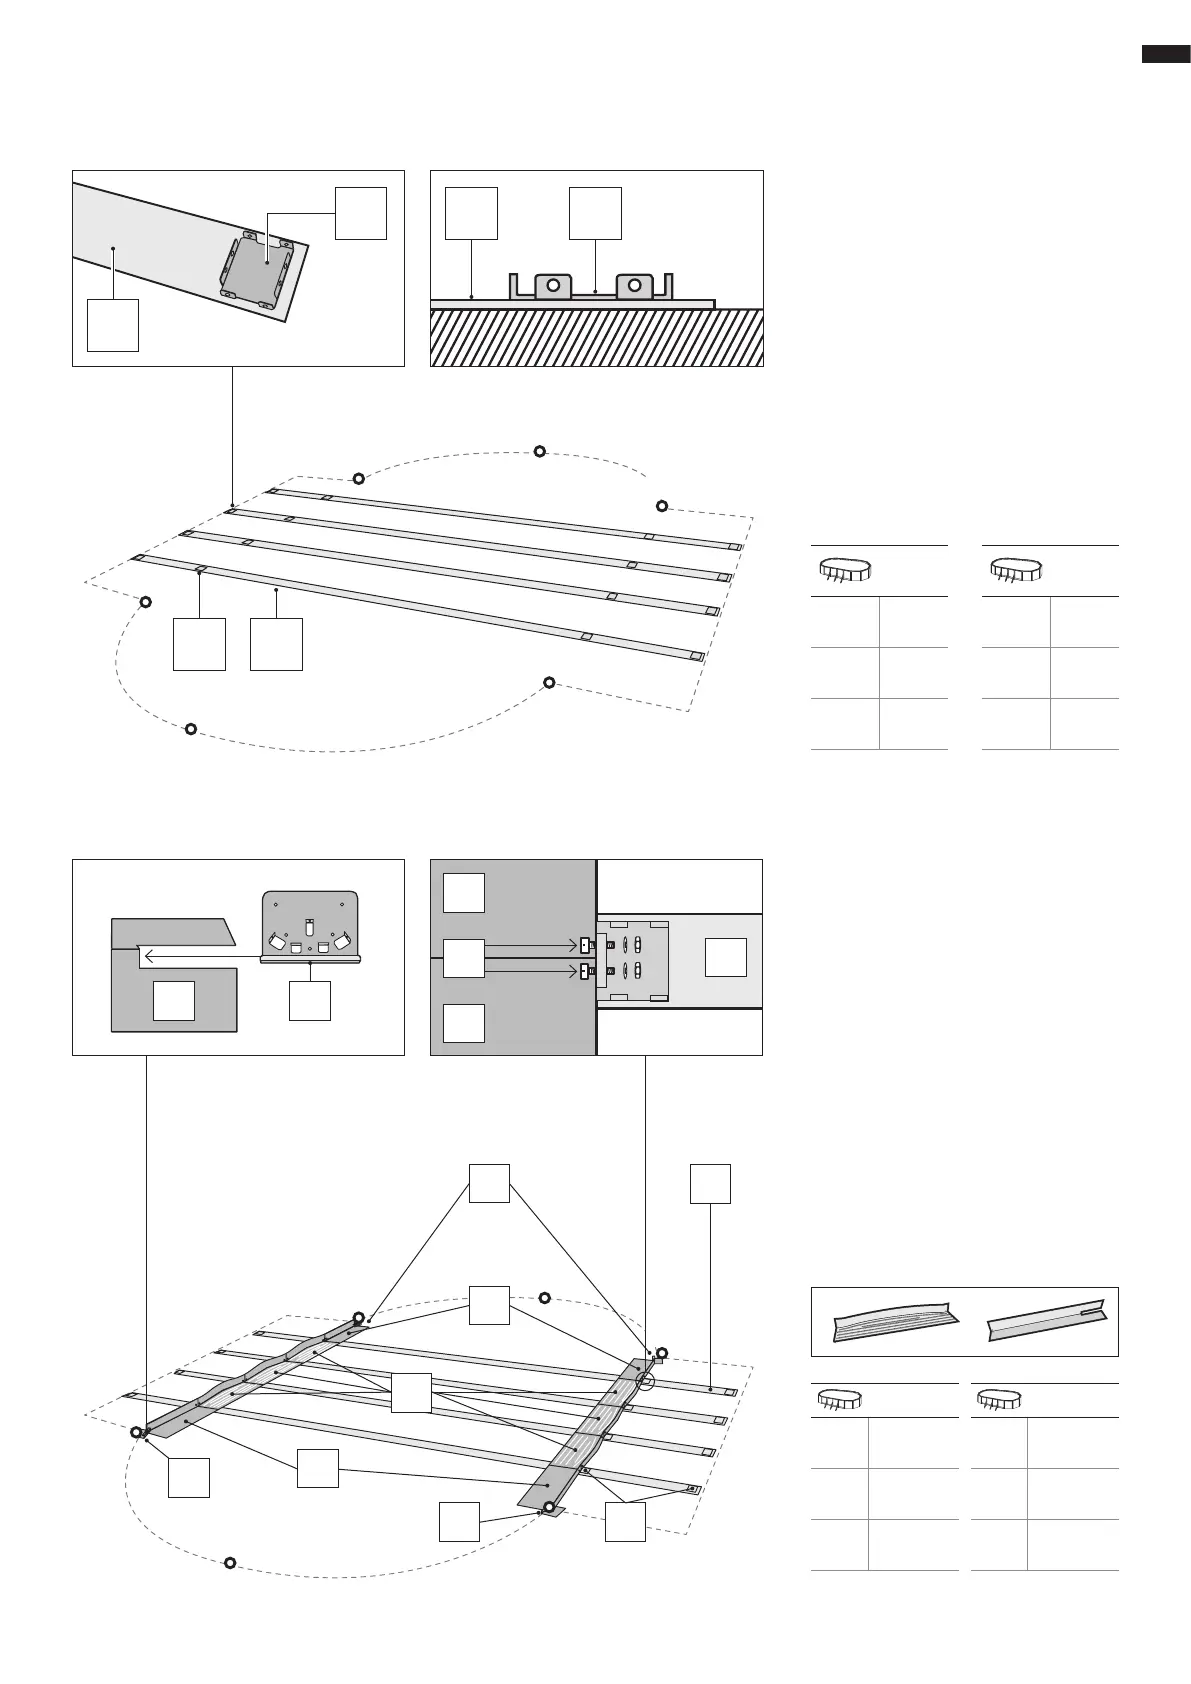
Installation of the swimming pool:
We recommend that this is done by two or
more adults and on a day without wind.
For your safety, it is very important to wear
gloves while assembling the pool.
Each strut has 4 drop-forged parts (PE) riv-
eted to it which must be fitted with the tabs
upwards. Fully extend the struts parallel to
each other across the straight part of the pool.
Fitting the metal brackets (EM1) - (EM2):
The central metal brackets (EM1) go in the
central part (half on one side and half on
the other), attached to the tabs on the drop-
forged parts (PE) on the struts by the screws
(T2). The widest part of the metal bracket
should face the inside of the pool and the nar-
row part should be upright so that it can be
attached to the innermost drop-forged part
on the strut. Once these brackets are in place
and firmly screwed on, fit the outer brackets
(EM2) onto the ends, also with T2 screws, en-
suring that the joining pieces (PU) to be fitted
into the bracket (EM2) slots face towards the
point where the relevant half-circular pool
end begins (Point C).
NB: When the metal brackets are fixed to-
gether the heads of the screws (T2) should
face the inside of the pool, and the washers
and nuts should face outwards.
installation
15


 To Next Page