A
A
B
B
C
C
C
D
D
D
D
C
F
G
A-A A-B=B-C C-D D-D
10,00 x 5,50
m.
10,20 x 7,50
m.
9,93 m. 2,750 m. 1 m. 4,87 m.
9,15 x 4,70 m. 9,35 x 6,70 m. 9,01 m. 2,350 m. 1 m. 4,87 m.
8,00 x 4,70 m. 8,30 x 6,70 m. 7,88 m. 2,350 m. 1 m. 3,75 m.
7,30 x 3,75 m. 7,70 x 5,95 m. 7,23 m. 1,875 m. 1 m. 3,75 m.
6,10 x 3,75 m. 6,30 x 5,75 m. 6,11 m. 1,875 m. 1 m. 2,62 m.
5,00 x 3,00 m. 5,20 x 5,00 m. 5,10 m. 1,500 m. 1 m. 2,62 m.
2.1
assembly instructions
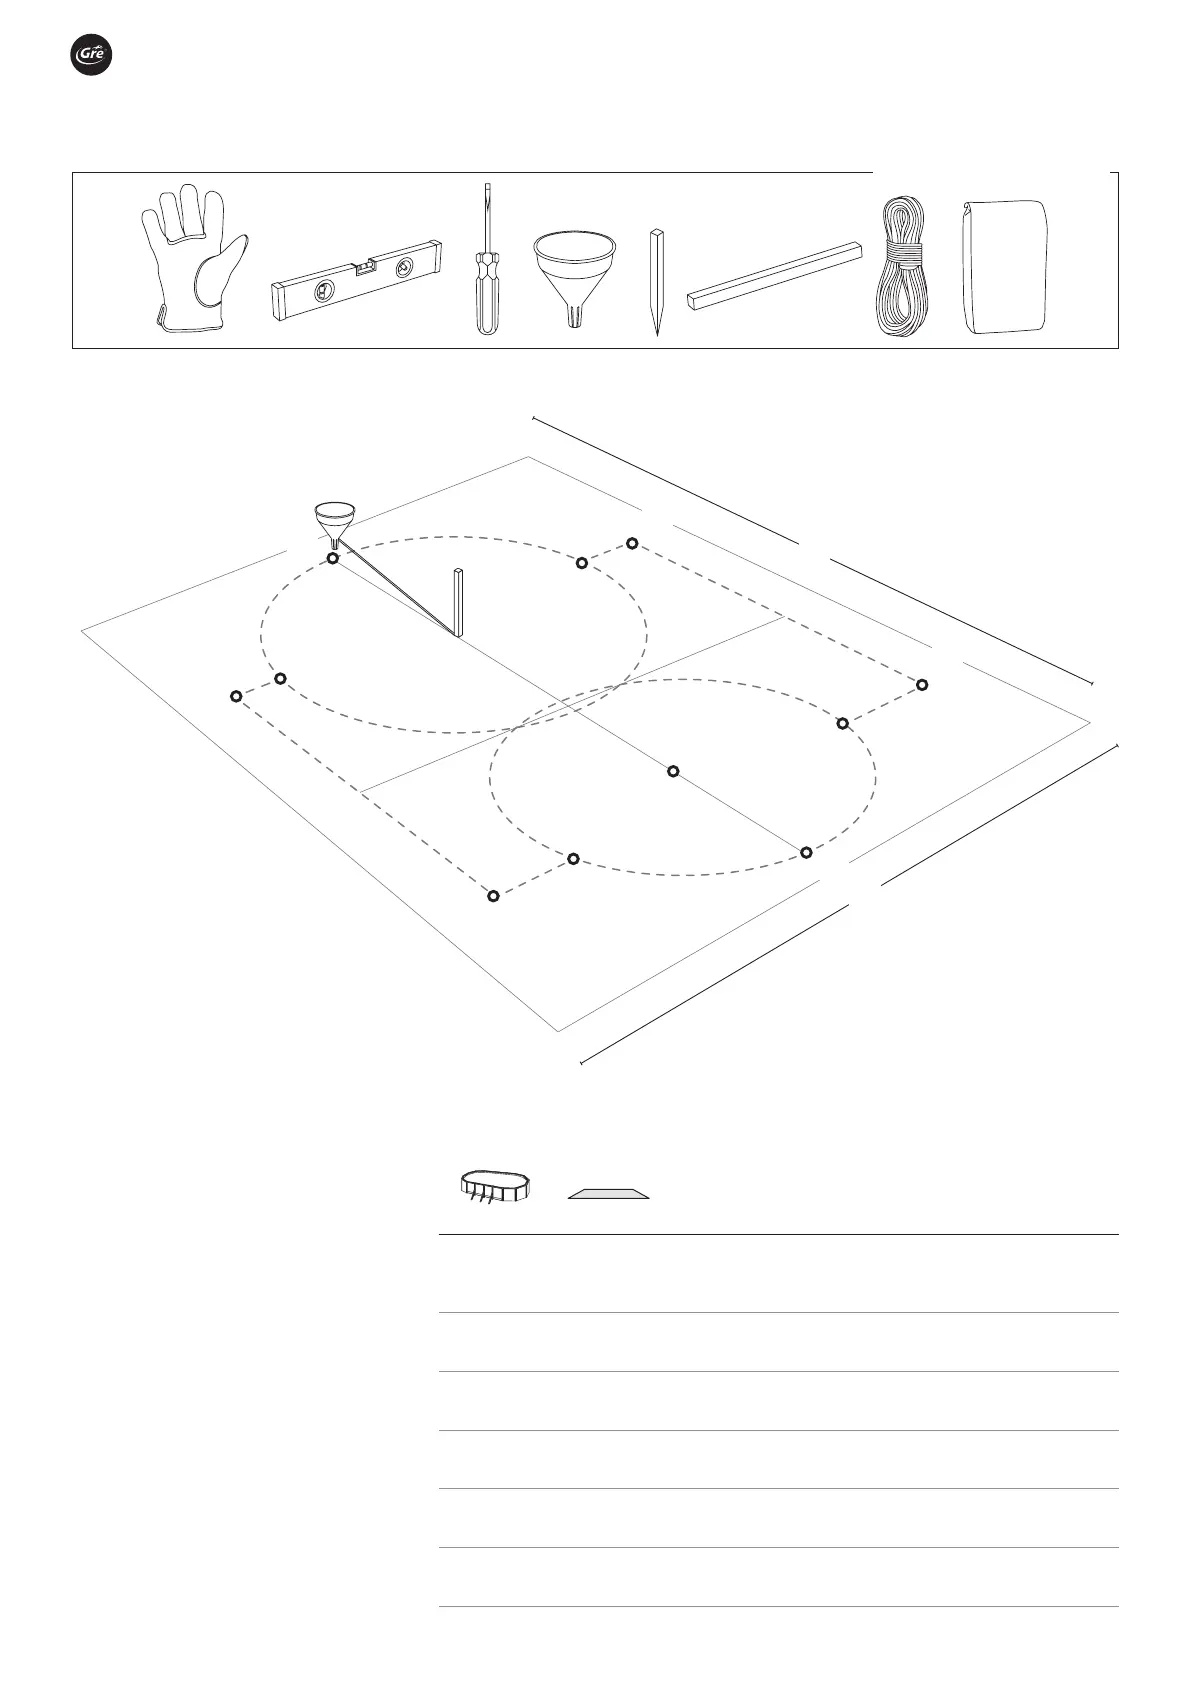
Necessary tools (not included)
Mark the installation area:
Once the location area is chosen (which
have to be perfectly levelled), we’ll pro-
ceed at the marking.
You ‘ve got 2 options for that:
→ 1° To prepare a concrete platform (ce-
ment,…) with the necessary measure
according to your swimming-pool size.
→ 2° Directly on the ground: To mark the
ground using wood pickets, screw-
driver, funnel (or plastic bottle), flour
or lime and a rope.
It is advisable to level the total surface
area necessary before marking it (mark-
ing should be centered on the rectangle
corresponding to the pool model) so that
assembly work is more convenient and
easy.
Required surface
6