45
INSTALATION OF THE TOP RAILS’ TRIMS
This piece covers the joints of the copping (there must be a space between the copping). It is aesthetic.
Possible due to irregularities of the terrain the trim does not t completely. If this happens, do not worry because it does not aect the structural system. In that case we suggest
using double faced tape or Velcro.
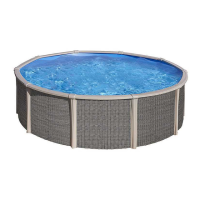
- Look for the trims. All pools have trims with an angular shape. Place them in the copping´s connections (photo 19)
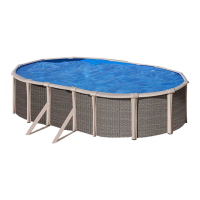
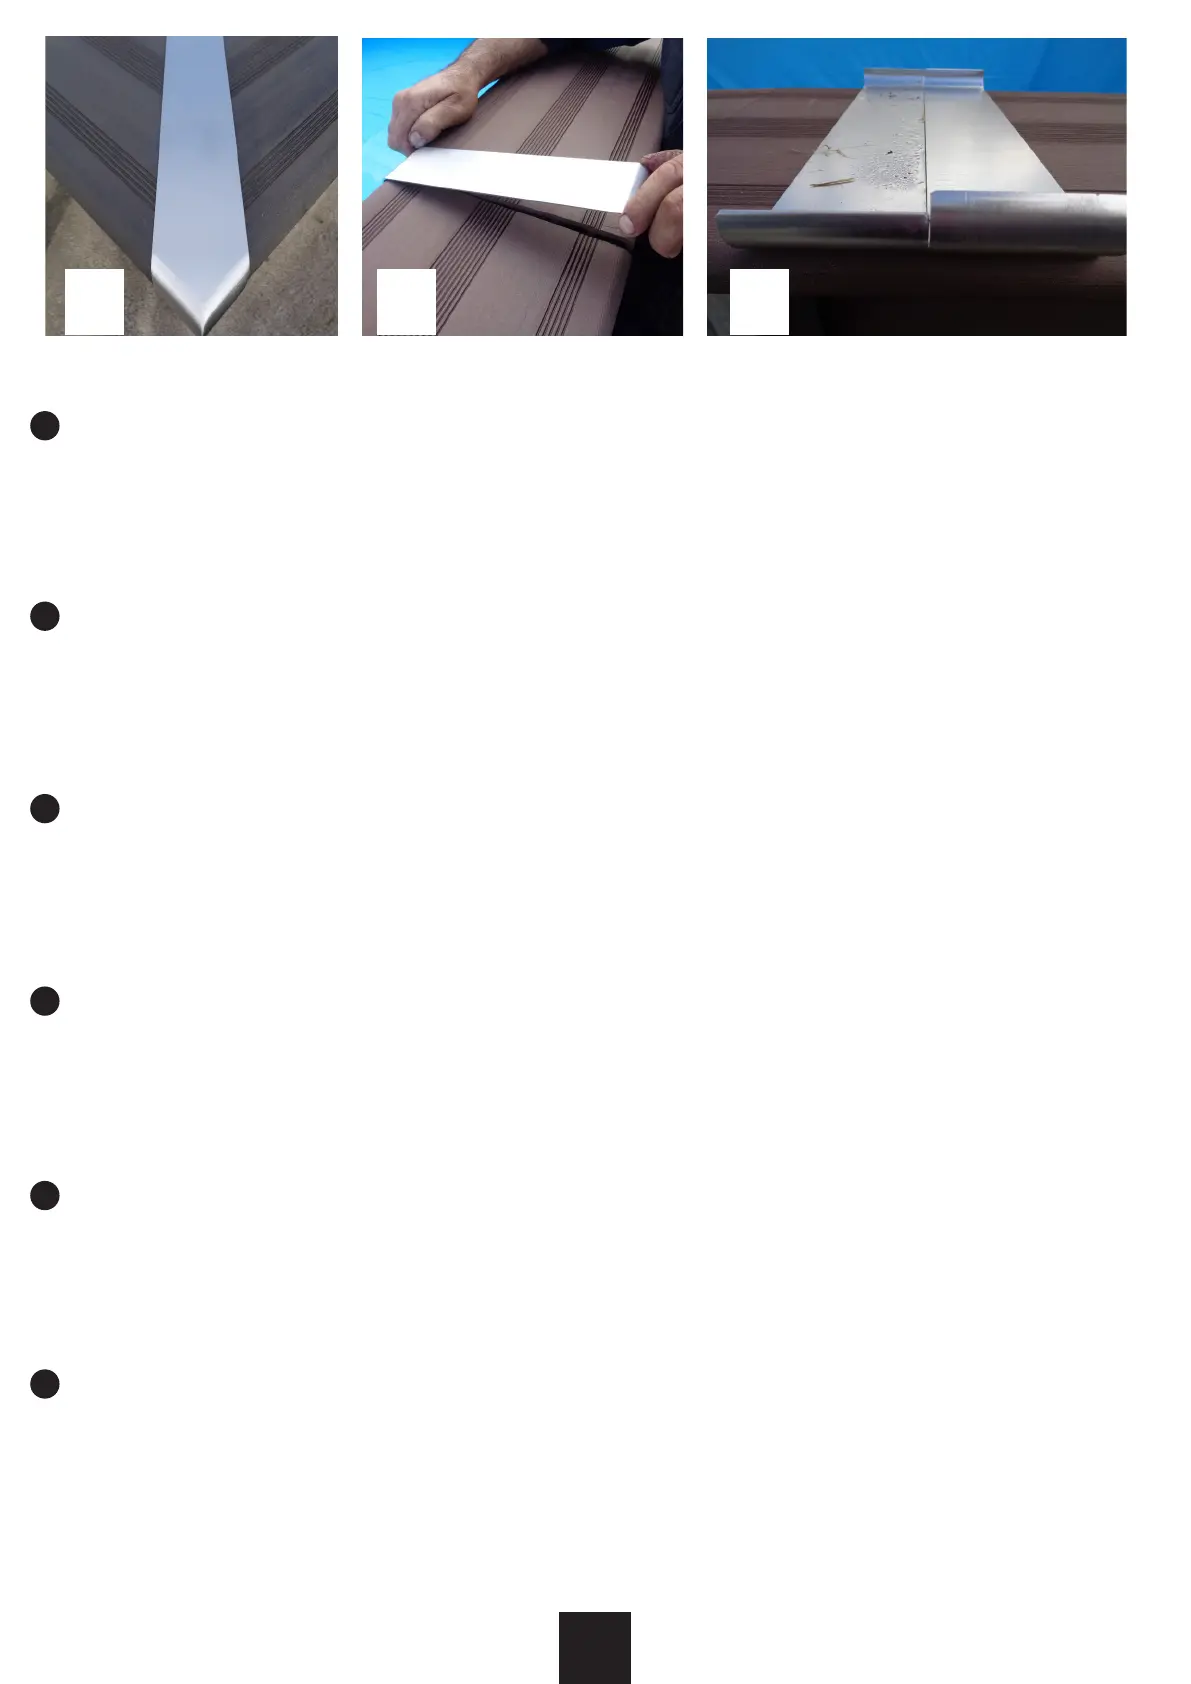
- Straight area: The ends are dierent. Place the longest part on the inside of the pool. (photos 20 and 21).
- Screws are not necessary.
MONTAŻ LISTEW WYKOŃCZENIOWYCH GÓRNYCH BRZEGÓW
Element ten zakrywa połączenia paneli brzegowych (pomiędzy panelami musi być przestrzeń). Jest to element estetyczny.
Możliwe, że z powodu nierówności terenu, listwa nie zostanie całkowicie dopasowana. Jeśli tak się stanie, nie należy się martwić, ponieważ nie ma to wpływu na strukturę basenu.
W takim przypadku sugerujemy użycie taśmy dwustronnej lub rzepu.
- Zwróć uwagę na wykończenia. Wszystkie baseny mają listwy wykończeniowe o kanciastym kształcie. Umieść je w miejscu połączenia paneli (zdjęcie nr 19).
- Prosta powierzchnia: Końce są różne. Najdłuższą część umieszczamy po wewnętrznej stronie basenu. (Zdjęcie nr 20 i 21).
- Śruby nie są konieczne
INSTALATION OF THE TOP RAILS’ TRIMS
This piece covers the joints of the copping (there must be a space between the copping). It is aesthetic.
Possible due to irregularities of the terrain the trim does not t completely. If this happens, do not worry because it does not aect the structural system. In that case we suggest
using double faced tape or Velcro.
- Look for the trims. All pools have trims with an angular shape. Place them in the copping´s connections (photo 19)
- Straight area: The ends are dierent. Place the longest part on the inside of the pool. (photos 20 and 21).
- Screws are not necessary.
MONTAREA FINISAJELOR ȘINELOR SUPERIOARE
Această piesă acoperă îmbinările ornamentului (trebuie să existe un spaiu între ornamente). Este estetic.
Este posibil ca, din cauza neregularităilor terenului, nisajul să nu se potrivească complet. Dacă se întâmplă acest lucru, nu vă facei griji, deoarece nu afectează sistemul structural.
În acest caz, vă sugerăm să folosii bandă adezivă cu faă dublă sau Velcro.
- Căutai nisajele. Toate piscinele au nisaje cu o formă unghiulară. Așezai-le în racordurile ornamentului (foto 19)
- Zona dreaptă: Capetele sunt diferite. Așezai partea cea mai lungă în interiorul bazinului. (fotograile 20 și 21).
- Nu sunt necesare șuruburi.
INSTALLATION AV DE ÖVERSTA SPÅREN
Detta stycke täcker fogarna på tätningen (det måste nnas ett mellanrum mellan tätningen). Det är estetiskt.
Möjligt på grund av ojämnheter i terrängen passar inte trimmen helt. Om detta händer, oroa dig inte eftersom det inte påverkar det strukturella systemet. I så fall föreslår vi att du
använder dubbelband eller kardborreband.
- Leta efter trimmarna. Alla pooler har kantar med en vinkelform. Placera dem i kopplingsanslutningarna (foto 19)
- Rakt område: Ändarna är olika. Placera den längsta delen på insidan av poolen. (foto 20 och 21).
- Skruvar är inte nödvändiga.
19 20 21
PL
EN
CS
SK
RO
SV
 Loading...