54
A B
NOTE 2:
INSTALLATION OF THE LED PROJECTOR STRUCTURAL SYSTEM
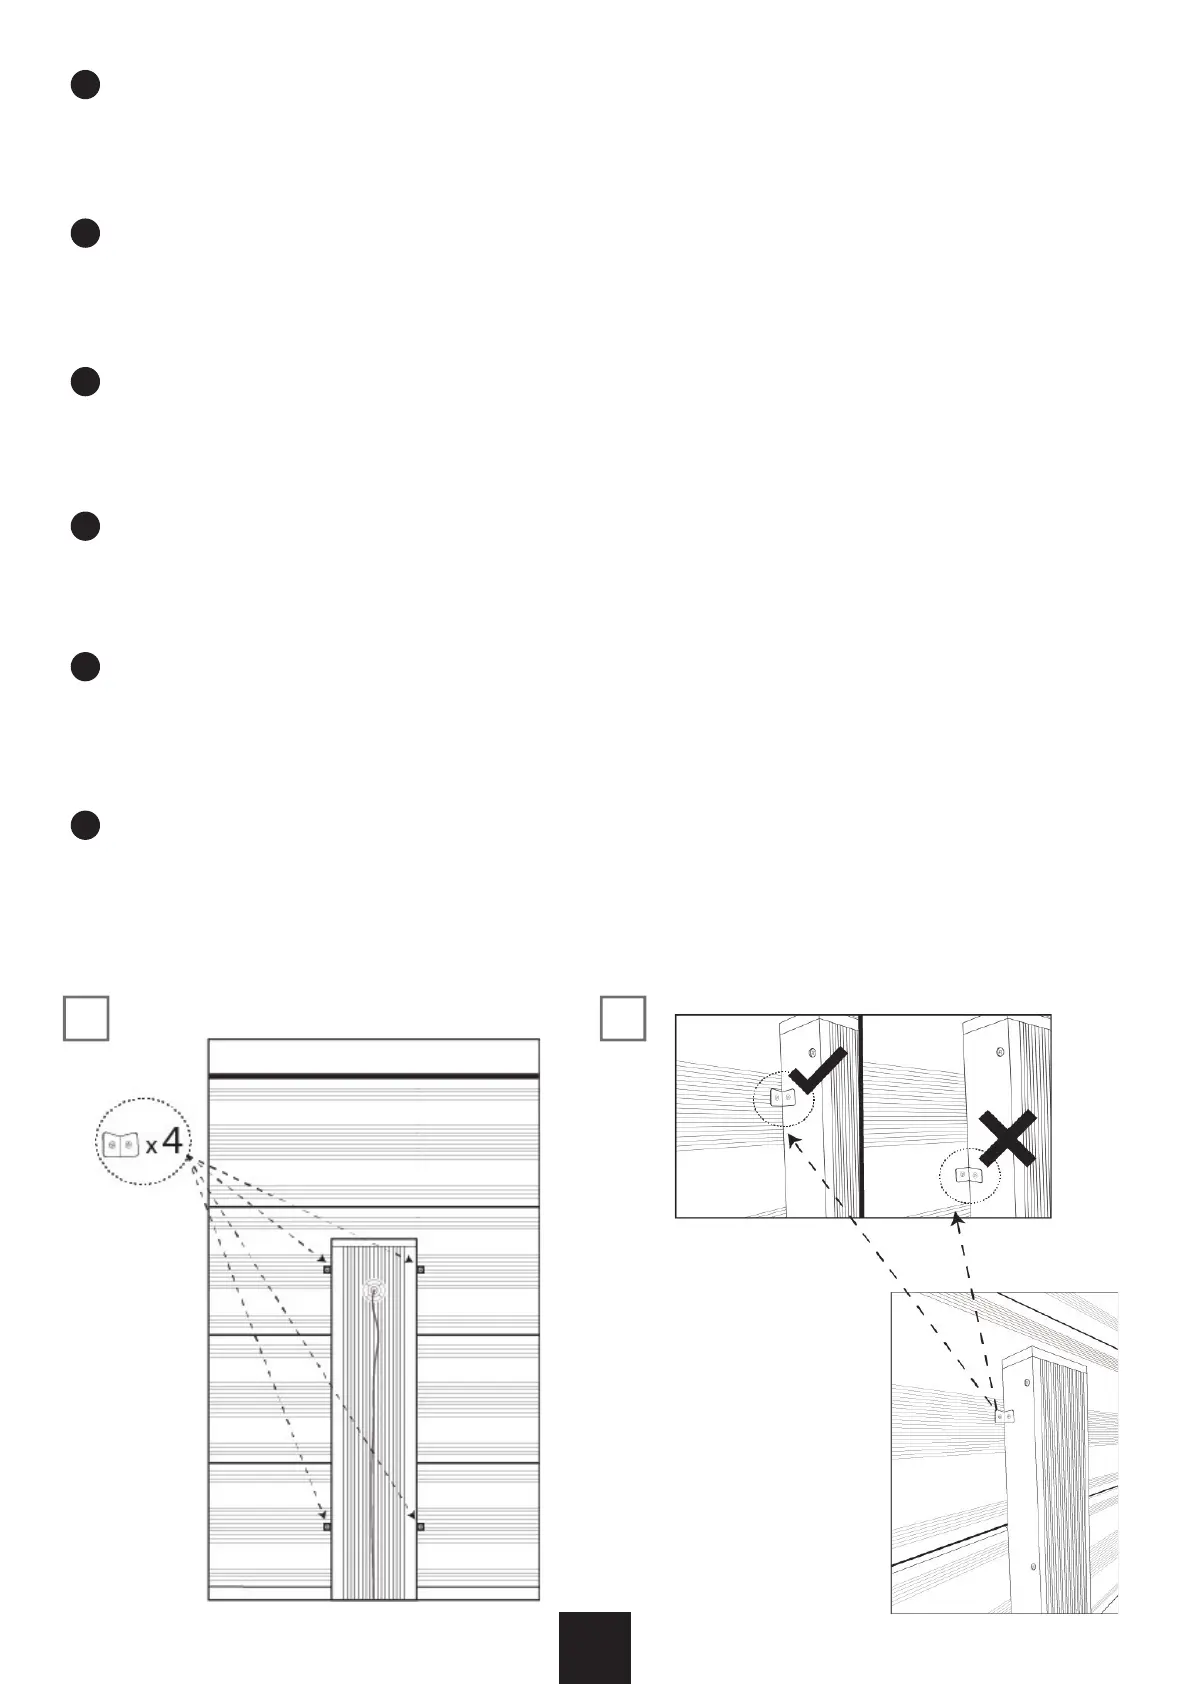
It is about covering the led proyector and the cable as we did for covering the structurtal system. Locate the piece and put it as shown in picture A.
The structural system is composed of 4 brakets and its respective screws.
ATTENTION! It is very important to place the brakets IN THE STRIPPED AREA of the panel as shown in picture B. If, for the contrary, you try to screw the brakets on the at surface, you
won´t be able to screw them properly and the panel may damage.
UWAGA 2:
INSTALACJA SYSTEMU STRUKTURALNEGO PROJEKTORA LED
Chodzi tutaj o zakrycie projektora led i kabla, tak jak zrobiliśmy to w przypadku zakrywania systemu strukturalnego. Znajdź element i umieść go tak, jak pokazano na rysunku A.
System strukturalny składa się z 4 zawiasów i odpowiednich śrub.
UWAGA! Bardzo ważne jest, aby umieścić wsporniki na ŚCIĘTYM OBSZARZE panelu, jak pokazano na rysunku B. W przeciwnym razie, będziesz próbował przykręcić wsporniki na płaskiej
powierzchni i nie będziesz w stanie przykręcić ich prawidłowo – panel może zostać uszkodzony.
NOTE 2:
INSTALLATION OF THE LED PROJECTOR STRUCTURAL SYSTEM
It is about covering the led proyector and the cable as we did for covering the structurtal system. Locate the piece and put it as shown in picture A.
The structural system is composed of 4 brakets and its respective screws.
ATTENTION! It is very important to place the brakets IN THE STRIPPED AREA of the panel as shown in picture B. If, for the contrary, you try to screw the brakets on the at surface, you
won´t be able to screw them properly and the panel may damage.
NOTA 2:
INSTALAREA SISTEMULUI STRUCTURAL DE PROIECTOR LED
Este vorba de acoperirea protectorului cu led și a cablului, așa cum am făcut pentru acoperirea sistemului structural. Localizai piesa și punei-o așa cum se arată în imaginea A.
Sistemul structural este compus din 4 consolă și șuruburile respective.
ATENŢIE! Este foarte important să plasai consolele ÎN ZONA CU DÂRE ale panoului, așa cum se arată în imaginea B. Dacă, dimpotrivă, încercai să înșurubai consolele pe suprafaa plană,
nu vei putea să le înșurubai corect și panoul poate deteriora.
ANTECKNING 2:
INSTALLATION AV LED-PROJEKTORENS STRUKTURSYSTEM
Det handlar om att täcka den ledda projektorn och kabeln som vi gjorde för att täcka det strukturella systemet. Leta reda på biten och lägg den som
visas i bild A. Struktursystemet består av fyra fästen och dess respektive skruvar.
UPPMÄRKSAMHET! Det är mycket viktigt att placera fästena INOM FÄRGET OMRÅDET på panelen som visas på bild B. Om du tvärtom försöker
skruva fast fästena på den plana ytan kommer du inte att kunna skruva fast dem ordentligt och panelen kan skada.
PL
EN
CS
SK
RO
SV
 Loading...