EasyManua.ls Logo

Great Little Trading Paddington Midsleeper User Manual

Great Little Trading Paddington Midsleeper
10 pages
To Next Page IconTo Next Page
Page #1 background imageLoading...
Page #1 background image
1
Paddington Midsleeper
A few important pointers before you start:
Please read the instructions right through before you start, and check
that all the components have been included in the pack; we nd
separating all the hardware into piles makes it easier to be sure that
everything is present and correct.
Make sure you have the right tools. Allen keys are provided if required,
but screw drivers and other tools are not. You’ll nd details of the
tools you need at the beginning of the instructions.
It’s a good idea to build the unit in the room where you are going to be
using it, to avoid the need to move it after it’s been assembled.
Do not throw away any packing materials until assembly is complete,
just in case you accidentally discard smaller parts or hardware.
09/02/2017
V4
easy - medium - hard
Assembly Difculty
two-person job
Thank you for shopping with GLTC, we hope you enjoy having
this product in your home.
We know assembling furniture, toys or accessories is not everyone’s
favourite way to spend their time, so we’ve tried to make assembling
this item as quick and painless as possible.
Hopefully our efforts will have been worthwhile and you’ll sail through
the whole process. But if it all feels a bit too much like hard work, then
we do have an assembly company we can recommend: the Flatpack
Construction Company offers a nationwide service and can be
contacted on 0843 289 4951 or www.atpackconstruction.co.uk.
www.gltc.co.ukwww.gltc.co.uk

Other manuals for Great Little Trading Paddington Midsleeper

Question and Answer IconNeed help?

Do you have a question about the Great Little Trading Paddington Midsleeper and is the answer not in the manual?
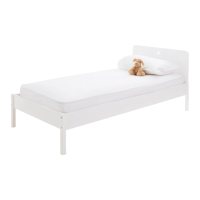
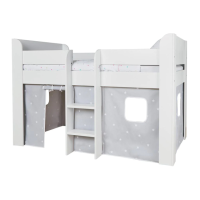
Great Little Trading Paddington Midsleeper Specifications

General IconGeneral
TypeMidsleeper Bed
MaterialWood
Bed SizeSingle
Mattress IncludedNo
BrandGreat Little Trading Co.
ModelPaddington Midsleeper
ColorWhite
Weight Limit100 kg
Assembly RequiredYes
Storage OptionsUnderbed storage
Safety FeaturesGuardrails

Summary

Product Introduction and Preparation

Assembly Preparation Tips

Essential tips for a successful assembly, including checking parts and tools.

Safety, Care, and Support

Safety Warnings

Critical safety information for product use, including age suitability and fall risks.

Customer Service and Product Care

How to get help for missing parts and guidelines for cleaning and maintaining the product.

Provide Feedback

Information on how to submit suggestions for improving the product or instructions.

Component Identification

Main Component Identification

Visual guide to identify all main bed components labeled A through N.

Hardware Component Identification

Visual guide to identify all screws, bolts, dowels, and nuts required for assembly.

Step-by-Step Assembly

Step 1: Prepare Headboards and Rails

Inserting dowels into headboards, rails, and leg front panels.

Step 2: Assemble Bed Legs

Constructing RH and LH legs by attaching side panels to front panels with bolts.

Step 3: Assemble Bed Ends

Connecting headboards and rails to assembled legs to form bed ends.

Step 4: Secure Bed Ends

Attaching bed ends to the legs using shorter screws.

Step 5: Insert Guard Rails and Side Rails

Inserting longer dowels into guard rails and side rails.

Step 6: Attach Side Rails and Guard Rail

Connecting side rails and rear guard rail to bed ends with bolts and nuts.

Step 7: Attach Front Guard Rails and Side Rails

Connecting front side rails and guard rails to bed ends with bolts and nuts.

Step 8: Attach Ladder Sides

Placing the RH and LH ladder sides onto the front guard rails.

Step 9: Secure Ladder Sides and Braces

Fastening ladder sides with bolts/nuts and attaching rail support braces.

Step 10: Attach Tread Panels

Securing tread panels to the ladder sides using longer bolts.

Step 11: Secure Ladder to Frame Rails

Attaching the ladder structure to the main frame rails using bolts.

Step 12: Install Slat Set and Optional Caps

Fixing the slat set to the rails and optionally adding cover caps for bolts.

Related product manuals