9
Window
Sill
Window
Sash
Screws
Frame Locking Brackets (2)
Left Right
To install the Window Sill & Sash Seal, cut the
seal to fit the length of the window. Peel off the
backing, and attach to window sash and window
sill.
Place the air conditioner on the sill with the Lower
Guide Rail against the back edge. Center the unit,
and close the window securely behind the Upper
Guide Rail. The unit should be slightly tilted to the
outside. Use a level: about 1/3 bubble will show
correct slant.
To install the fixed bracket, attach the bracket to the
window side sash with one Type B Screw. This
prevents broken glass or damage to the windows.
Front View
Side View
Vinyl
Window
Wooden
Window
NOTE: Top Rail and sliding panels at each side are offset to provide the proper pitch to the
rear of .8 cm (5/16”). This is necessary for proper condensed water utilization and drainage. If
you are not using the side panels for any reason, this pitch to the rear must be maintained.
5
7
6
8
Extend the left and right Flexible Screens to the
window sashes. Attach 3 Type B Screws in holes in
the upper panel. Install the Frame Locking Brackets
between the bottom of the Flexible Screen and the
window sill, attach with 2 Type B Screws.
Window Sill &
Sash Seal
(With Adhesive)
Note: In order to prevent the window
sill from splitting drive the pilot holes before
inserting the screws.
Note: To install the air conditioner onto
the window sill, it is recommended to use 2
PEOPLE.
INSTALLATION INSTRUCTIONS
NOTICE:
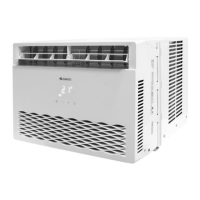
This picture is for reference only. Please refer to the actual product for the appearance.
BACK FRONT
Upper Guide
Rail
Lower Guide
Rail
Window Frame
Horizontal or inclined about 3°

 Loading...