Touch ’n Hold Smooth ® Installation Instructions
(FOR SINGLE AND DUAL KITS)
Hardware Included
INSTALLATION To see installation video, visit: touchnholddoorclosers.com/how-to-install
1) Preparation
The screw pack contains Fig.1:
• 8 - #10 x 1-1/2” screws
• 4 - #10 x 5/8” screws
• 2 - short pins
• 2 - long pins
2) Install the jamb bracket
Locate the positioning tab on the jamb bracket.
Place the bracket so this tab butts up against the
door. Using a pencil, mark your door jamb at each of the four jamb bracket screw holes. Drill 1/8”
pilot holes on the marks. Fasten bracket to jamb with four #10 x 1-1/2” screws, per Fig.2.
Note: Closer can be located anywhere on the door. For dual kits, follow
these additional instructions.
Top Closer: Locate jamb bracket about 1“ down from the top of the door. (Fig. 3)
Bottom Closer:
Locate jamb bracket about 1“ above the door expander if possible. Bottom
closer may need to be positioned over the door expander in some cases.
3) Install the door bracket & closer
3.1) Attach the door bracket to the closer
Using the long pin, secure the door bracket to the outer hole of the
closer as shown in Fig. 4. Make sure that the arrow on the bracket is pointing back
towards the closer (to the hinge side of the door).
Any questions – contact:
email: info@touchnhold.com
phone: 1-866-TH-Closer
(1-866-842-5673)
www.touchnhold.com
Power drill with a 1/8” drill bit
• No.2 Phillips screwdriver
• Pencil
Single kits include:
• 4 - #10 x 1x1/2” screws
• 2- #10 x 5/8” screws
• 1- Short pin
• 1- Long pin
• Short Yellow Spacer
• Jamb Bracket
• Door bracket
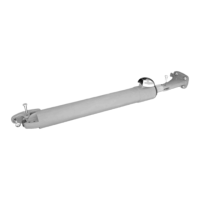
• Touch n Hold TM Smooth closer
Dual kits include:
• All of the hardware included with single kit &
• 4- #10 x 1x1/2” screws
• 2- #10 x 5/8” screws
• 1- Short pin
• 1- Long pin
• Long Yellow Spacer
• Jamb Bracket
• Door bracket
• Closer (no button)
ATTENTION! HOLD OPEN FEATURE WILL ENGAGE THE FIRST TIME THE ROD IS
PULLED OUT DURING INSTALLATION. DO NOT PUSH THE BUTTON TO
RELEASE THE HOLD OPEN FEATURE. SIMPLY PULL ROD FARTHER OUT.
Operating the Touch ‘n Hold® Push-Button Hold Open Feature
1. Press Button: Door Stays Open 2. Push Door Farther Open: Door Closes
INS-GS-SK-E rev A
Pg. 1