18
BATTERY CHARGER
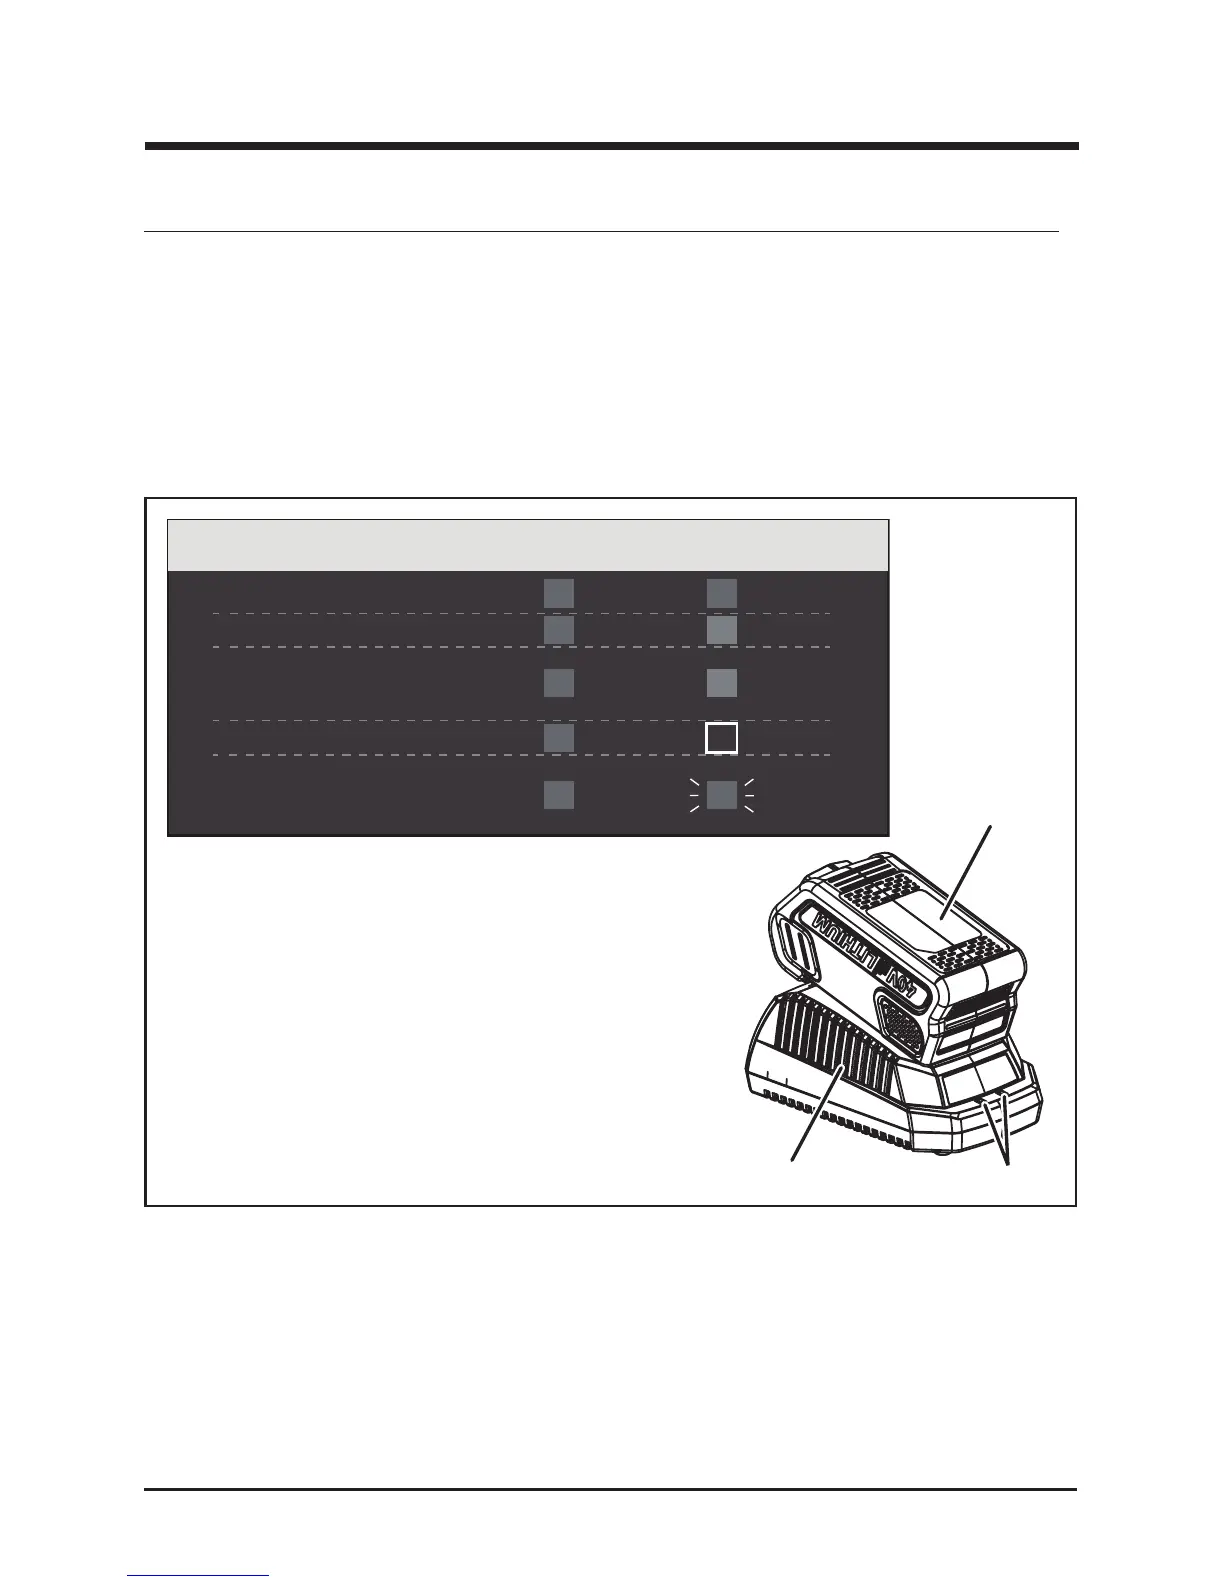
CHARGING PROCEDURE (See Figure 10)
NOTE: The battery is not shipped fully charged. It is recommended to fully charge before rst use to ensure
that maximum run time can be achieved. This lithium-ion battery will not develop a memory and may be
charged at any time. A fully discharged battery pack will require approximately 60 minutes (73Wh) / 120
minutes (146Wh) to fully charge from a discharged state.
• Plug the charger into an AC power outlet.
• Insert the battery pack (1) into the charger (2).
This is a diagnostic charger. The Charger LED Lights (3) will illuminate in specific order to
communicate the current battery status. They are as follows:
CHECKING THE CHARGE
If the battery pack does not charge properly:
• Check the current at the power outlet with another tool. Make sure that the outlet is not turned off.
• Check that the charger contacts have not been shorted by debris or foreign material.
• If the surrounding air temperature is not normal room temperature, move the charger and
battery pack to a location where the temperature is between 45˚F and 104˚F .
Fig. 10
3
1
2
CHARGING PROCEDURE (LED INDICATOR)
BATTERY IS CHARGING:
FULLY CHARGED:
BATTERY IS TOO WARM:
(REMOVE FOR APPROX. 30
MINUTES TO ALLOW TO COOL)
DEFECTIVE BATTERY:
(REMOVE AND REPLACE WITH
NEW BATTERY IF THIS OCCURS)
NO BATTERY PRESENT
RED RED
GREEN
ORANGE
OFF
RED
RED
RED
RED
RED
BLINKING