85
5 Nm
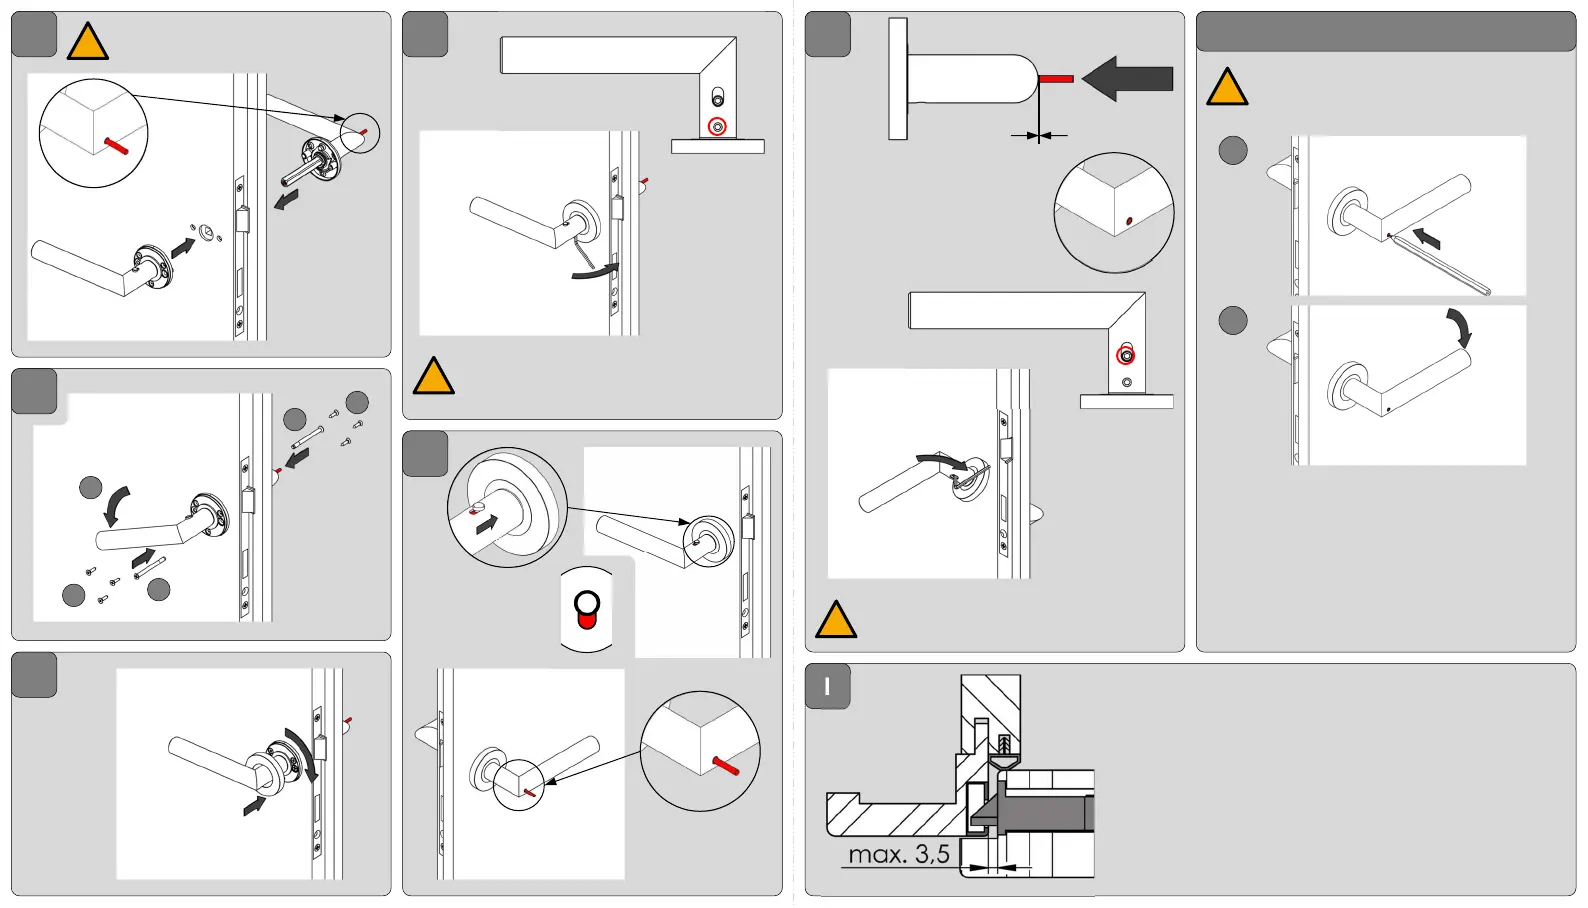
Stift muss über den Griff herausstehen /
Pin must protrude over the handle
7
Notentriegelung /emergency release
!
1
2
I
Um eine einwandfreie Funktion der SMART2LOCK Garnituren zu
gewähren, darf der Abstand zwischen Schließblech und
Schlossstulp max. 3,5mm betragen. Ggf. muss das Türblatt über
ein Einstellen der Bänder angepasst werden.
In order to ensure proper functioning of the SMART2LOCK fittings,
the distance between the strike plate and the lock faceplate must
not exceed 3.5 mm. If necessary, the door leaf must be adjusted by
adjusting the hinges.
Notentriegelung nach erfolgter Montage
prüfen / check emergency release after
installation
1
2
2
3
3
Bei erneuter Montage neue Madenschraube
oder Schraubensicherung verwenden /
Use a new grub screw or screw lock when
reinstalling
9
10
6
0
!
!
Pin zurückschieben, bis er mit dem
Griff bündig ist/
Push the pin back until it is flush
with the handle
Madenschraube nur Handfest anziehen /
Tighten grub screw only hand tight
!
Griffunterseite / handle bottom
Griffunterseite / handle bottom
Abschließen /
lock up
Geeignet sind Gegenstände mit einen Durchmesser von
≤ 3mm und einer Länge von mind. 4mm / Objects with
a diameter of ≤ 3mm and a length of at least 5mm are
suitable
z.B / e.g. - Bleistift / pencil
- Kugelschreiber / ballpoint pen
- Zahnstocher / toothpick
- Büroklammer / paperclip