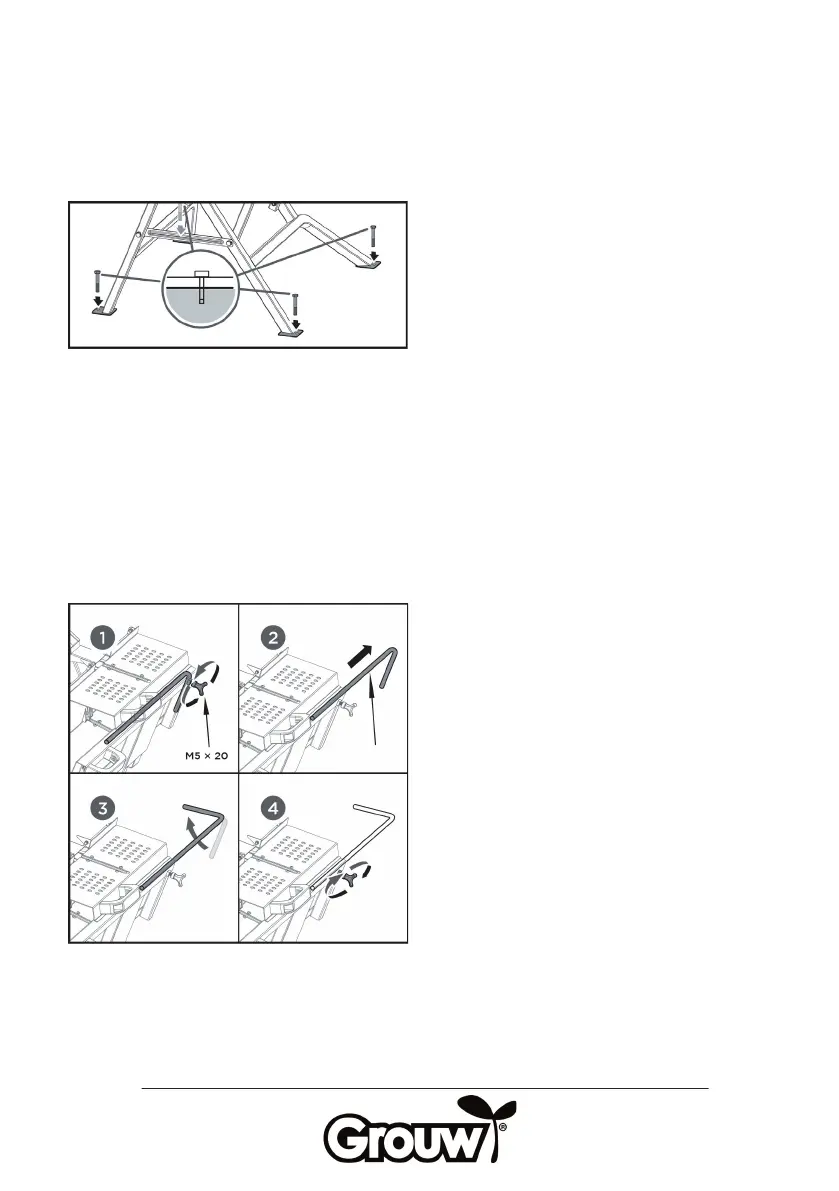
Position the saw so that it is horizontal and
If necessary, secure the saw’s feet to the
ground using suitable screws or bolts.
Place the workpiece to be cut in the cradle
(13) so that the part to be sawed is in line
If necessary, use the length stop (7) so that all
the logs are sawn to the same length.
Loosen the wing screw and pull out the
length stop to the length suitable for the
pieces of wood you want to saw. Turn the
length stop so that its angled part acts as a
stop for the log. Retighten the wing nut.
NB! The saw requires a connection to a plug
If an extension lead is used, the lead must
cross-section and be fully
uncoiled before use. Make sure that the cord
will not be squeezed or come into contact
with the saw during work.
Open the cover (11) and place the log in the
Switch on the motor using the on/off button
(2) and allow the blade to reach full speed.
Grasp the cradle’s left handle (12) and push
the cradle towards the blade in a smooth
When the item nears the blade, the blade
guard is pushed to the side and the blade
saws through the wood. Pull the cradle back
once sawing is complete. The blade guard
closes automatically and you can guide the
workpiece forward in the cradle to prepare
If the wood has not been fully sawn through,
you must turn it 180 degrees and saw it
Switch the saw off using the on/off button
 Loading...