EasyManua.ls Logo

Grundig Ocean-Boy 210 User Manual

Grundig Ocean-Boy 210
15 pages
To Next Page IconTo Next Page
Page #1 background imageLoading...
Page #1 background image
ave
es
Bet
+
Bedienungsanieitung
Cperating
Instructions
Mode
cvempioi
istruzioni
per
"uso
Batteriebetrieb
Achtung!
.Vor
dem
Einsetzen
der
Batterien
bzw.
des
Accus
Gerat
ausschalten.
.
Das
Gerat
arbeitet
mit
9V
Gleichspannung.
Hierzu
sind
6
Mono-
zellen
(je
1,5
Volt)
nétig.
Zu
ihrer
Unterbringung
befindet
sich
im
Gerat
ein
herausnehmbarer
Batteriekasten,
der
nach
Offnen
der
Riickwand
zwei
Schrauben
sind
zu
losen
rechts
zuganglich
ist.
Nach
Abnahme
des
Kastendeckels
werden
die
Monozellen
in
zwei
Reihen
Ubereinander
eingelegt,
wie
es
auf
dem
Kasten
angegeben
ist.
Batteriebehalter
wieder
gut
verschlieBen.
.
Anstelle
der
6
Monozellen
kann
auch
der
GRUNDIG
dryfit-PC-
Accu
476
im
Batteriebehdlter
verwendet
werden.
Dieser
Kleinaccu
ist
mit
Hilfe
des
GRUNDIG
Netzteils
TN
14
immer
wieder
aufladbar.
_Eine
Ladung
reicht
fir
¢g,
30-45
Betriebsstunden.
Hinweise
zum
Aufladen
des
Accus
finden
Sie
im
Abschnitt
,GRUNDIG
dryfit-PC-
Accu”.
.
Achten
Sie
darauf,
daB
der
Schiebeknopf
@
im
rickw€rtigen
Buchsenfach
unten
fir
Batterie-
bzw.
Accu-Betrieb
in
Stellung
“BATT/ACCU
zu
bringen
ist.
;
cronget
nine
2
Transistor
3005
Battery
Operation
Important!
Switch
off
set
before
inserting
batteries
or
accu.
Your
portable
is
designed
to
operate
on
6
batteries
of
1.5V
each.
For
installation
of
batteries
remove
rear
panel
(after
having
loosened
two
screws)
and
take
out
battery
container
which
is
located
on
the
right
side.
Remove
cover
of
container
and
insert
batteries
as
indicated.
Refit
cover
carefully.
instead
of
the
6
batteries
one
accumulator
type
GRUNDIG
-dryfit-
PC-Accu
476
may
be
used.
This
accumulator
may
be
recharged
whenever
it
should
be
exhausted
by
means
of
the
GRUNDIG
power
pack
TN
14.
Being
fully
charged,
it
will
operate
30-45
hours.
Instructions
for
recharging
can
be
found
in
paragraph
“GRUNDIG
dryfit-PC-Accu”.
:
Do
not
forget
to
set
the
slider
switch
©
in
the
socket
compartment
on
the
rear
of
the
receiver
to
position
BATT/AGCU.
)
cean-Boy
210
|
puna
reese
errno
speed
Question and Answer IconNeed help?

Do you have a question about the Grundig Ocean-Boy 210 and is the answer not in the manual?

Grundig Ocean-Boy 210 Specifications

General IconGeneral
TypePortable Radio
TuningAnalog
MaterialPlastic
ShapeRectangular
AntennaTelescopic
Frequency RangeFM: 87.5-108 MHz
Wave bandsFM
Power SourceBatteries
Power SupplyBatteries or Mains

Summary

Battery and Power Supply Management

Battery Installation and Accumulator Use

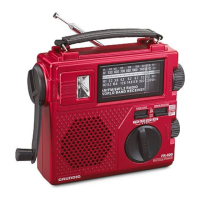
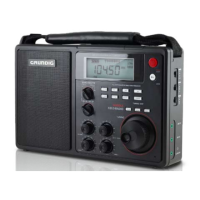
Details battery installation, accumulator use, and switch position.

Battery Status Check

Explains using the meter to check battery condition.

Mains Power Connection

Details connecting the power pack and setting the switch.

Basic Operation and Controls

Power On/Off and Volume Adjustment

Instructions for turning the receiver on/off and adjusting volume.

Wave Band Tuning

Lists buttons for selecting LW, MW/AM, SW, and FM bands.

Tuning and Sound Adjustment

Station Tuning and Fine-Tuning

Explains using tuning knobs and the fine-tuning control.

Tone Control

Adjusting treble and bass frequencies.

Advanced FM Features

FM Station Presets

Setting and recalling pre-programmed FM stations.

FM Automatic Frequency Control (AFC)

How to switch the AFC on/off for FM reception.

Antennas and External Connectivity

Built-in Aerials

Using telescopic and ferrite antennas for different bands.

External Audio and Speaker Connections

Connecting external speakers, earphones, record players, and tape recorders.

External Antenna and Ground Connections

Connecting external FM, AM, and car antennas.

Special Use Cases and Component Usage

In-Car Operation

Operating the radio in a car, including power and antenna connections.

Rechargeable Battery (Accu-dryfit-PC) Usage

How to charge and use the GRUNDIG dryfit-PC accu.

Technical Specifications

Radio Specifications

Contains specifications like power supply, circuits, wave bands, output, etc.

Related product manuals