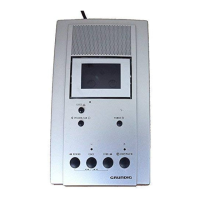
Some Technical Features
Your tape recorder Is designed
for
half-track recording and playback.
To
fill
a tape completely, proceed in the following manner.
As
you have
noticed on your
first
recording, the tape runs from
left
to
right beginning
with the green
leader tape, when recording track 1.
At
the end
of
this
track, the
reels are reversed and track 2
is
recorded
to
the other tape
half. The tape runs from right
to
left
beginning with the red leader tape.
After
this, the tape Is completely record.ed.
Playback
is made in the same sequence as recording.
Recordi
ng
through a microphone
The microphone
is
connected
to
the Radio/Micro p 0 socket. When re-
cording through a microphone, monitoring
Is recommended. Thus you
may notice
e.
g.
if
a vocalist's voice comes out clearly.
If
the micro-
phone and the recording machine are
placed in the same room, an
earphone must be used
for
monitoring. Otherwise an acoustic feed-
back between loudspeaker and microphone
will cause squealing and
howling in the system.
Before recording adjust
level
by
means
of
level control
@.
Just depress
successively buttons
®.
® and
<l)
. When you want
to
begin
your
re-
cording,
release temporary stop button ®. The tape starts running and
all signals entering the microphone are recorded.
Temporary stop, fast rewind and
playback are made as outlined above.
D'abord
un
peu
de technique
Votre
enreglstreur a ete conctu pour !'enregistrement
et
Ia
reproduction
suivant
Ia
technique
·double-piste•
. Pour enreglstrer entlerement
Ia
bande, procedez comme suit:
Durant !'enregistrement de
Ia
plste
1,
Ia
bande defile de gauche a droite
en passant devant
les tetes, en commenctant par
Ia
bande amorce verte.
A
Ia
fin du defilement de Ia bande, on placers
Ia
boblne remplle
sur
le
support-bobine de gauche
et
celle
vide
sur
celul de
droite
. On enreglstre
alors
Ia
plste 2, en commenctant, cette fols-cl, par
Ia
bande amorce
rouge. La bande est
alnsl entlerement enregistree.
La
reproduction se
fera dans
le meme ordre que !'enregistrement.
Enregistrement Micro
Le microphone
est
branche a
Ia
pr
i
se
·Radio
/
Micro•
~
0
Lors d"enreglstrements
par
Micro,
II
est partlculierement recommande
d'utili
ser
•l
'ecoute a !'enregistrement•,
par
example
pour
contrOier, si le
chant n'
est
pas couvert
par
l'accompagnement. Si le micro
et
!'en-
registrement
sont
dans
Ia
meme piece,
II
est
Indispensable
d'tkouter
avec ecouteur
car
, sans eels, une reaction du haut-parleur
sur
le m
ic
ro-
phone produit un
slfflement intempestif (effet Larsen).
Le
reglage de niveau d'enreglstrement ® se fait avant !'enregistrement
proprement dit.
Pour eels, enclenchez successivement les touches
®.
®
et
<l).
Pour le commencement de !'enregistrement, vous faites re-
monter
Ia
touche
·Stop
momentane" ®. Le defilement commence
et
cheque son capte
par
le micro est enreglstre.
Pour !'interruption ,le rebobinage et
Ia
reproduction, vous procedez
comme
expllque precedemment.
 Loading...