EasyManua.ls Logo

Gryphon Omni-2 Plus+ User Manual

Gryphon Omni-2 Plus+
4 pages
To Next Page IconTo Next Page
Page #1 background image
Clear
Tubing
Pump
Barbed
Fitting
C
u
t
s
i
n
A
n
y
D
i
r
e
c
t
i
o
n
Instructions
Gryphon Diamond Wire Saw model Omni-2 Plus+
• Always wear eye protection •
• Do not run blade dry- use plenty of water •
• Keep ngers clear of moving parts •
• Do not operate with nger guard removed •
• Do not operate with front cover removed •
• Unplug saw when changing blades or guides •
Important - Fill Base completely with water before use
Front
Cover
Motor Housing
Motor
Switch
Light
Switch
Upper
Blade Guide
Base
Platform
Finger Guard
Tubing
Vertical
Shafts
Blade
Chuck
Connecting
Rod
Aluminum
Block
Lower
Wrist
Pin
Upper
Wrist
Pin
Gryphon Wire Saw Parts Identication
Motor Assembly
Assembly Step 1
Place motor assembly on top of base. Slip a plastic washer onto each of the two
plastic thumbscrews found in your parts bag. Insert thumbscrews into blue
vibration grommets at the upper outside corners of the housing. Tighten screws
into motor assembly snug tight only (do not overtighten in order to minimize
vibration).
Base of saw viewed from above
Upper Housing with Cover removed
Right side of assembled saw
Question and Answer IconNeed help?

Do you have a question about the Gryphon Omni-2 Plus+ and is the answer not in the manual?

Gryphon Omni-2 Plus+ Specifications

General IconGeneral
BrandGryphon
ModelOmni-2 Plus+
CategorySaw
LanguageEnglish

Summary

Initial Setup and Identification

Important: Fill Base with Water

Ensure the base is completely filled with water before operation for proper cooling and guide life.

Gryphon Wire Saw Parts Identification

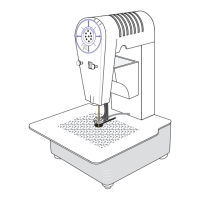
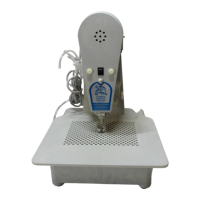
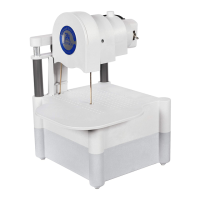
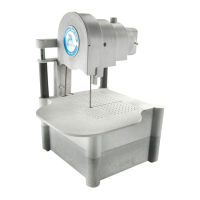
Identifies all major components of the Gryphon Wire Saw model Omni-2 Plus+.

Assembly Instructions

Assembly Step 1: Motor Assembly

Attaching the motor assembly to the base using plastic thumbscrews and washers.

Assembly Step 2: Finger Guard and Tubing

Installing the finger guard and routing the tubing through it.

Assembly Step 3: Installing First Blade

Detailed steps for inserting and securing the diamond wire blade into the chuck.

Assembly Step 4: Installing Batteries

How to install AA batteries into the battery holder for the saw's lamp.

Preparing to Saw

Water Level and Flow Check

Fill the base to cover the lower guide and ensure proper water flow to the blade.

Start-up Maintenance

Lubricating the steel vertical shafts with specific light oils for longevity.

Sawing Operation

Instructions on starting the saw, water flow, and cutting techniques.

Blade and Part Management

Extending Blade Life

Techniques for turning the blade to maximize its useful life.

Replacement Blades

Overview of Gryphon Turbo Diamond Wire Blades: Fine, Standard, Super Power, Slitting.

Changing Parts

Procedures for replacing blade guides and the blade chuck assembly.

Unclogging Water Line

Steps to clear blockages in the water supply tubing.

Warranty Information

Related product manuals